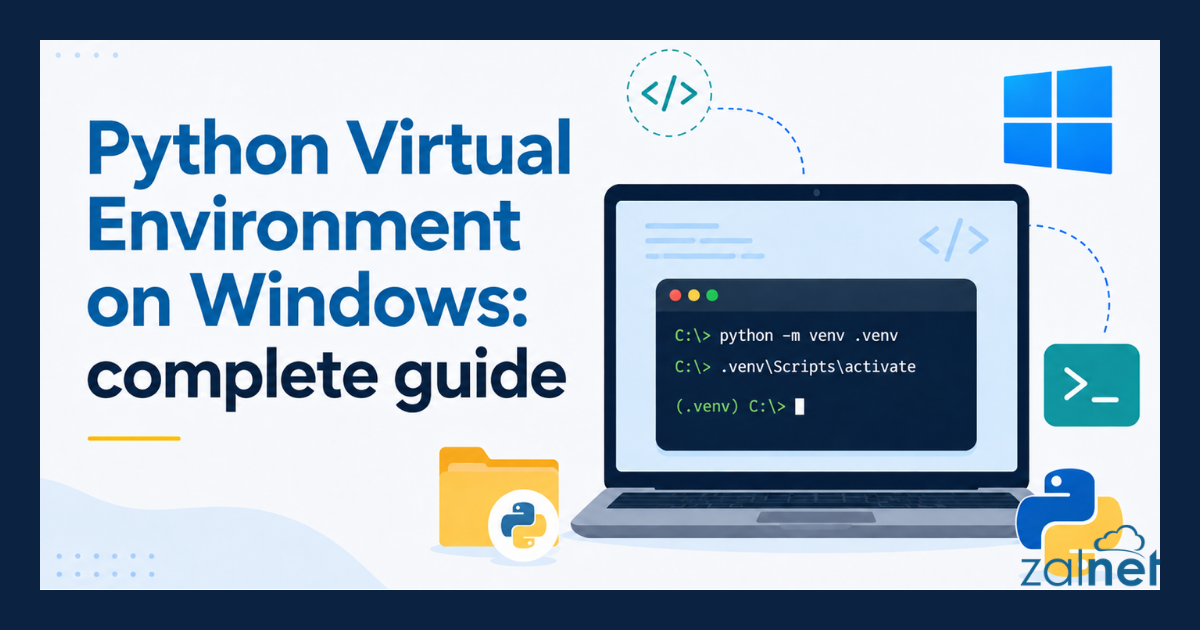
How to create a Python Virtual Environment on Windows
A Python virtual environment on Windows provides a separate and isolated workspace for a Python project. As a result, you can install the packages required by one application without affecting other projects or the main Python installation.
This step-by-step guide explains how to create, activate and manage a Windows Python environment. In addition, you will learn how to install packages, save project dependencies, configure Visual Studio Code and solve common activation problems.
Chcesz przeczytać ten artykuł po polsku – kliknij tutaj.
What is a Python Virtual Environment?
A Python virtual environment is a separate directory containing its own Python interpreter, package installer and installed libraries.
Think of it as a private toolbox created for one project. The tools placed inside this toolbox belong only to that project.
Without a virtual environment, packages are often installed globally. As a result, updating one package may accidentally break another project.
A virtual environment solves this problem by keeping project dependencies separate.
For example:
Project A
├── Python 3.13.x
├── pandas 2.x
└── matplotlib 3.x

Project B
├── Python 3.14.x
├── pandas 1.x
└── Django 5.x
Even though both projects use Python, they can use different package versions without creating conflicts.
Why should you use a Python Virtual Environment on Windows?
Using a Python virtual environment on Windows makes project management safer and more predictable.
The main benefits include:
- Packages installed for one project do not affect other projects.
- Different projects can use different library versions.
- You can recreate the project environment on another computer.
- You reduce the risk of dependency conflicts.
- You avoid filling the global Python installation with unnecessary packages.
- Visual Studio Code can automatically use the correct Python interpreter.
- You can share an accurate list of dependencies with other developers.
Virtual environments are useful for both beginners and experienced developers. In fact, creating one should usually be one of the first steps when starting a new Python project.
What you need before creating a Windows Python Environment
Before creating the environment, make sure that you have:
- A Windows 10 or Windows 11 computer
- Python installed
- Access to PowerShell or Command Prompt
- A folder for your Python project
- Visual Studio Code, if you want to write and run code in an editor
Python includes the venv module, so you normally do not need to install a separate virtual environment tool.
Step 1: Check whether Python is installed on Windows
- First, open Visual Studio Code. You can also open PowerShell, Windows Terminal or Command Prompt instances.
- Then click Terminal –> New Terminal.
- Choose PowerShell or Bash.
Next, run:
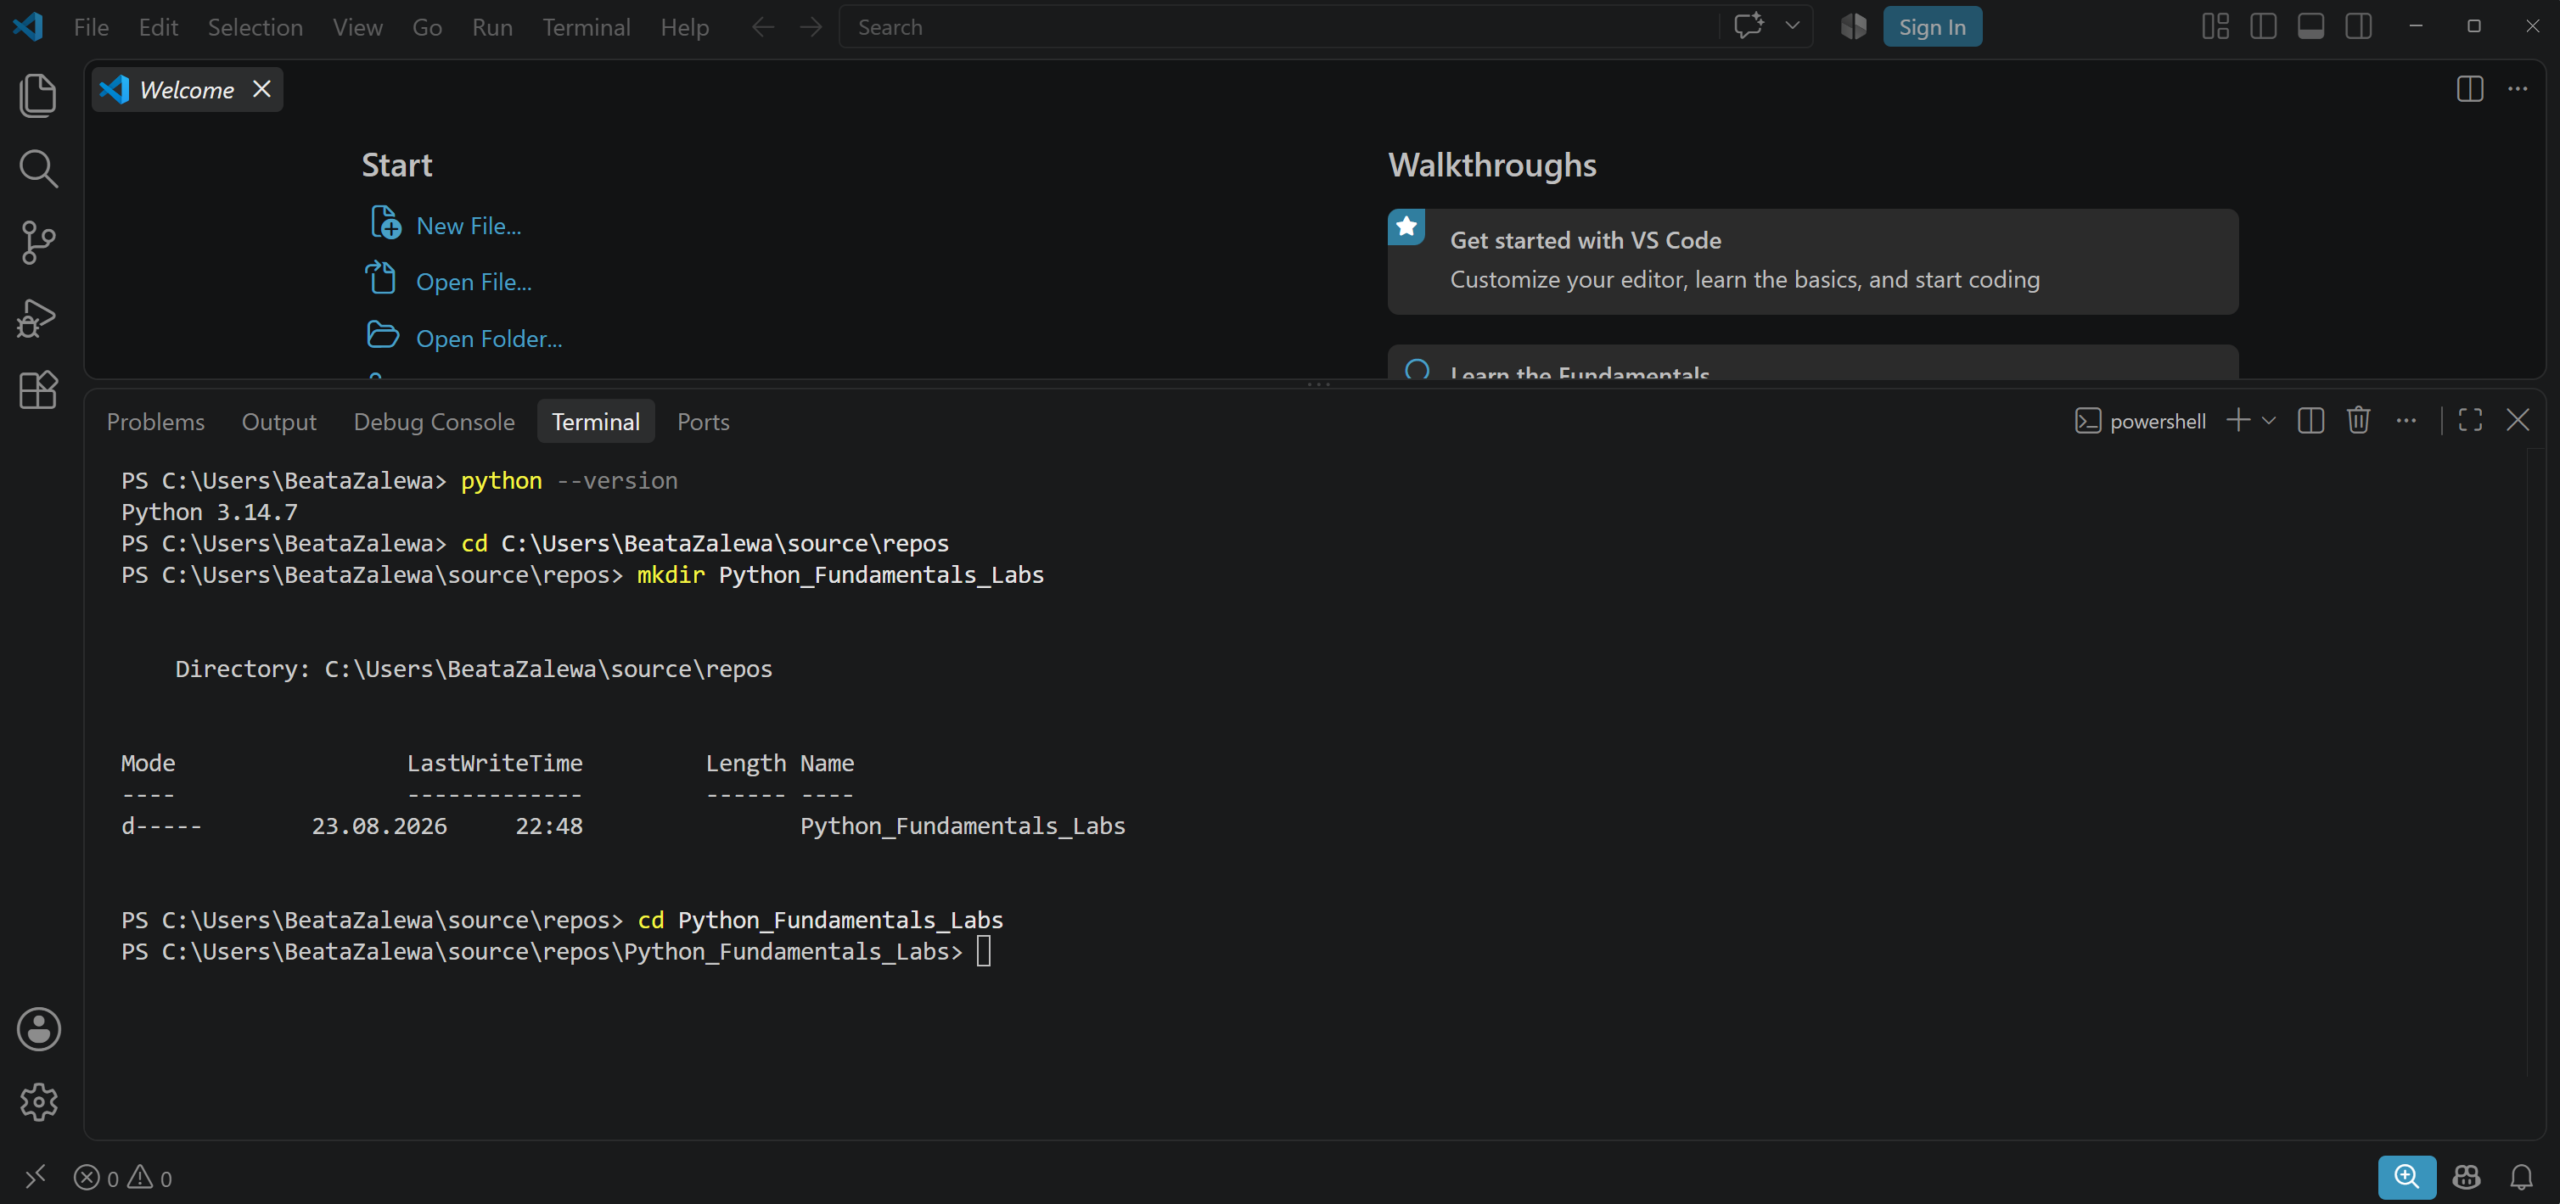
python --version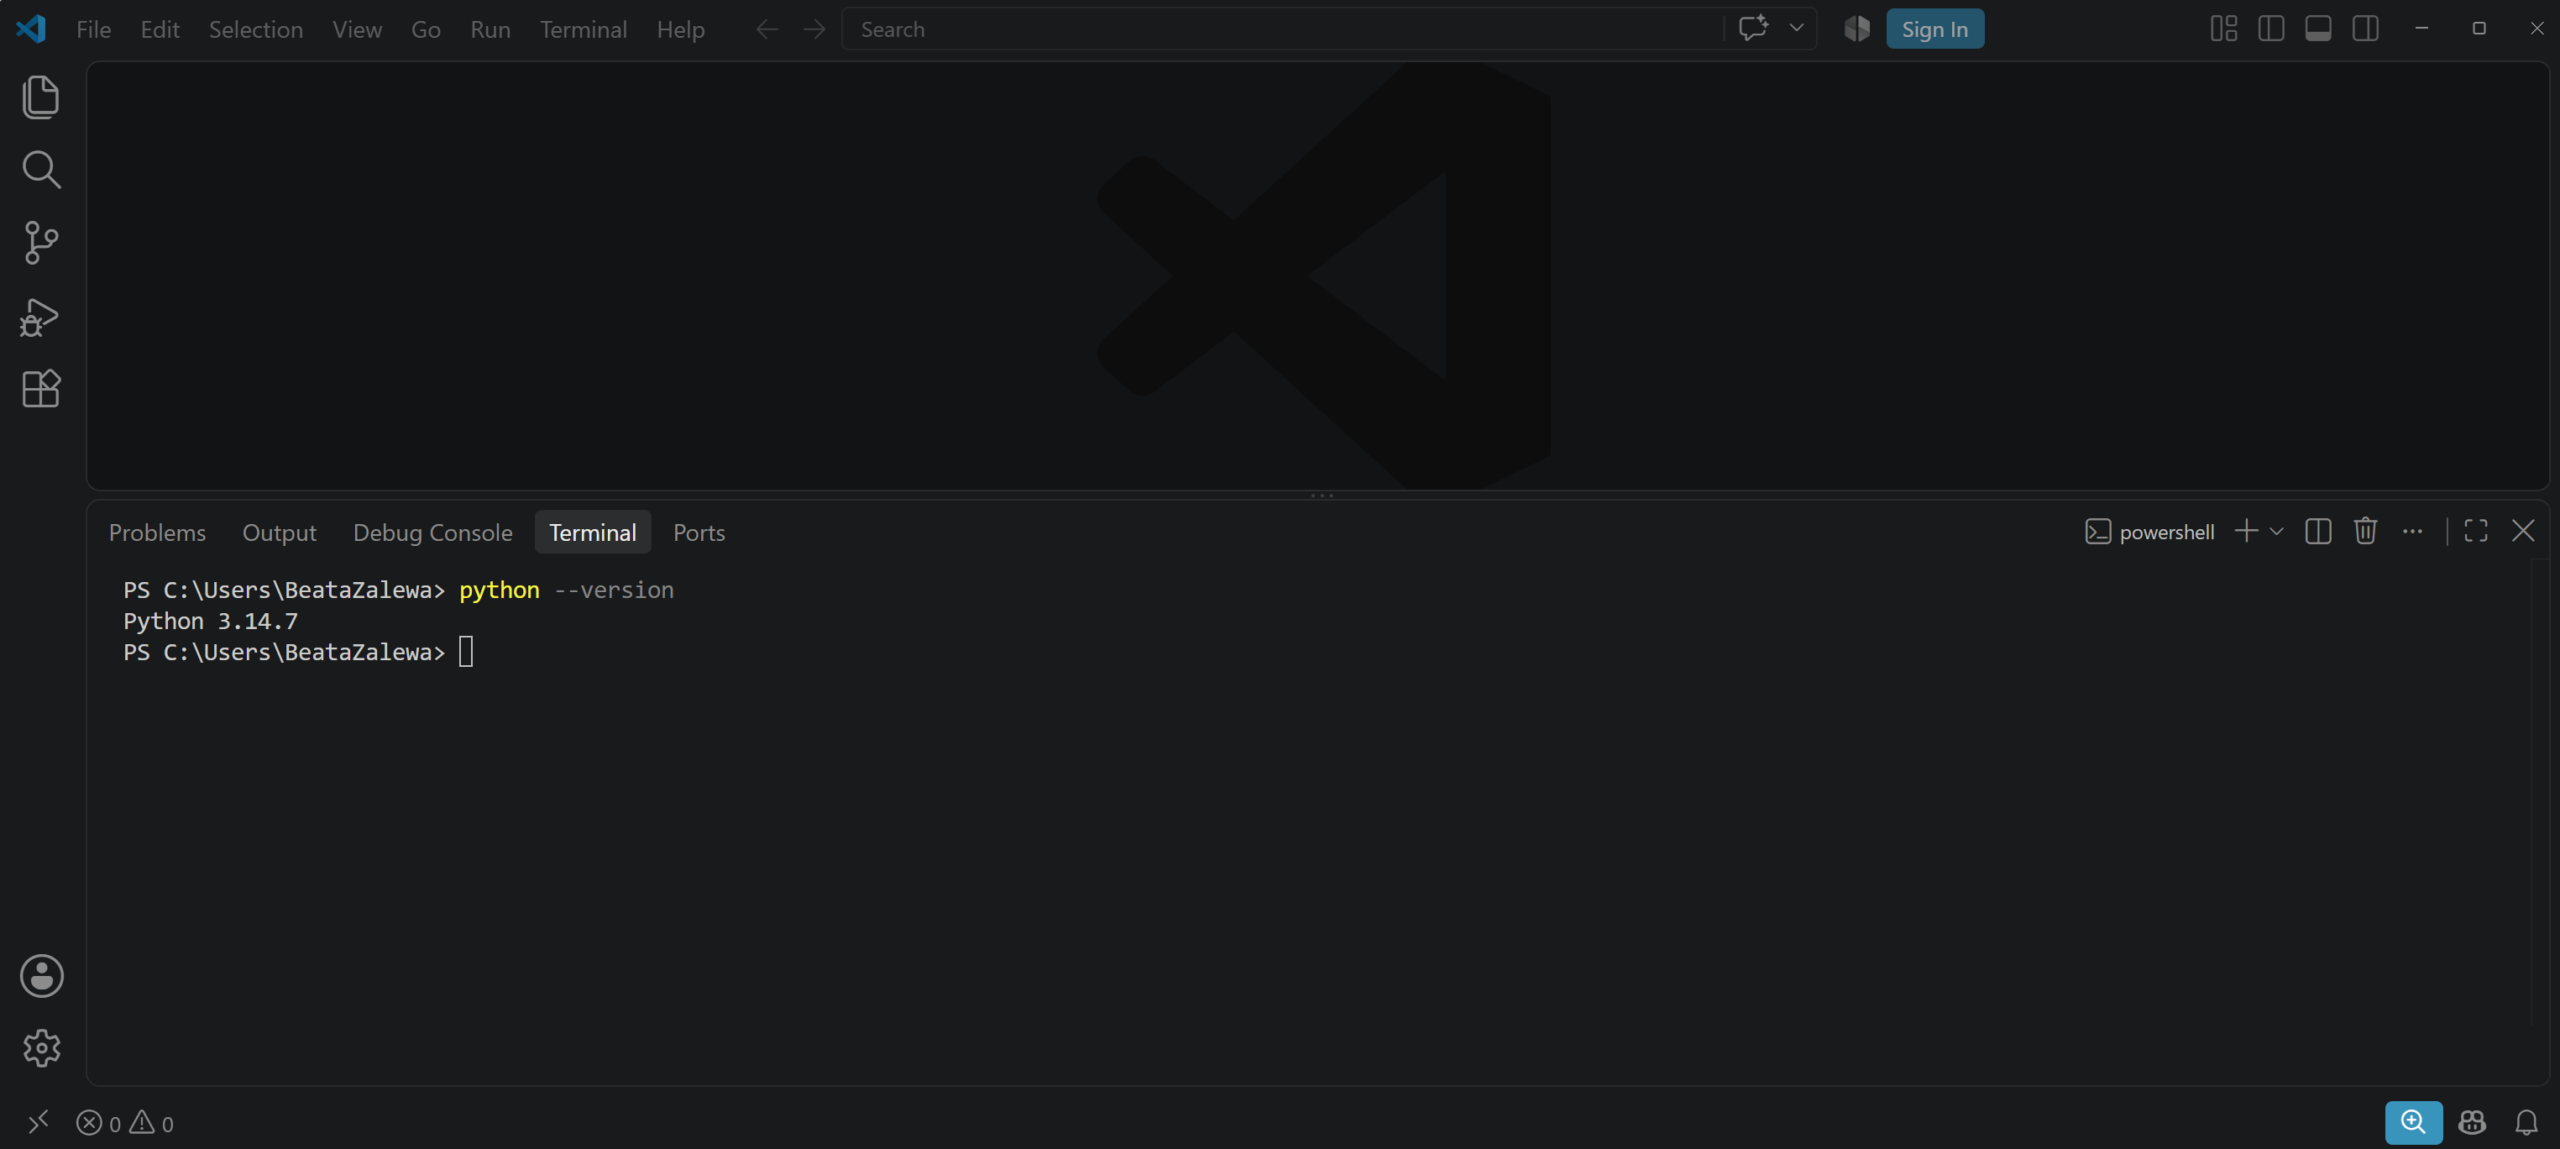
If Python is installed correctly, you should see a result similar to:
Python 3.14.7On some Windows systems, you may need to use the Python Launcher instead:
py --versionThe py command is commonly available when Python has been installed using the official Windows installer ( msi file).
What if Windows does not recognise the Python command?
You may see an error such as:
'python' is not recognised as an internal or external commandThis usually means that Python is not installed or its location has not been added to the Windows PATH environment variable.
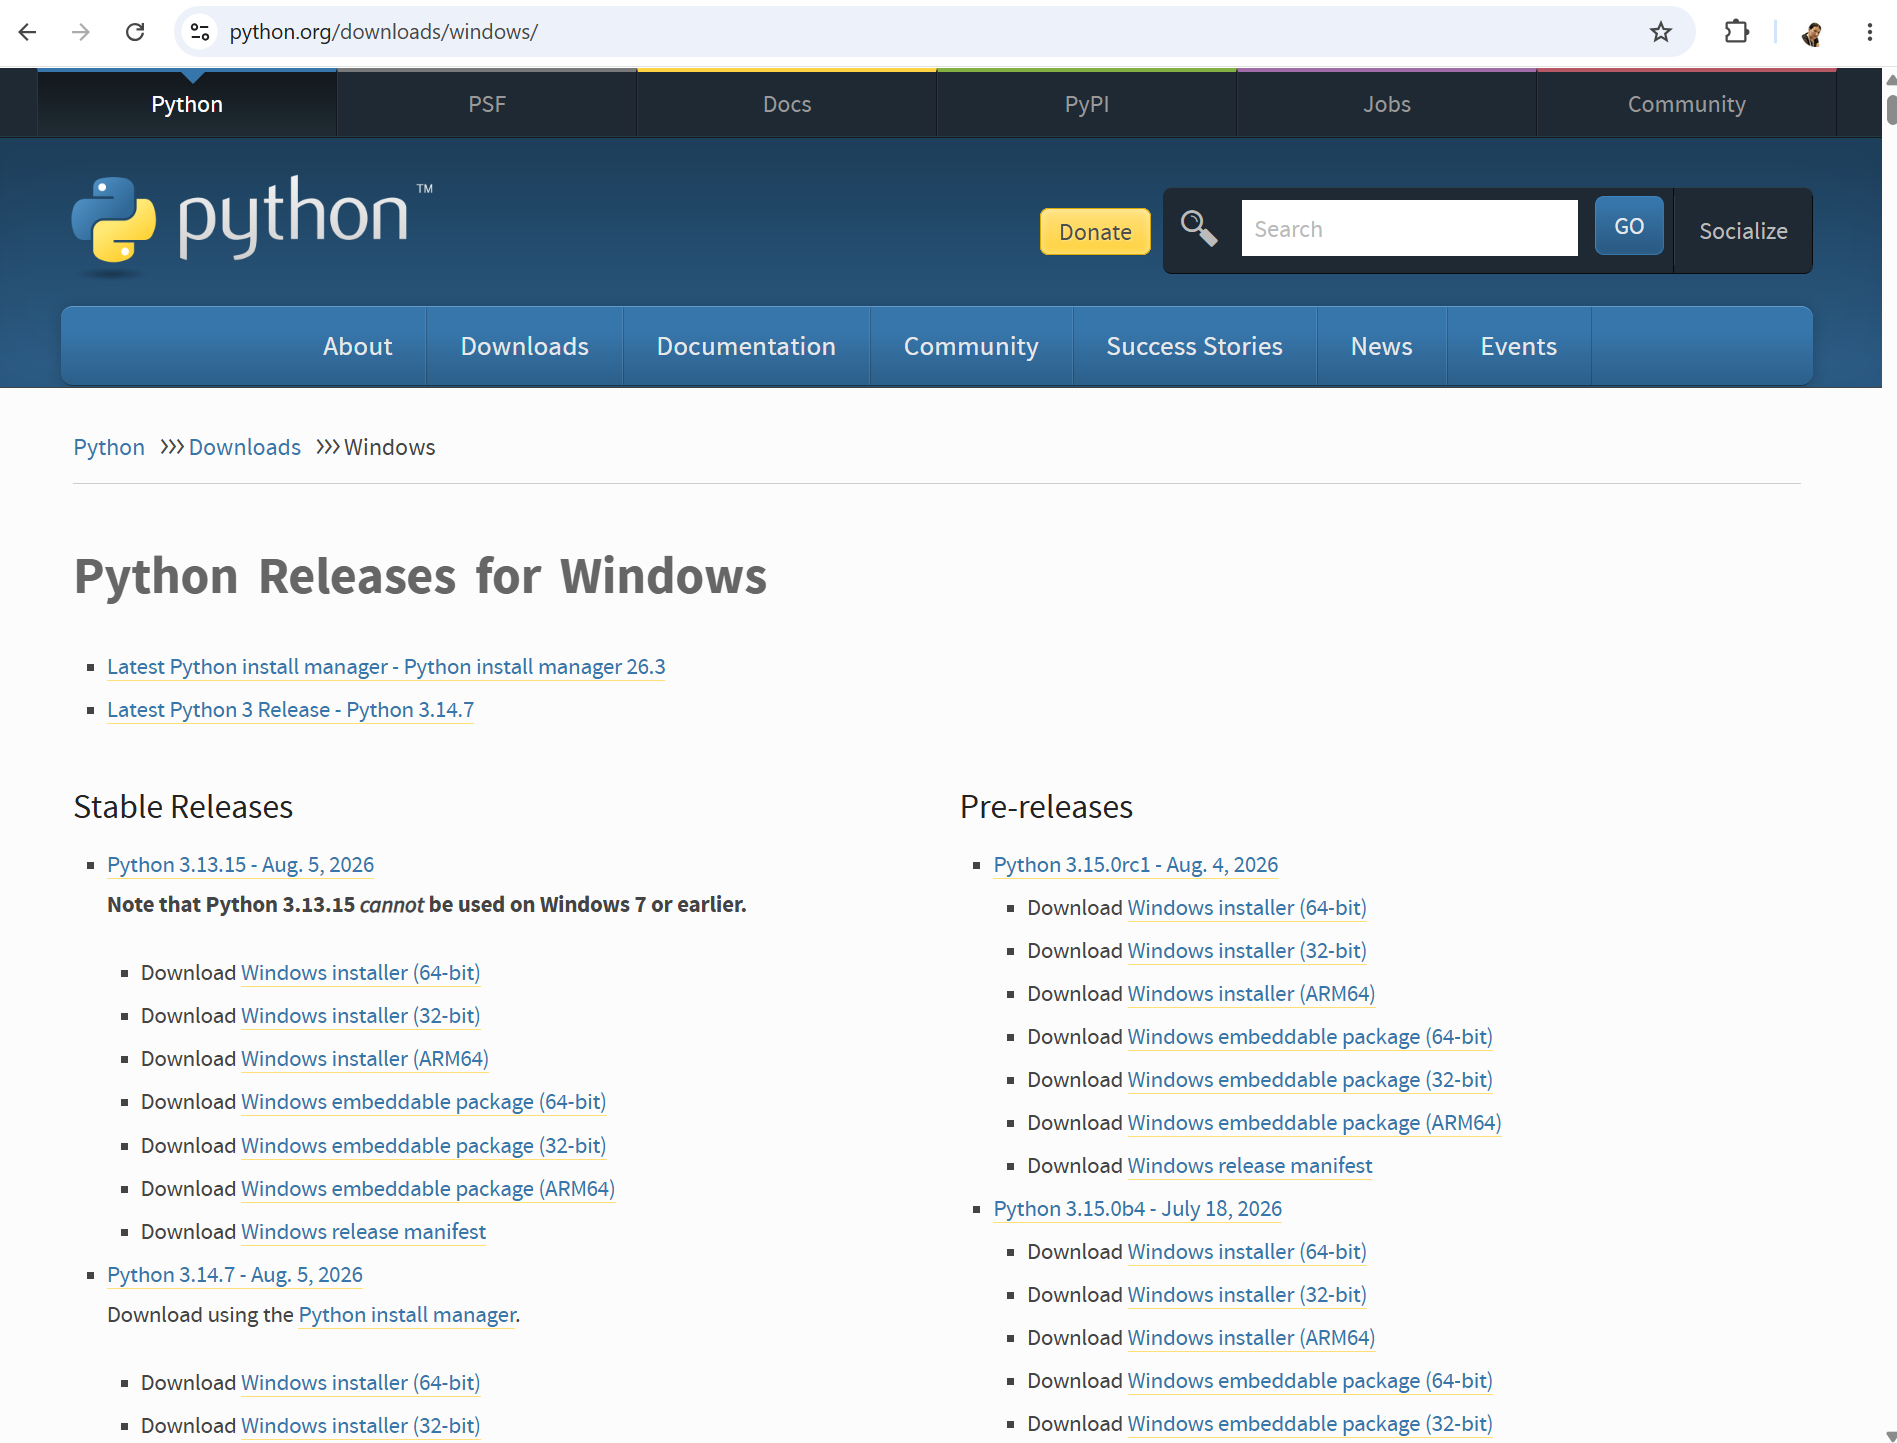
Download Python from the official Python website.
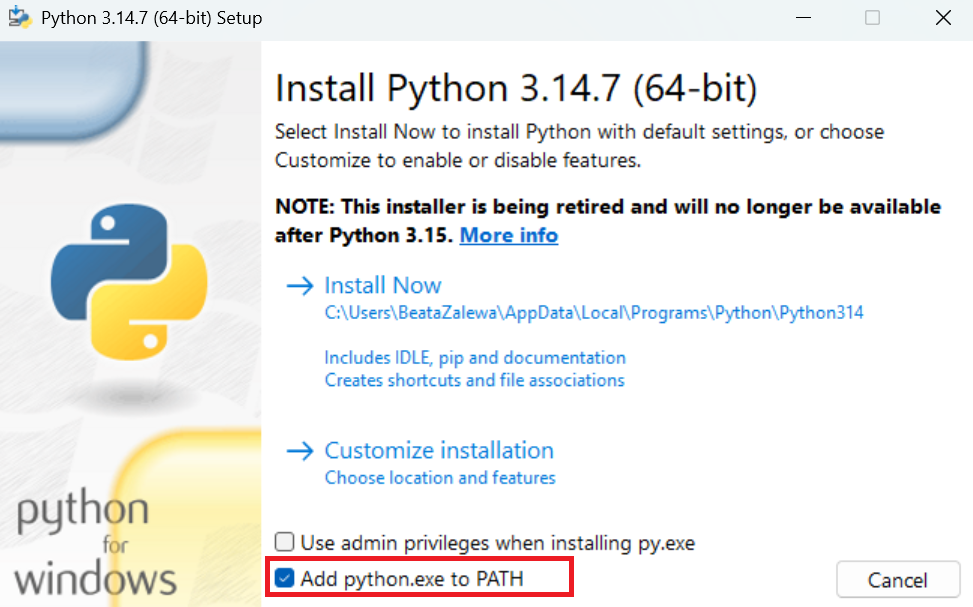
During the installation process, select the option: Add python.exe to PATH.
Then complete the installation and reopen Terminal (or PowerShell or Command Prompt.
Check the installation again:
python --versionor:
py --versionStep 2: Create a folder for your Python project
Each Python project should have its own folder.
Tip: Usually I create my project under location: C:\Users<username>\source\repos.
For example, create a directory named Python_Fundamentals_Labs.
cd C:\Users\<username>\source\repos
mkdir Python_Fundamentals_Labs
Next, enter the new directory:
cd Python_Fundamentals_LabsYou can also create the folder in File Explorer and navigate to it from the terminal.
For example:
cd C:\Users\source\repos\Python_Fundamentals_LabsMake sure that you create the virtual environment inside the correct project folder. Otherwise, it may become difficult to identify which environment belongs to which project.
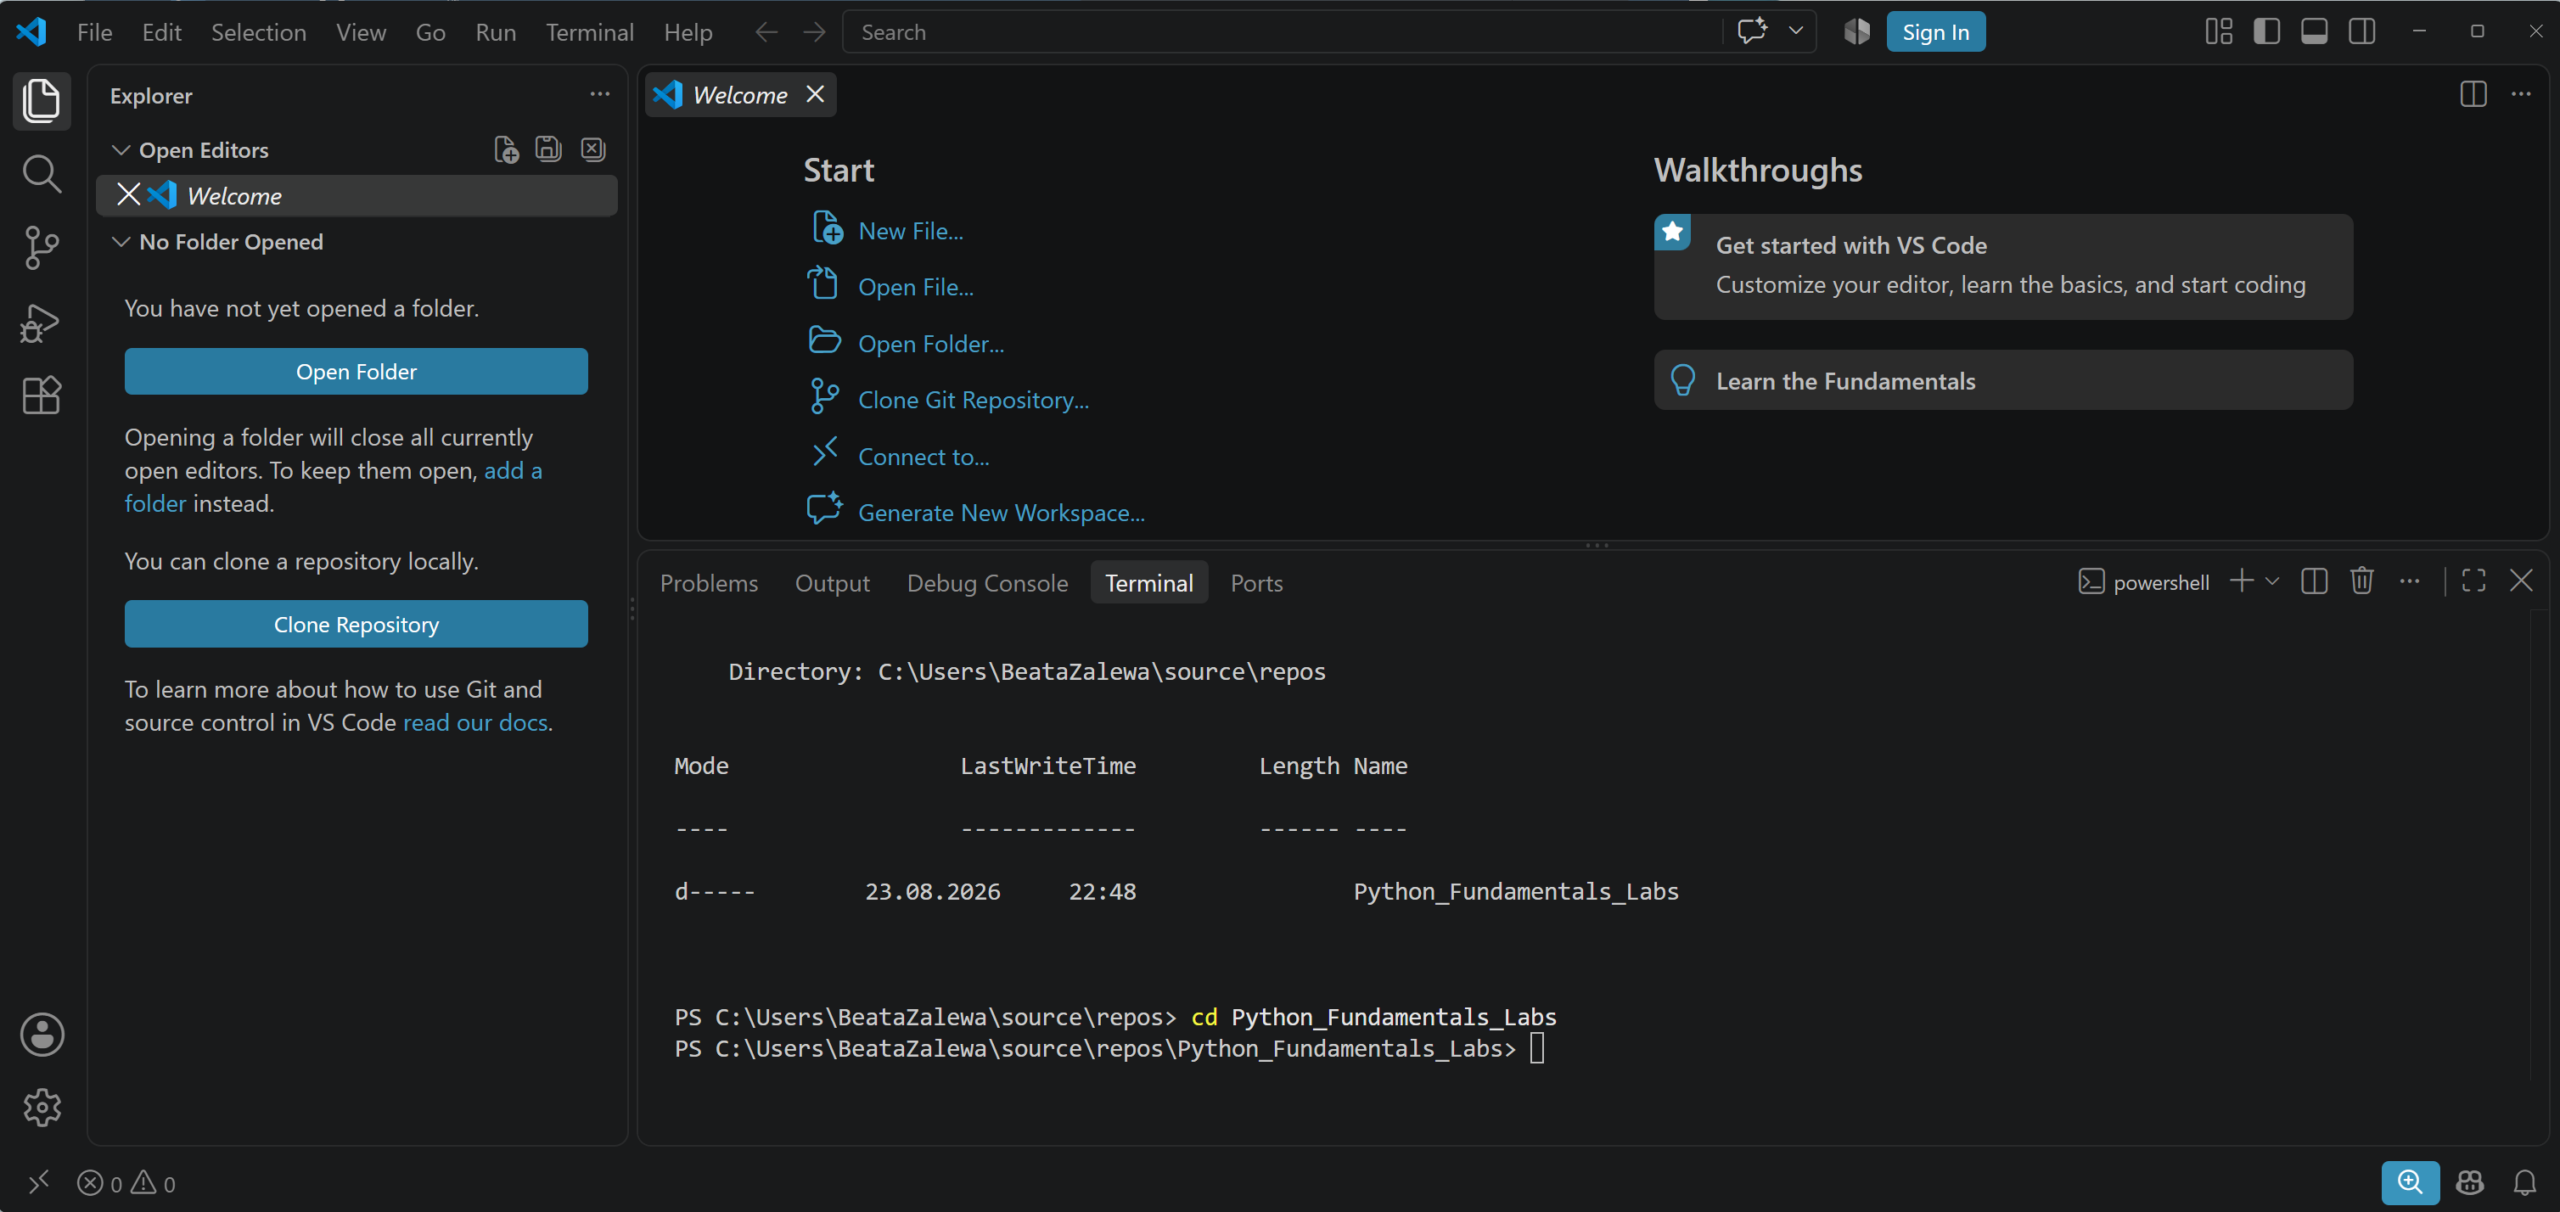
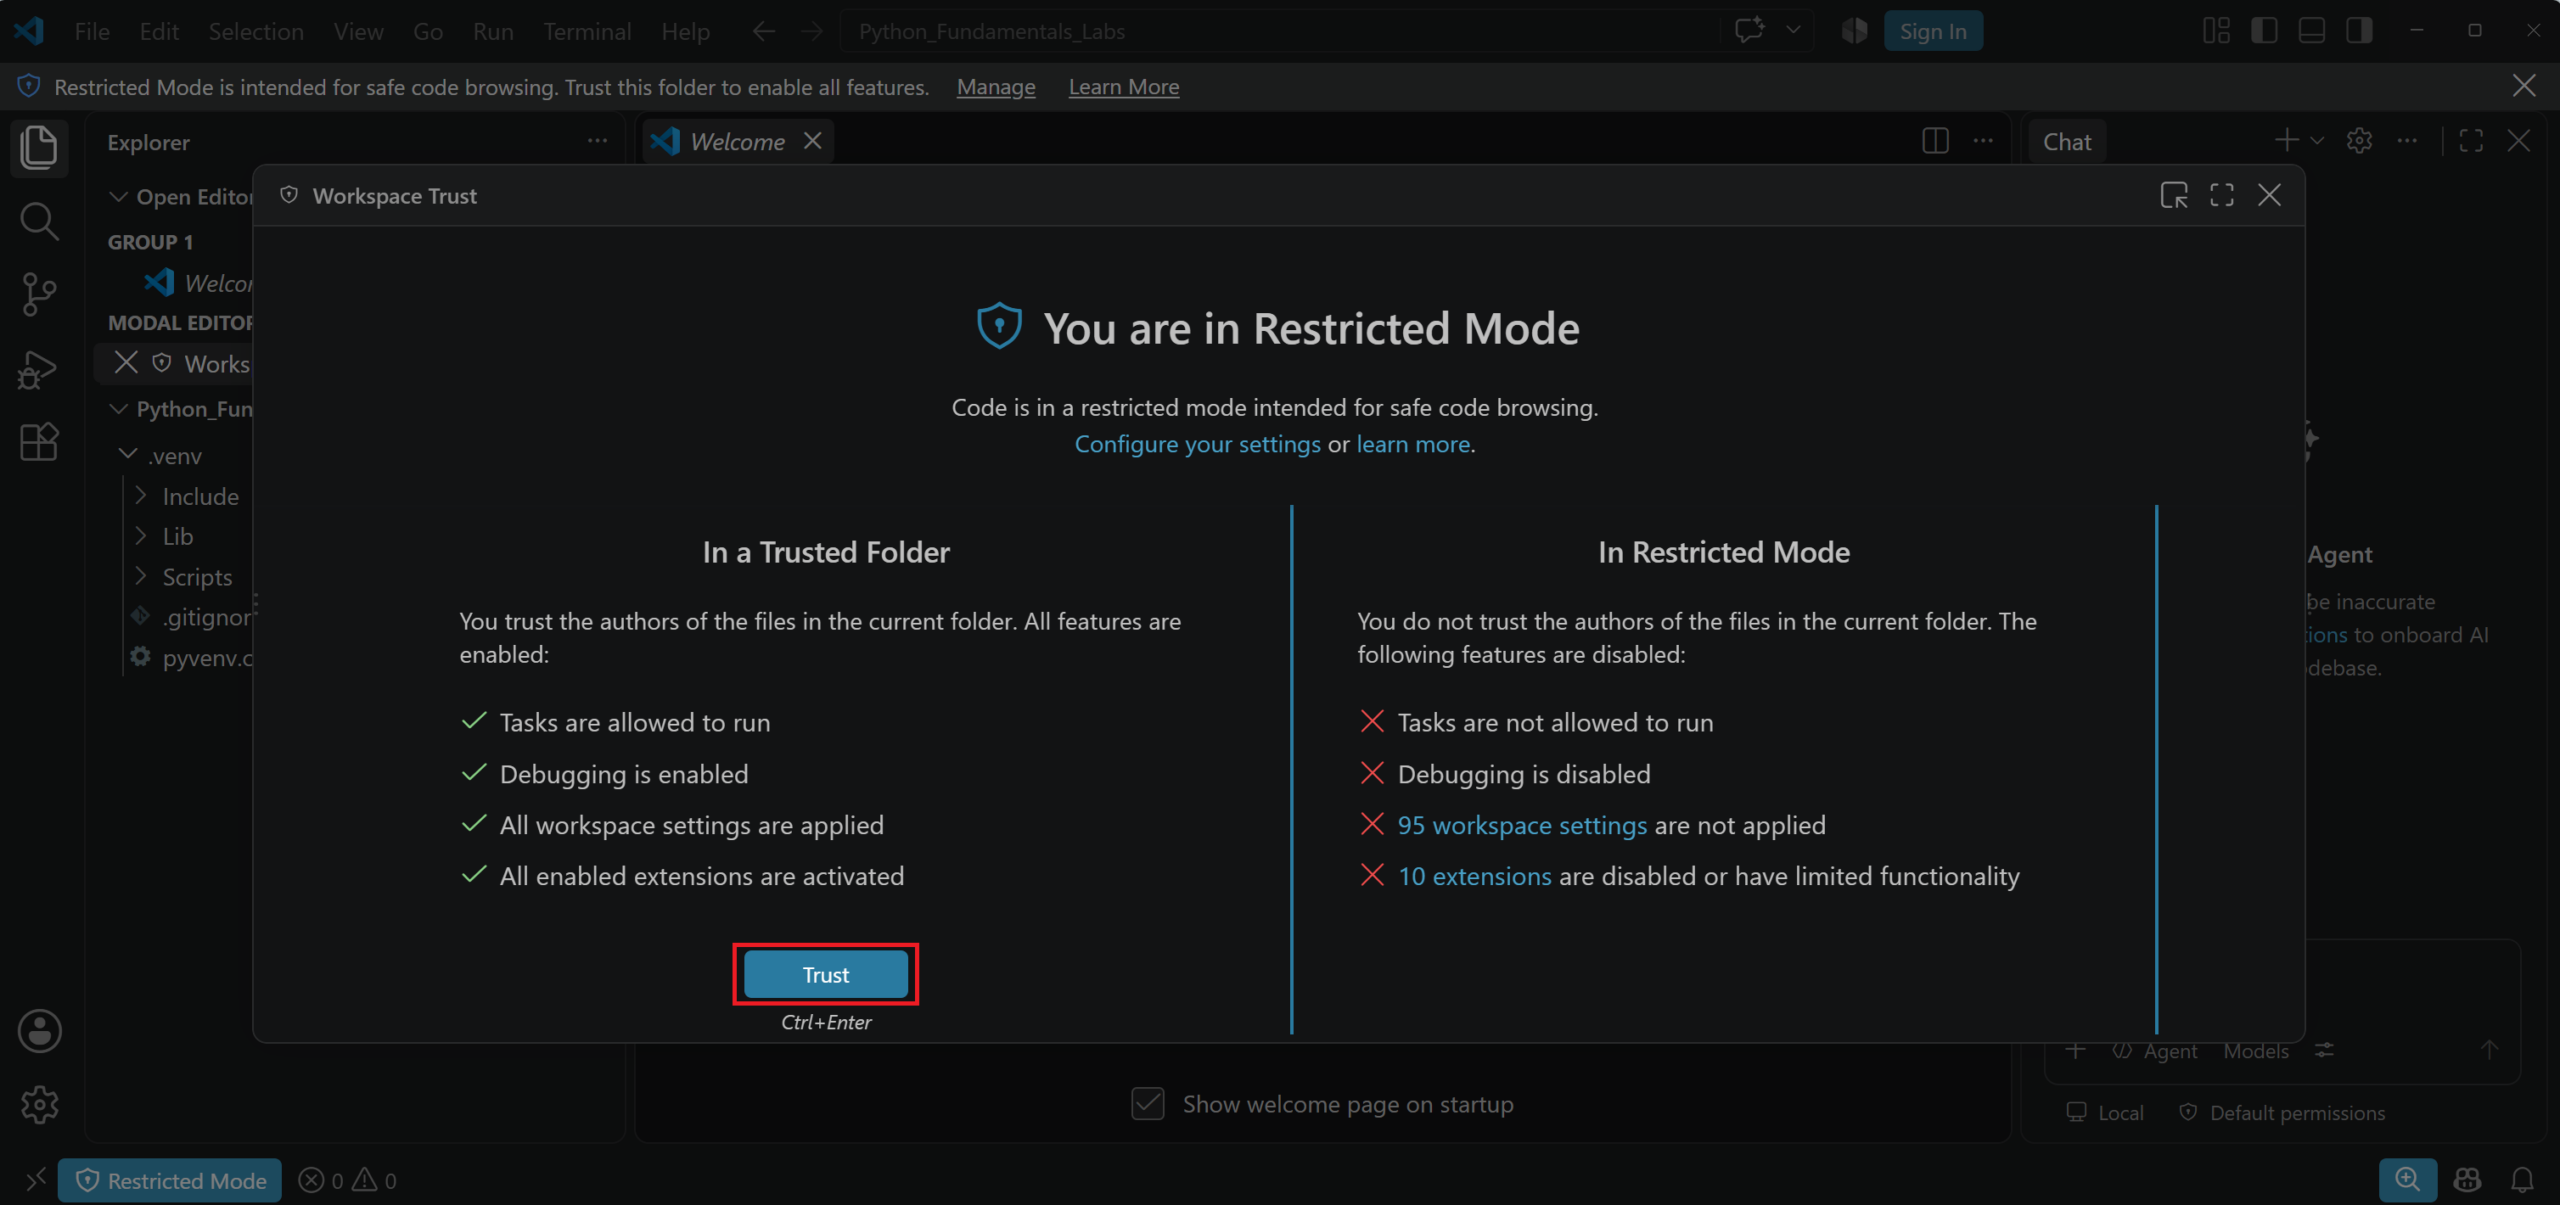
In Visual Studio Code from the Welcome page, Explorer or File menu, choose Open Folder.
Choose folder and click Select Folder. Check the content.
Tip: If needed, click Restricted Mode, then click Trust.
Step 3: Create a Python Virtual Environment on Windows
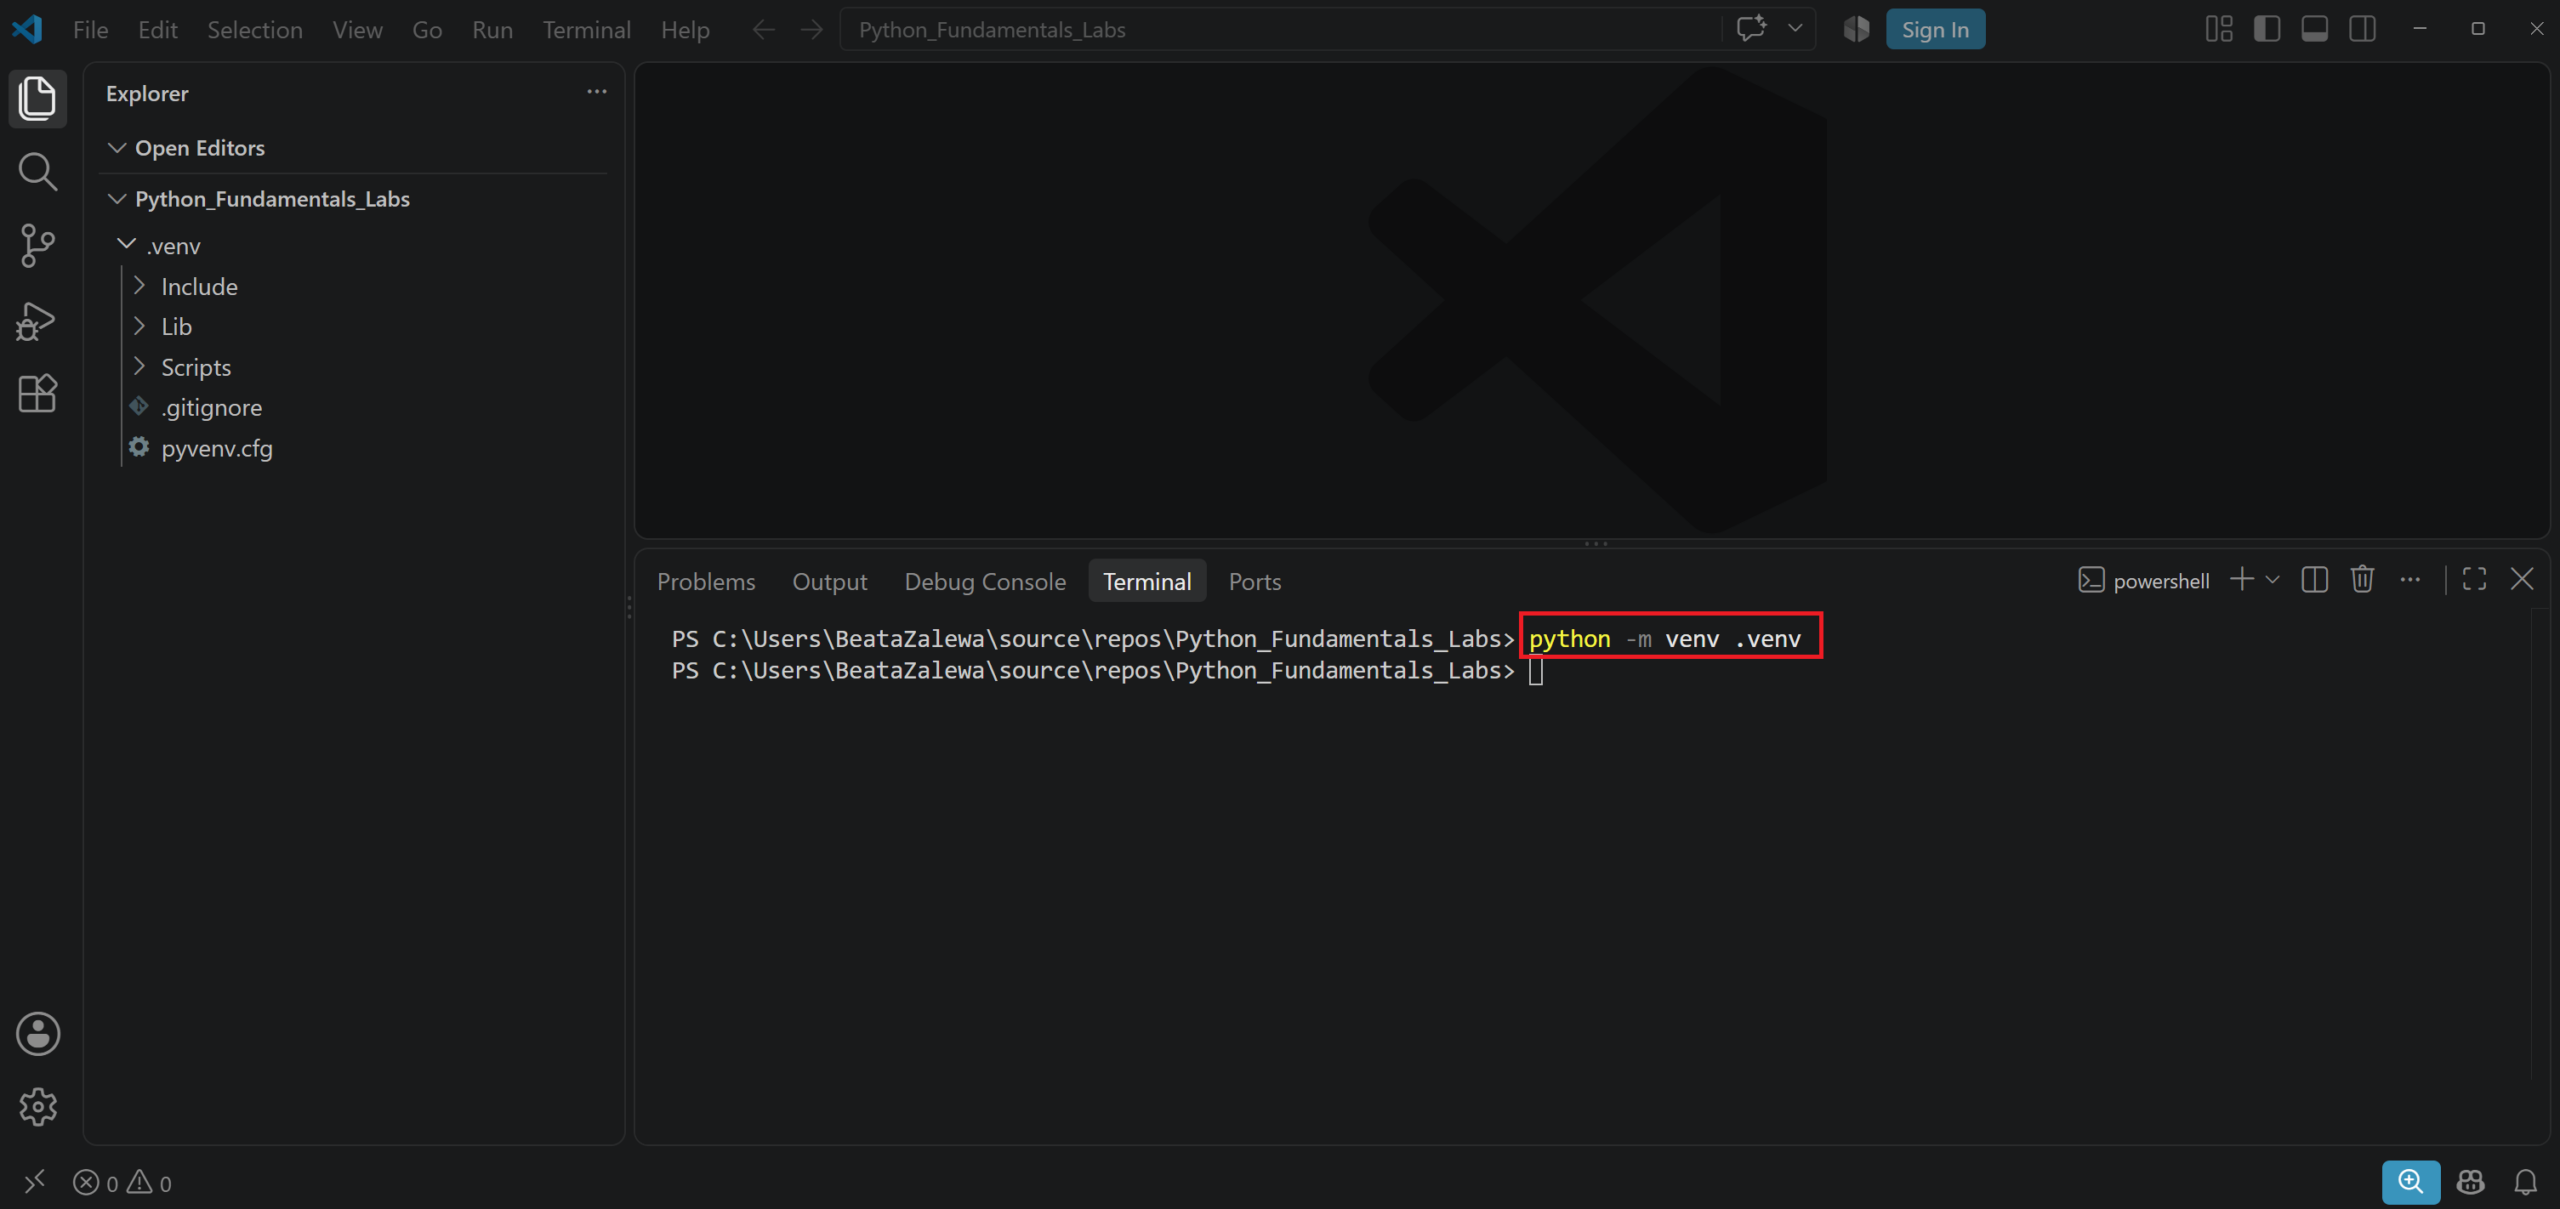
Once you are inside the project folder, run:
python -m venv .venvIf your system uses the Python Launcher, run:
py -m venv .venvLet us examine this command:
- python or py starts Python.
- -m tells Python to run a module.
- venv is the built-in virtual environment module.
- .venv is the name of the directory that will contain the environment.
The command creates a structure similar to:
my-python-project
└── .venv
    ├── Include
    ├── Lib
    ├── Scripts
    └── pyvenv.cfg
The Visual Studio will be reloaded, so you must open terminal again.
The .venv name is a widely used convention. The dot also helps distinguish the environment directory from the project’s source-code directories.
However, you can use another name:
python -m venv environmentIn that case, you must replace .venv with environment in all activation commands.
Step 4: Activate the Virtual Environment in Windows
Creating the environment is not the same as activating it. Activation tells the current terminal to use the Python interpreter and packages stored inside .venv.
To activate the environment in PowerShell, run:
.\.venv\Scripts\Activate.ps1Tip: If you receive error like .\.venv\Scripts\Activate.ps1 : File C:\Users\<username>\source\repos\Python_Fundamentals_Labs.venv\Scripts\Activate.ps1 cannot be loaded because running scripts is disabled on this system, run the command:
Get-ExecutionPolicyThen change the policy using this command:
Set-ExecutionPolicy -ExecutionPolicy RemoteSigned -Scope CurrentUserAnd Get-ExecutionPolicy command again to check actual policy (should be RemoteSigned):
Get-ExecutionPolicy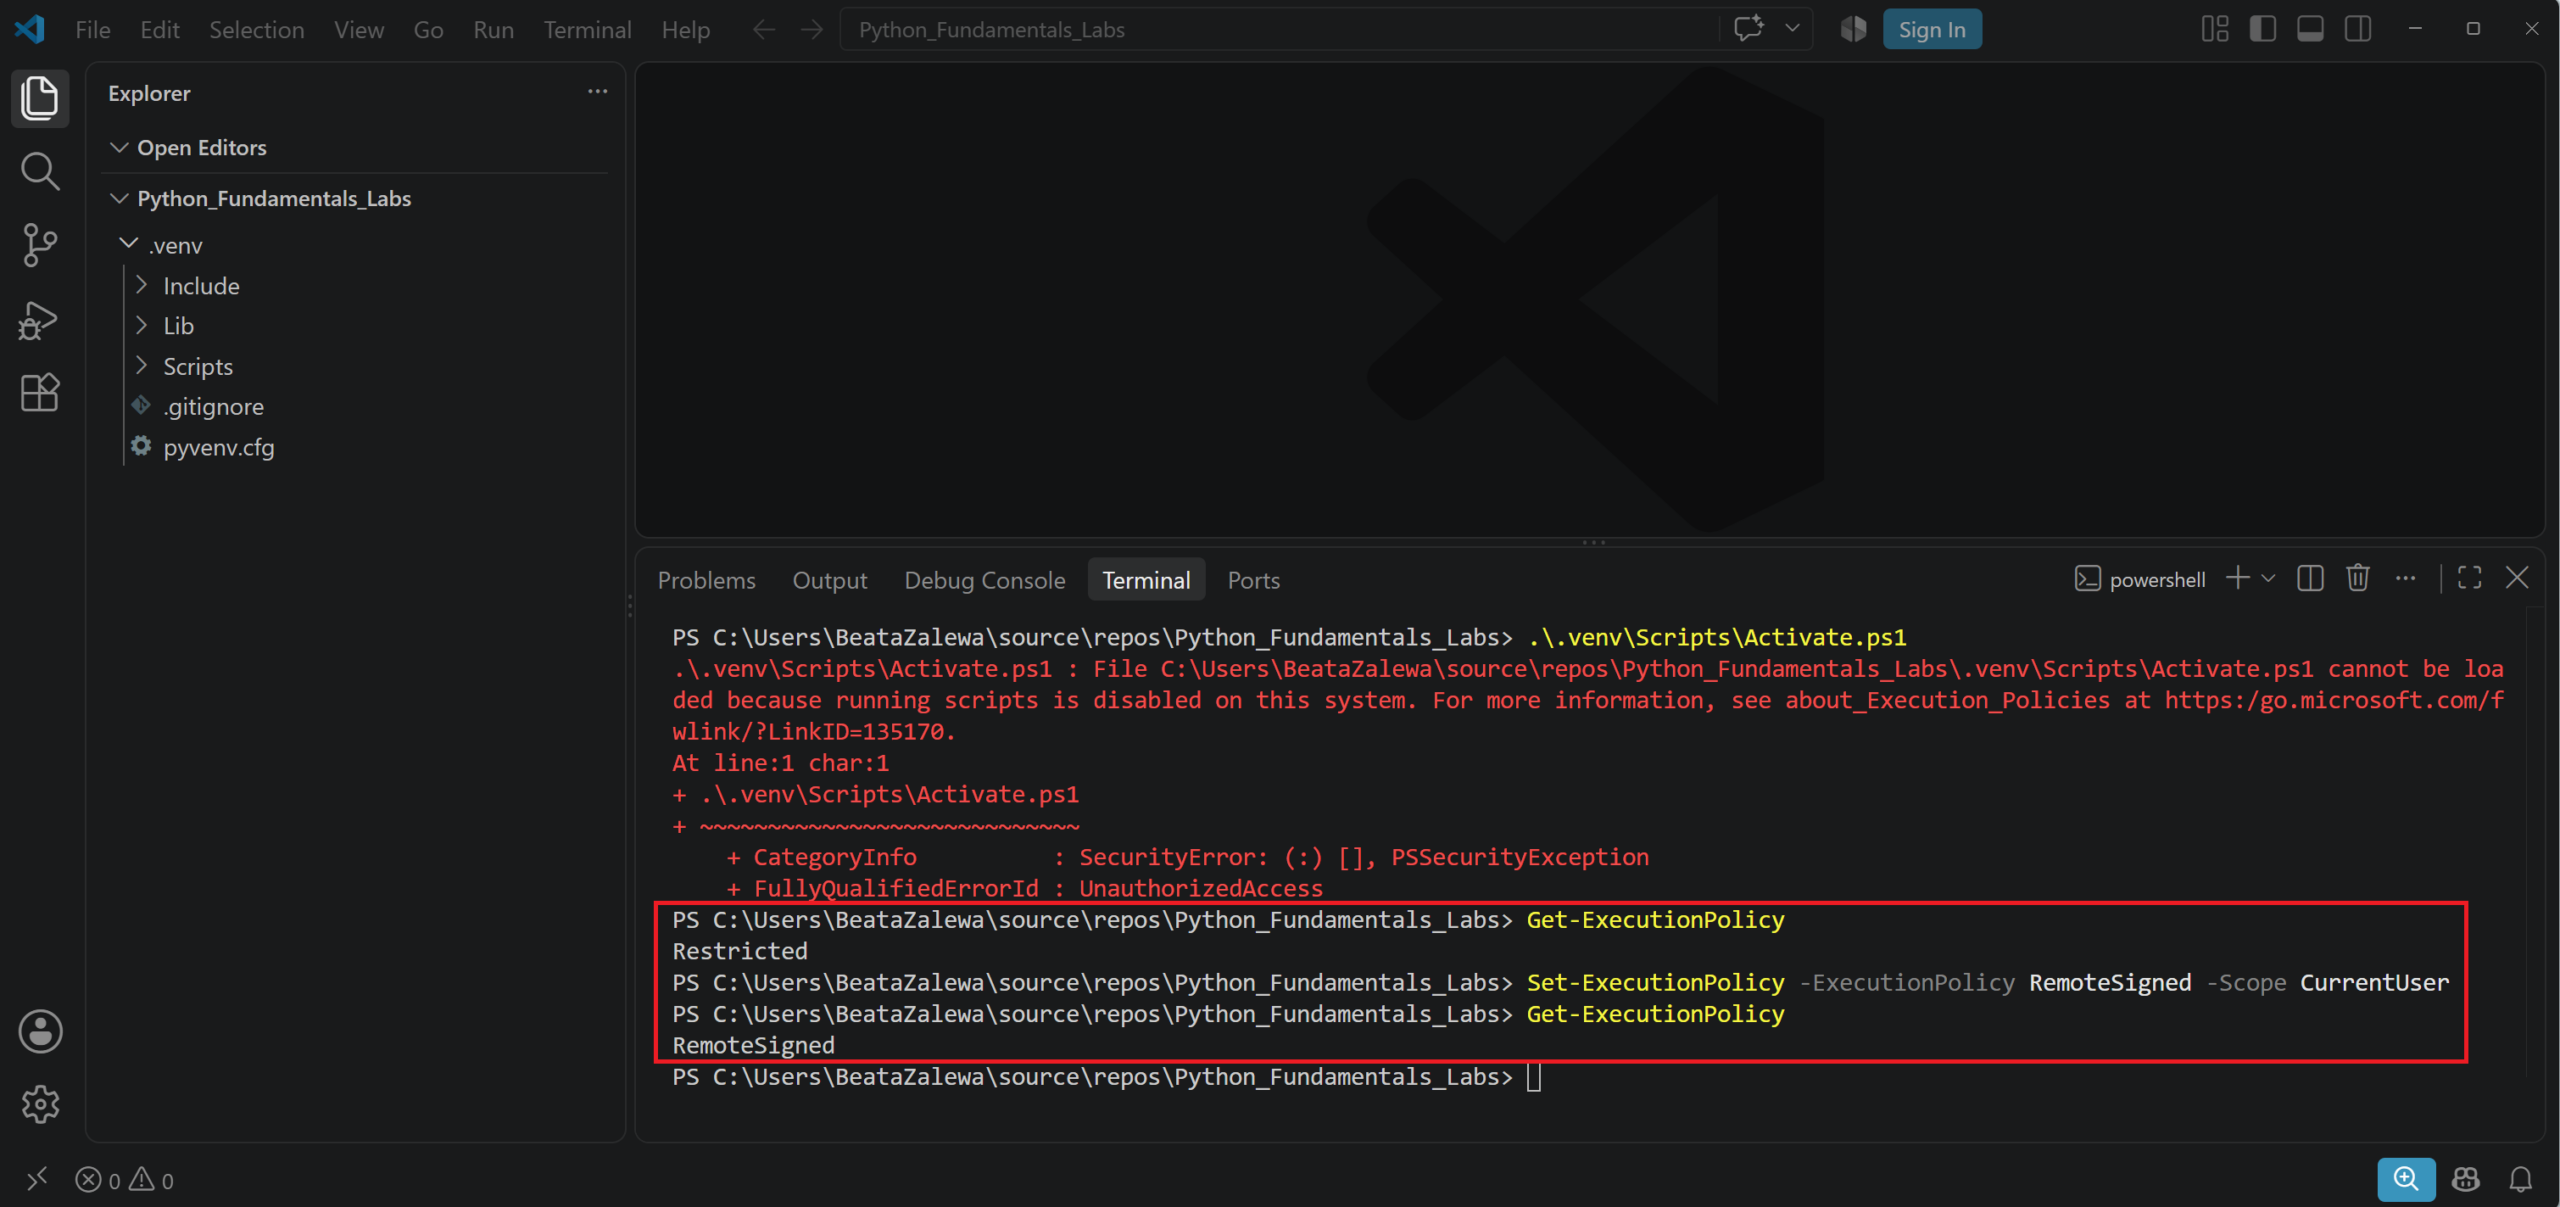
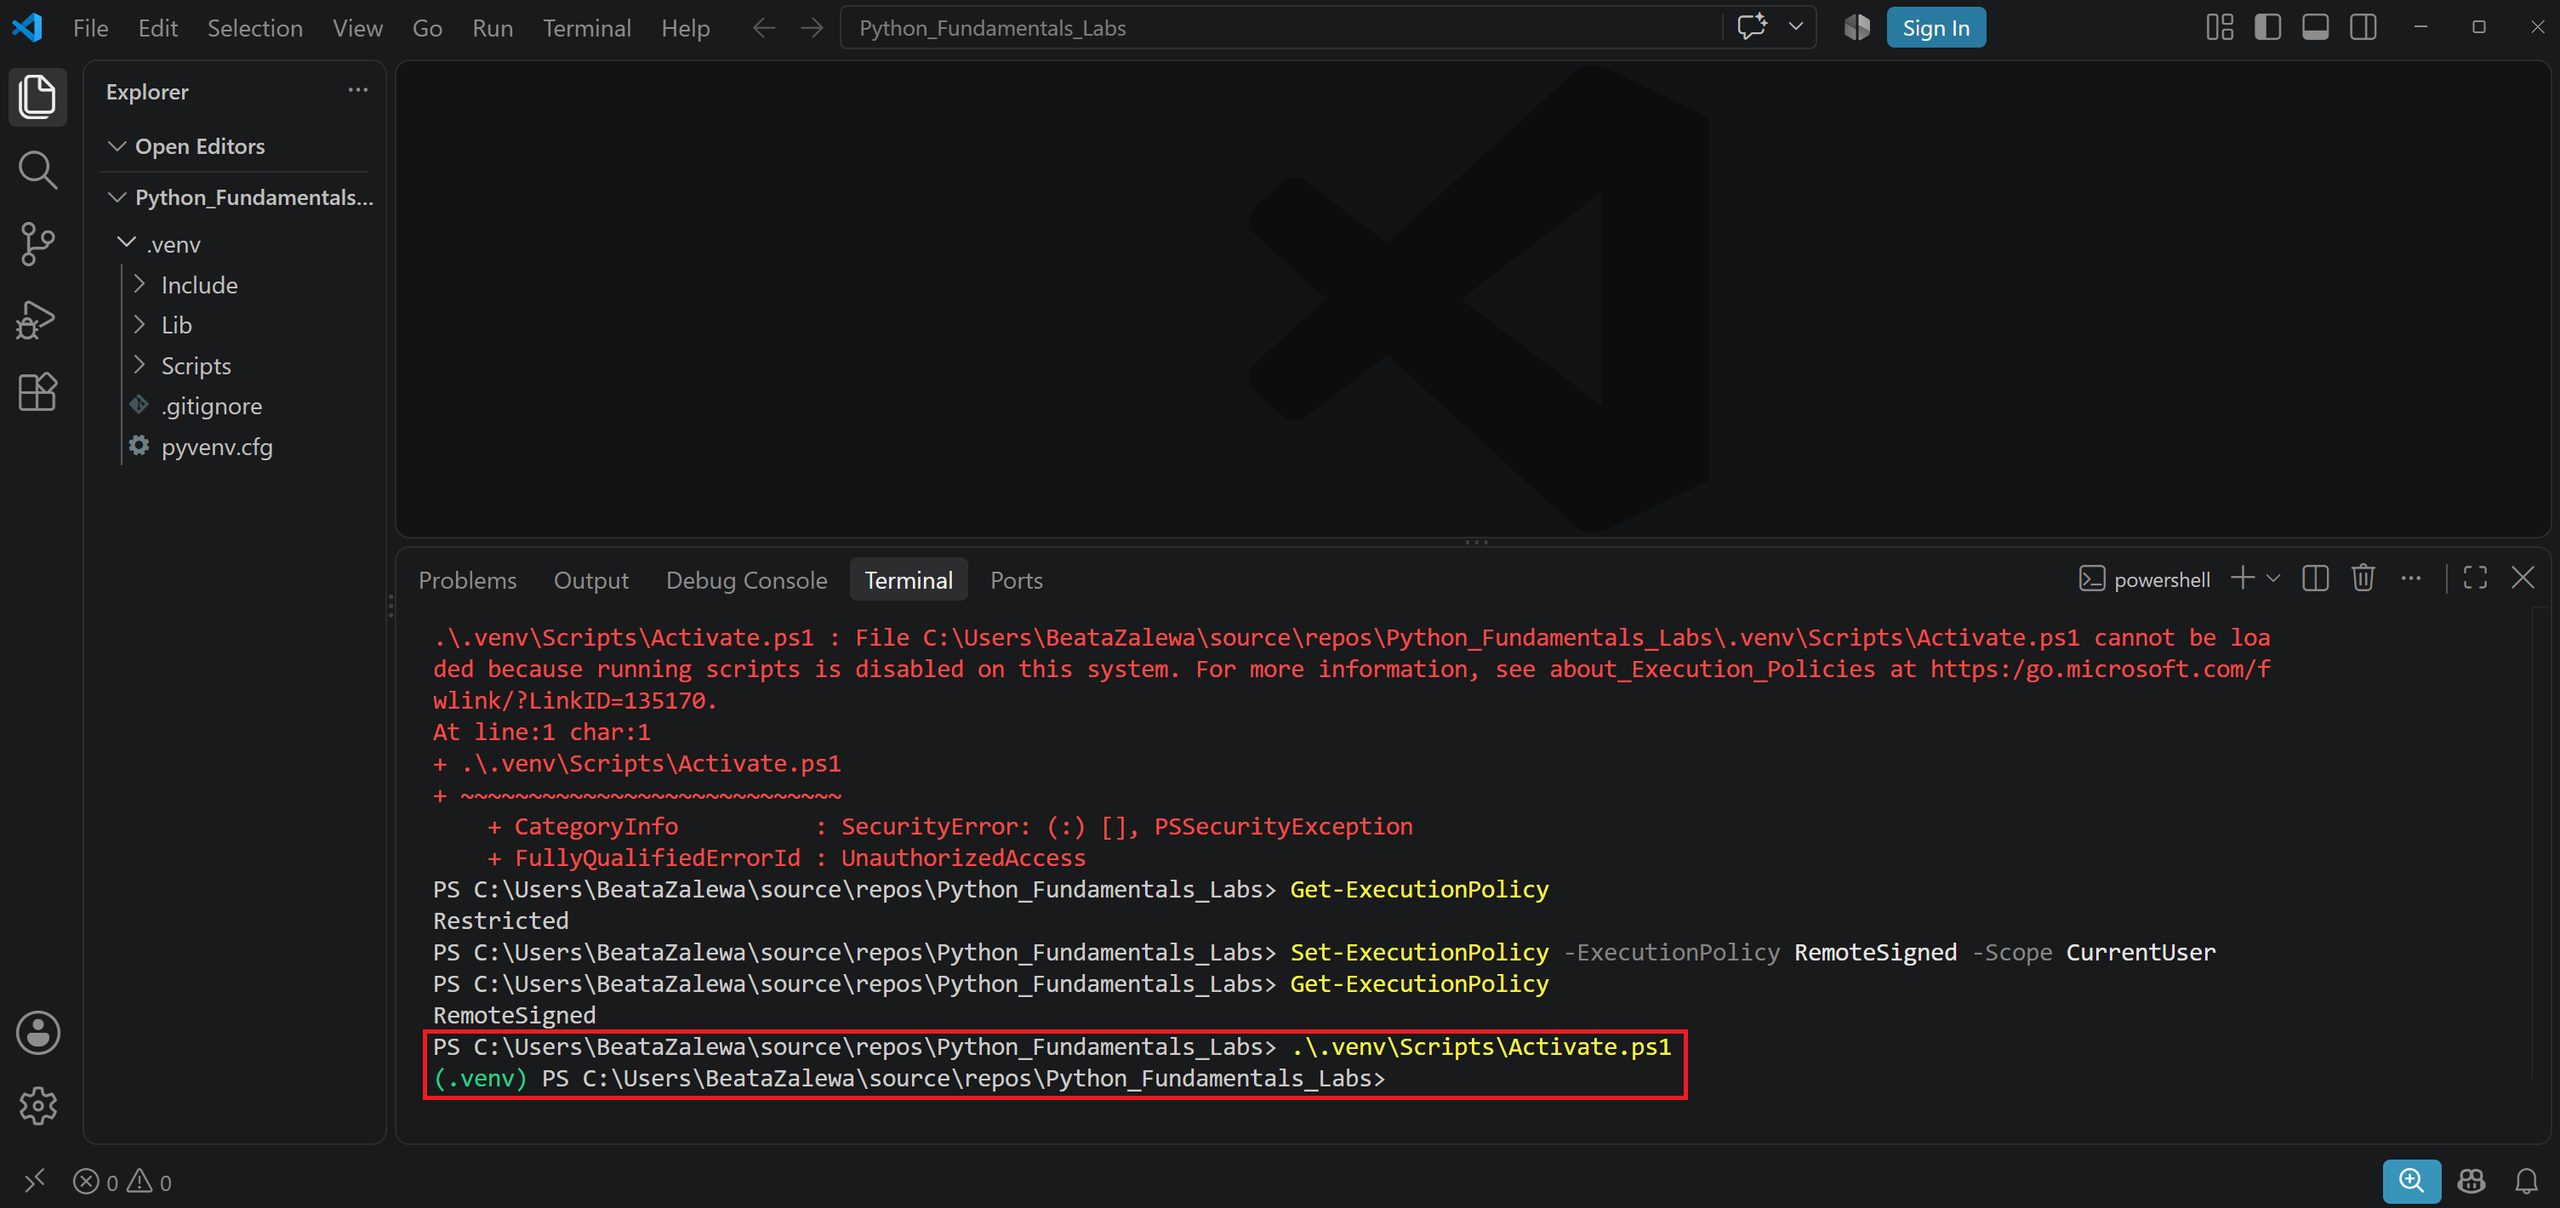
Now try to activate Virtual Environment again.After successful activation, your command prompt should start with:
(.venv)For example:
(.venv) PS C:\Users\<username>\source\repos\Python_Fundamentals_Labs>The (.venv) prefix confirms that the virtual environment is active.
From this point, commands such as python and pip should use the environment stored inside the project.
Activate the Virtual Environment in Command Prompt
If you use the traditional Windows Command Prompt, run:
.venv\Scripts\activate.batThe command prompt should then display:
(.venv) C:\Projects\my-python-project>Although PowerShell and Command Prompt use different activation files, they activate the same environment.
Activate the Virtual Environment in Git Bash
If you use Git Bash on Windows, run:
source .venv/Scripts/activateAfter activation, Git Bash should also display the environment name at the beginning of the command line.
How to confirm that the Virtual Environment is active
The (.venv) prefix is the easiest indication. However, you can also check which Python executable is currently being used.
In PowerShell, run:
Get-Command python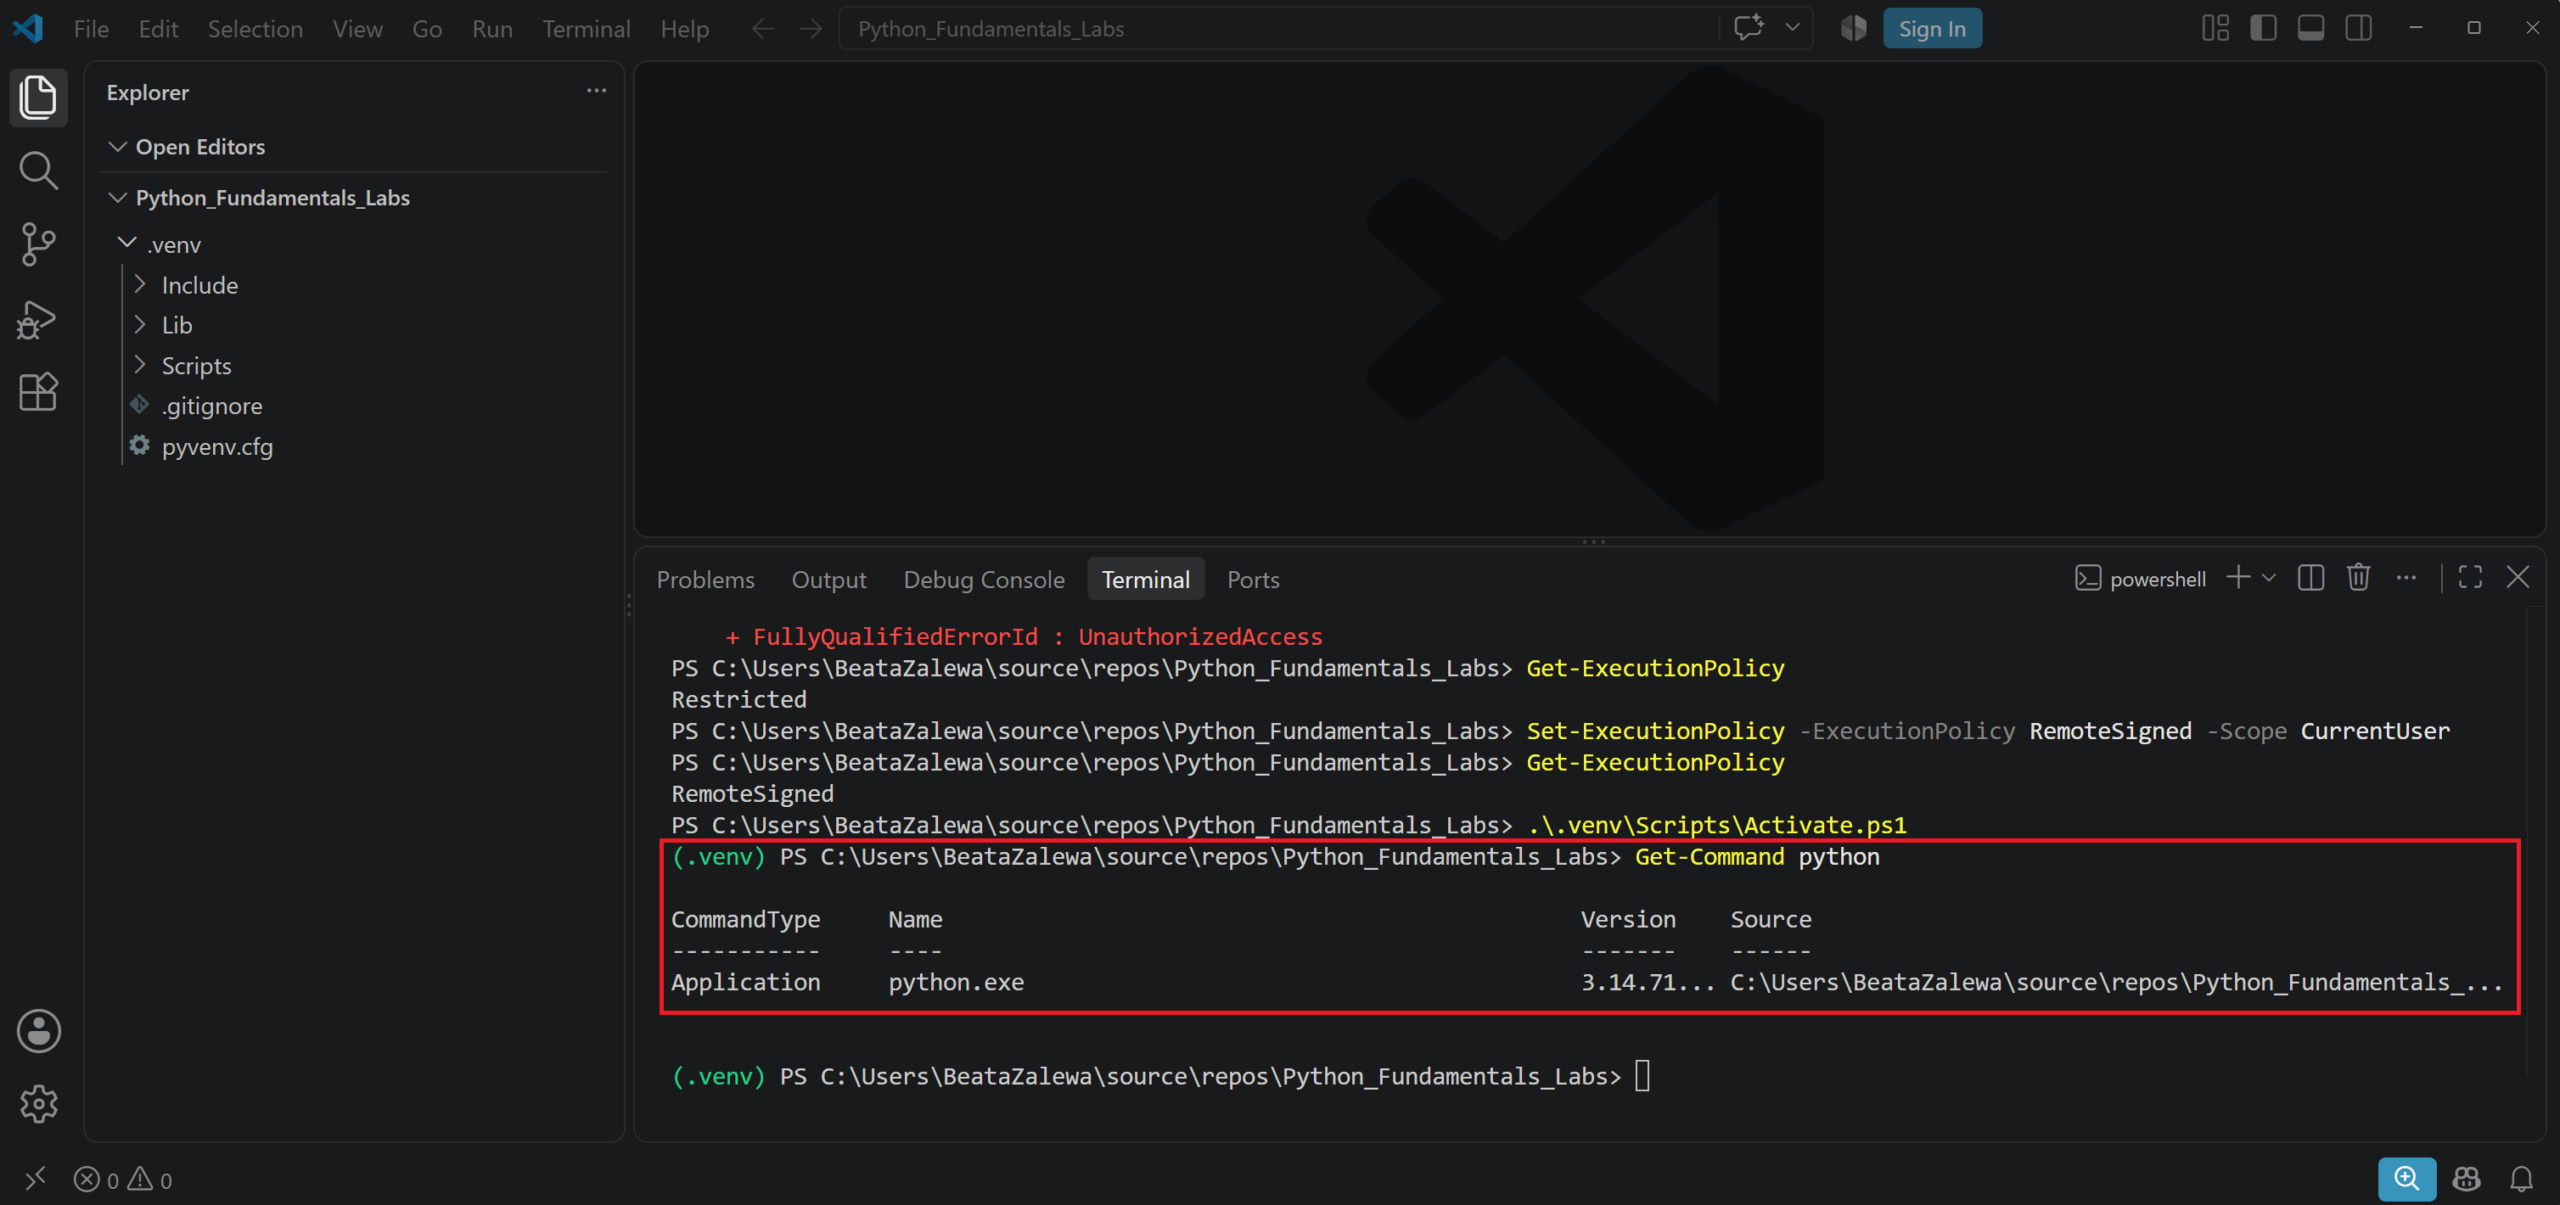
Alternatively, use:
where.exe pythonWhen the virtual environment is active, the first path should point to:
C:\Users\<username>\source\repos\Python_Fundamentals_Labs\.venv\Scripts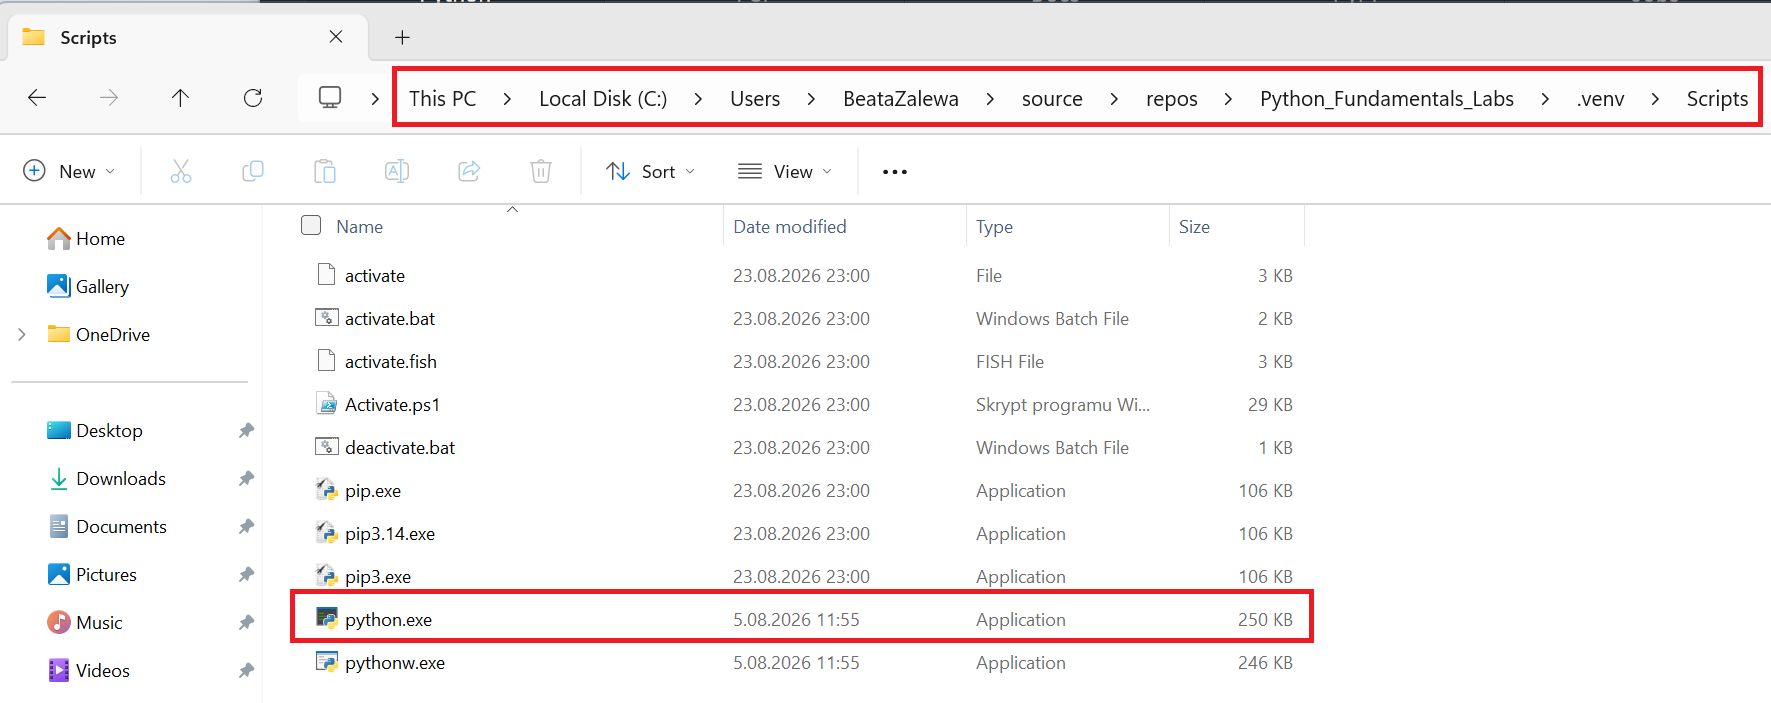
You can also use Python itself:
python -c "import sys; print(sys.executable)"The output should point to the Python interpreter inside .venv.
Step 5: Upgrade pip in the Virtual Environment
pip is Python’s standard package installer. It allows you to add third-party libraries to the environment.
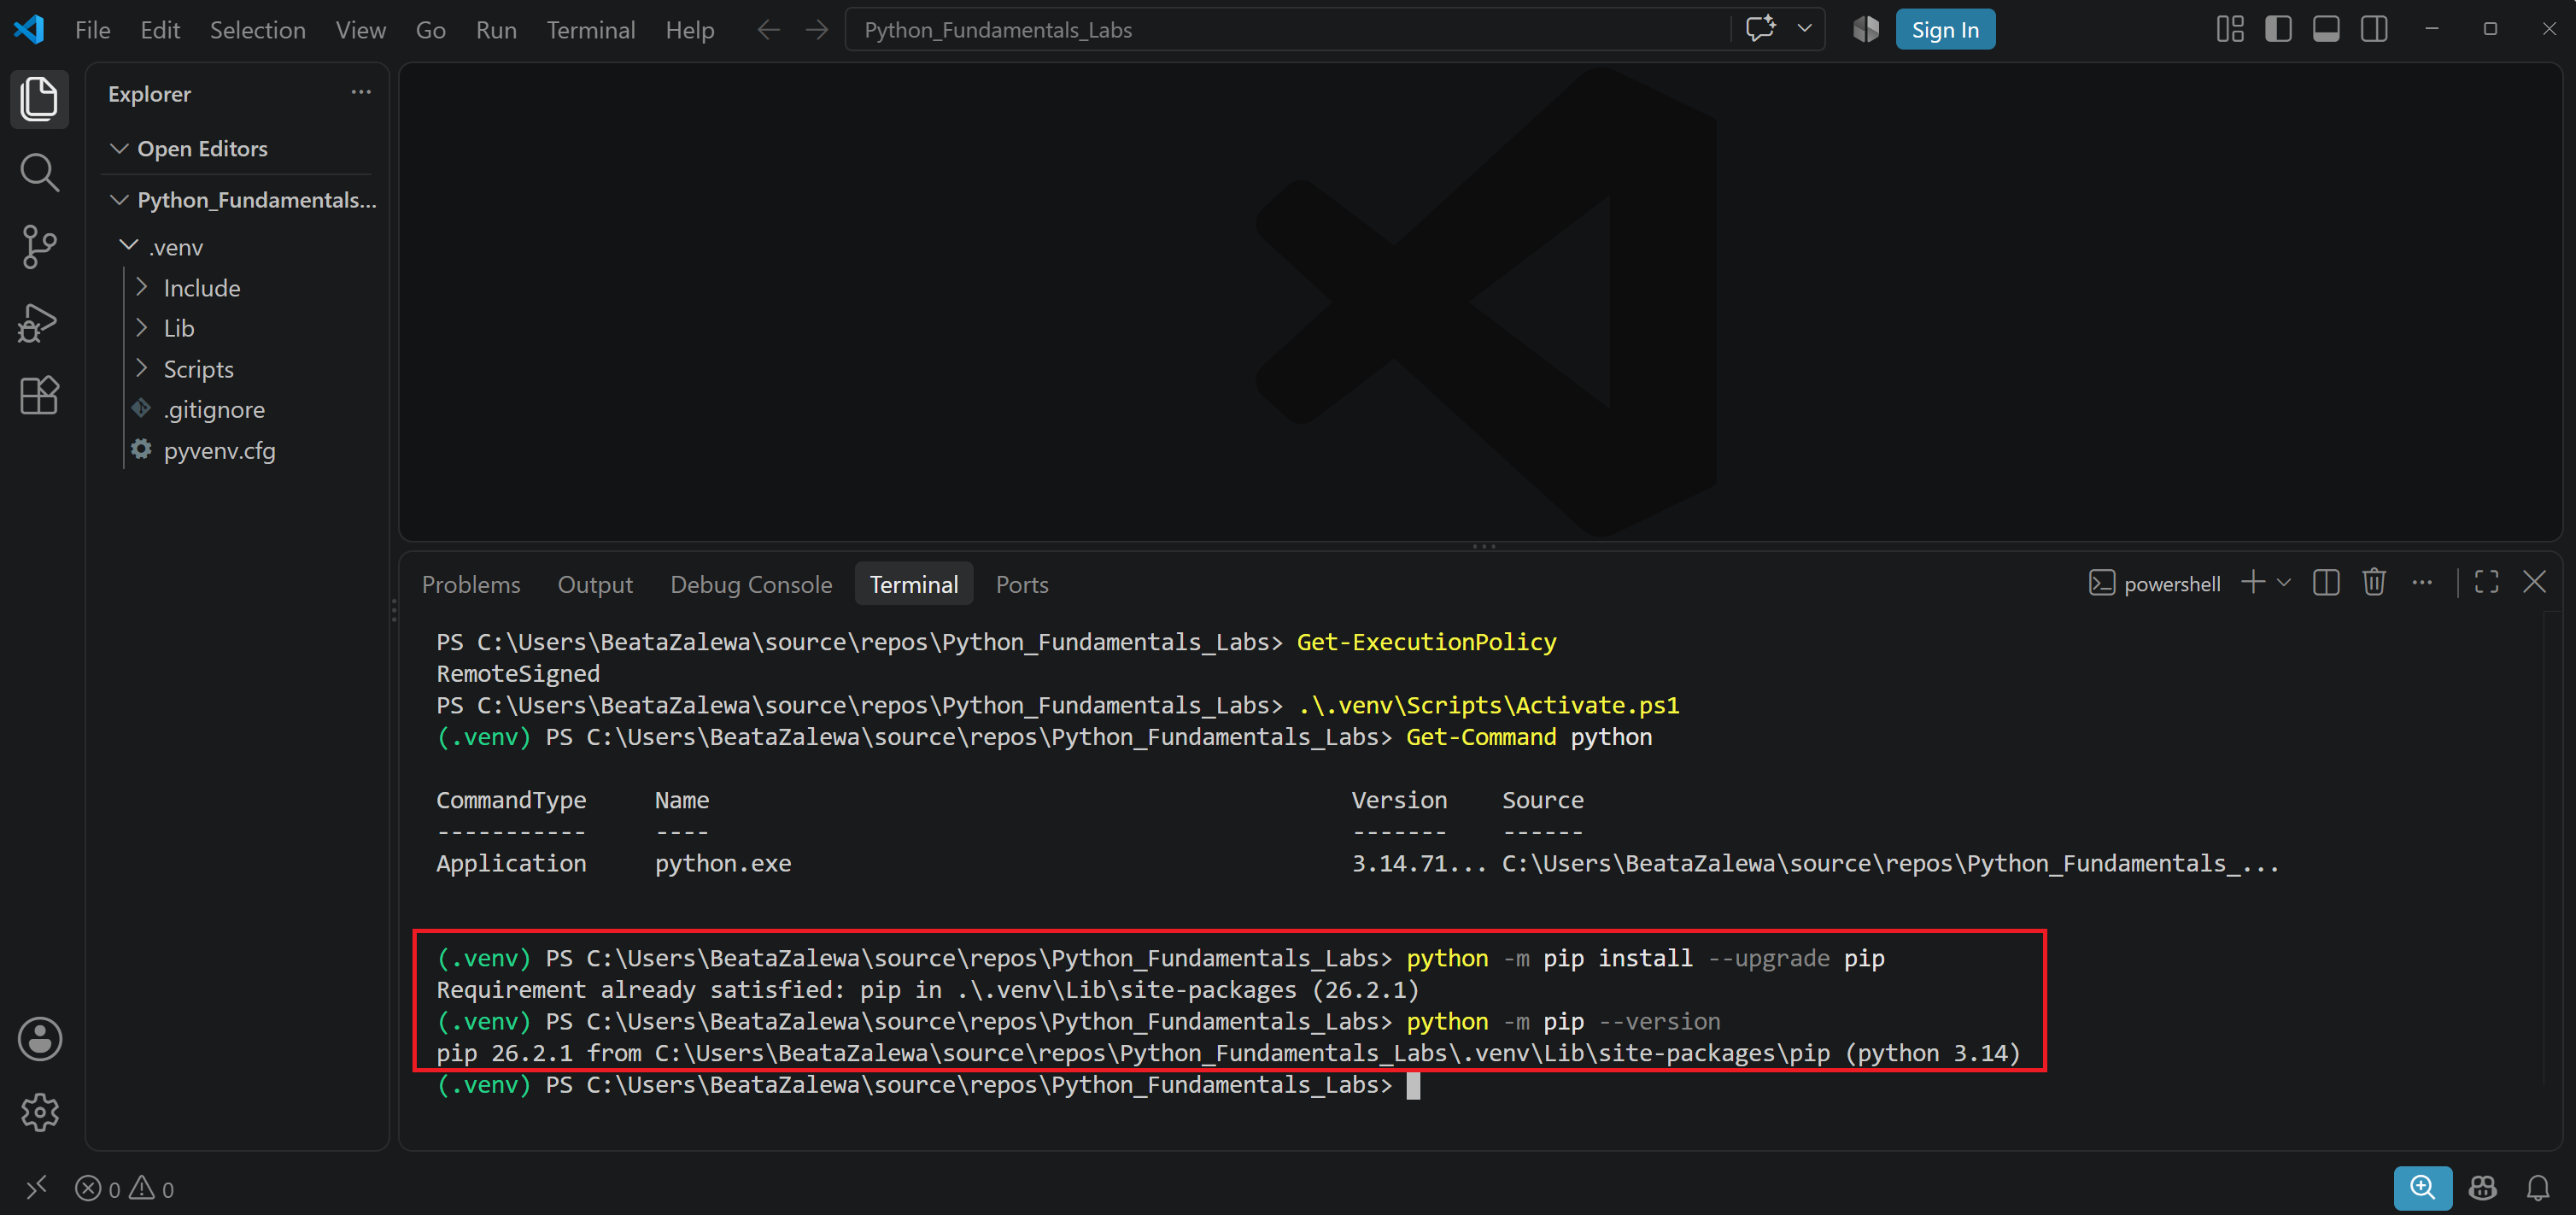
Before installing packages, upgrade pip:
python -m pip install --upgrade pipUsing python -m pip is helpful because it makes it clear which Python interpreter is running pip.
After the upgrade, check the installed version:
python -m pip --versionThe displayed path should refer to the .venv directory.
Step 6: Install packages in a Python Virtual Environment
You can now install packages inside the active environment.
For example:
python -m pip install pandas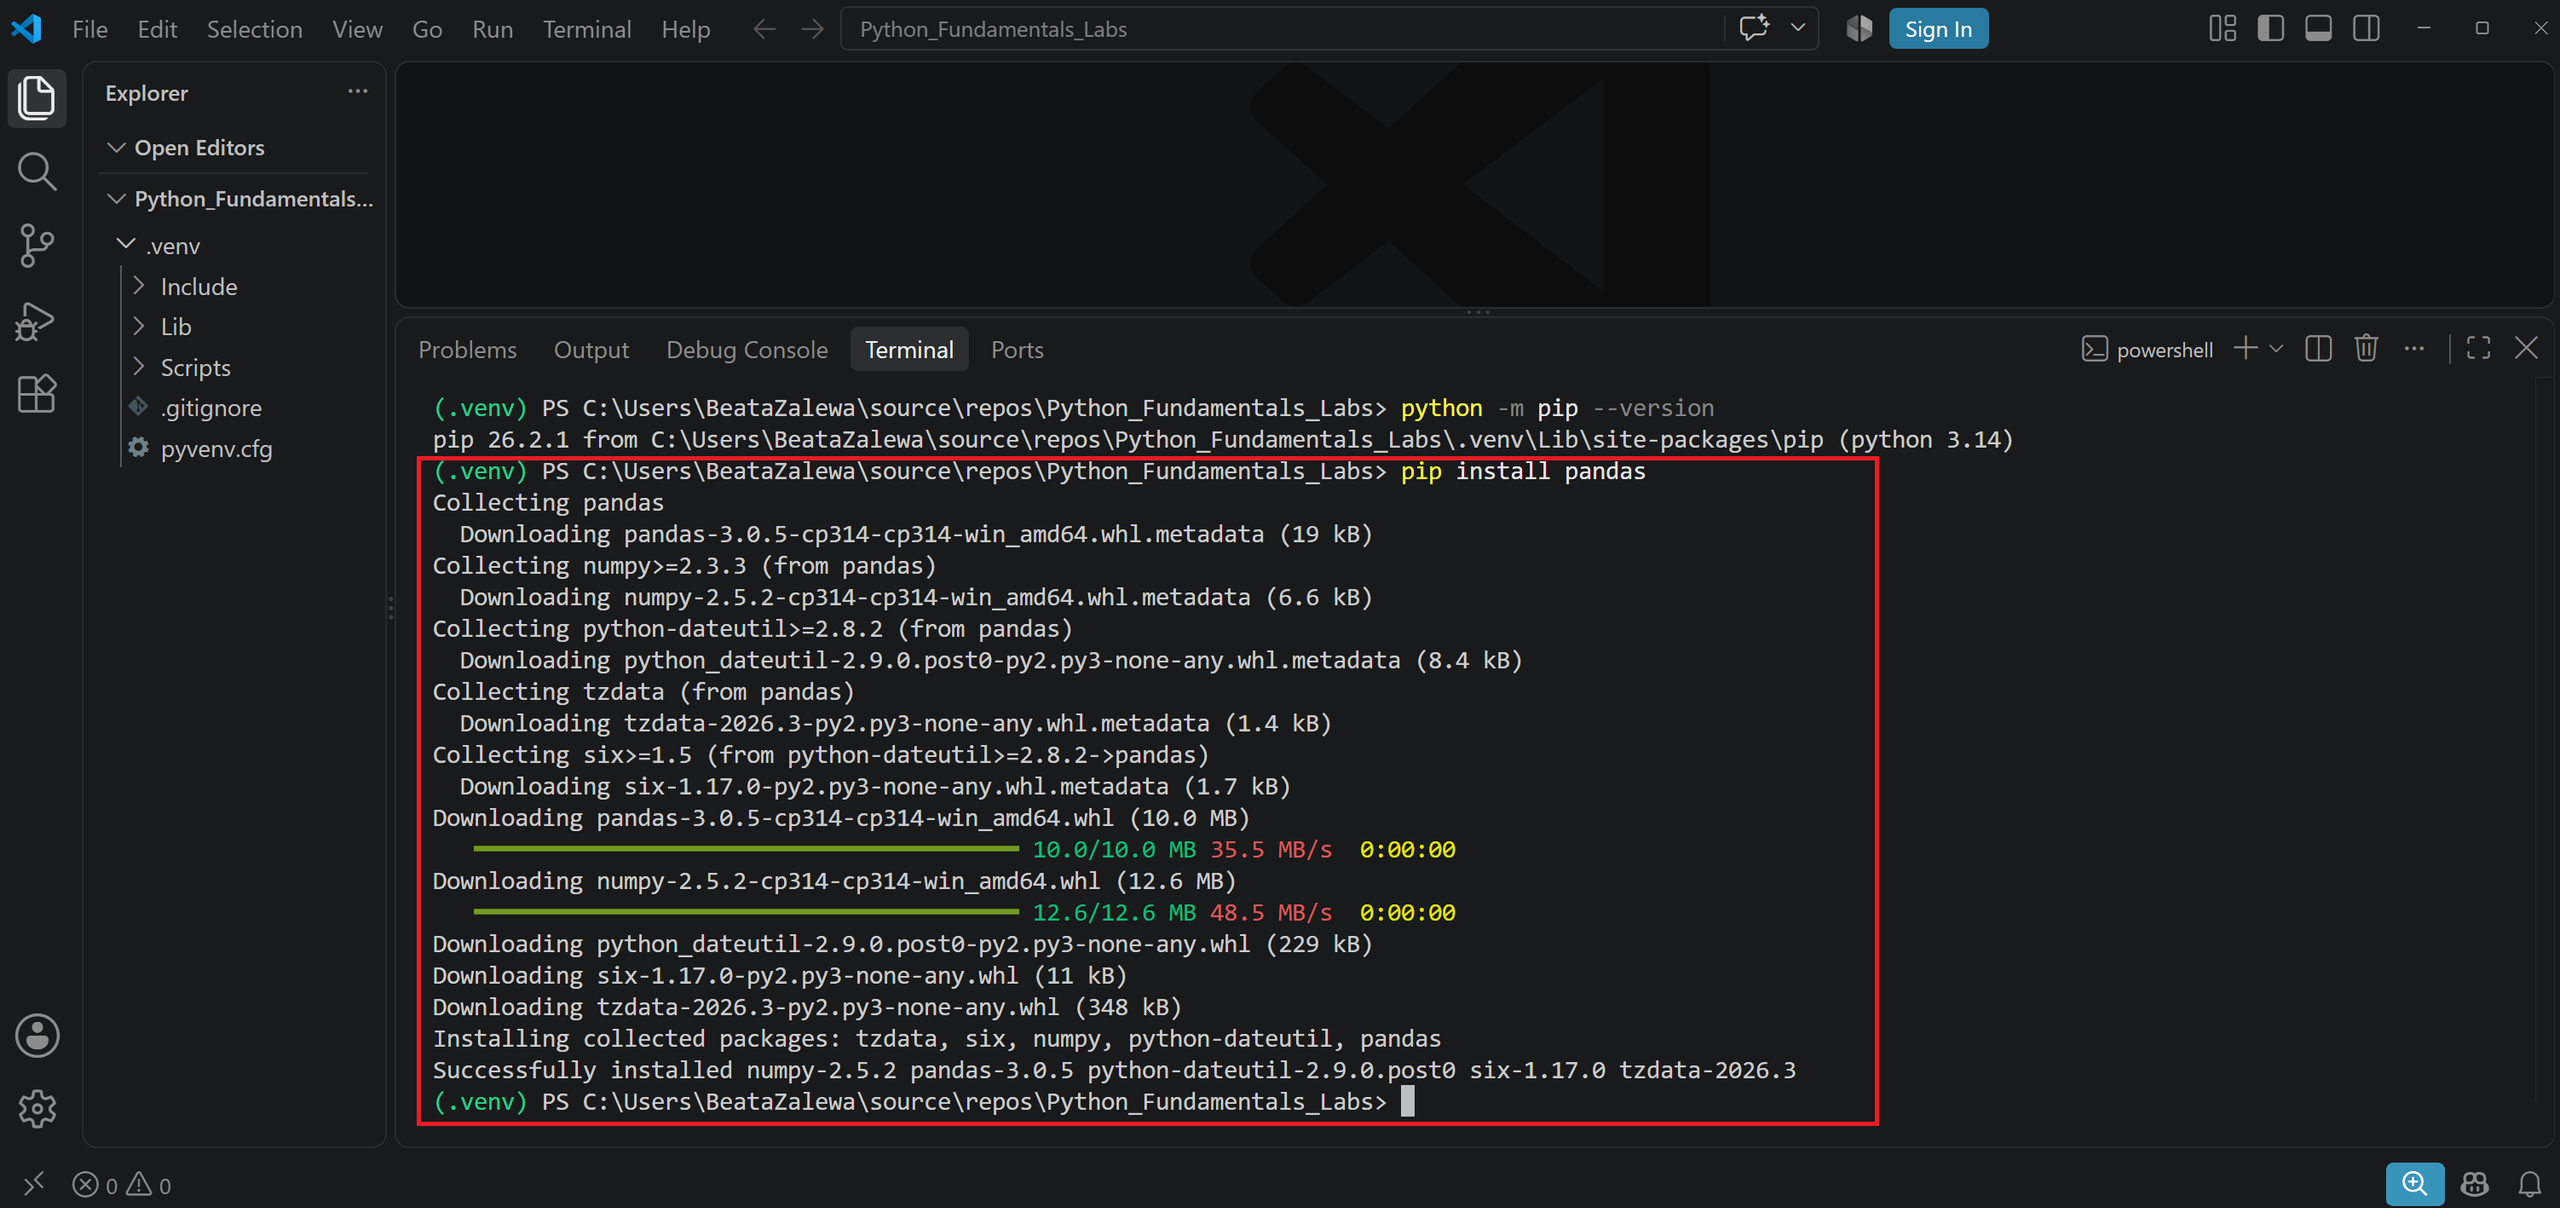
To install several packages at the same time, run:
python -m pip install pandas matplotlib openpyxlThese packages are often used for:
- pandas – working with tabular data
- matplotlib – creating charts and plots
- openpyxl – reading and writing Microsoft Excel files
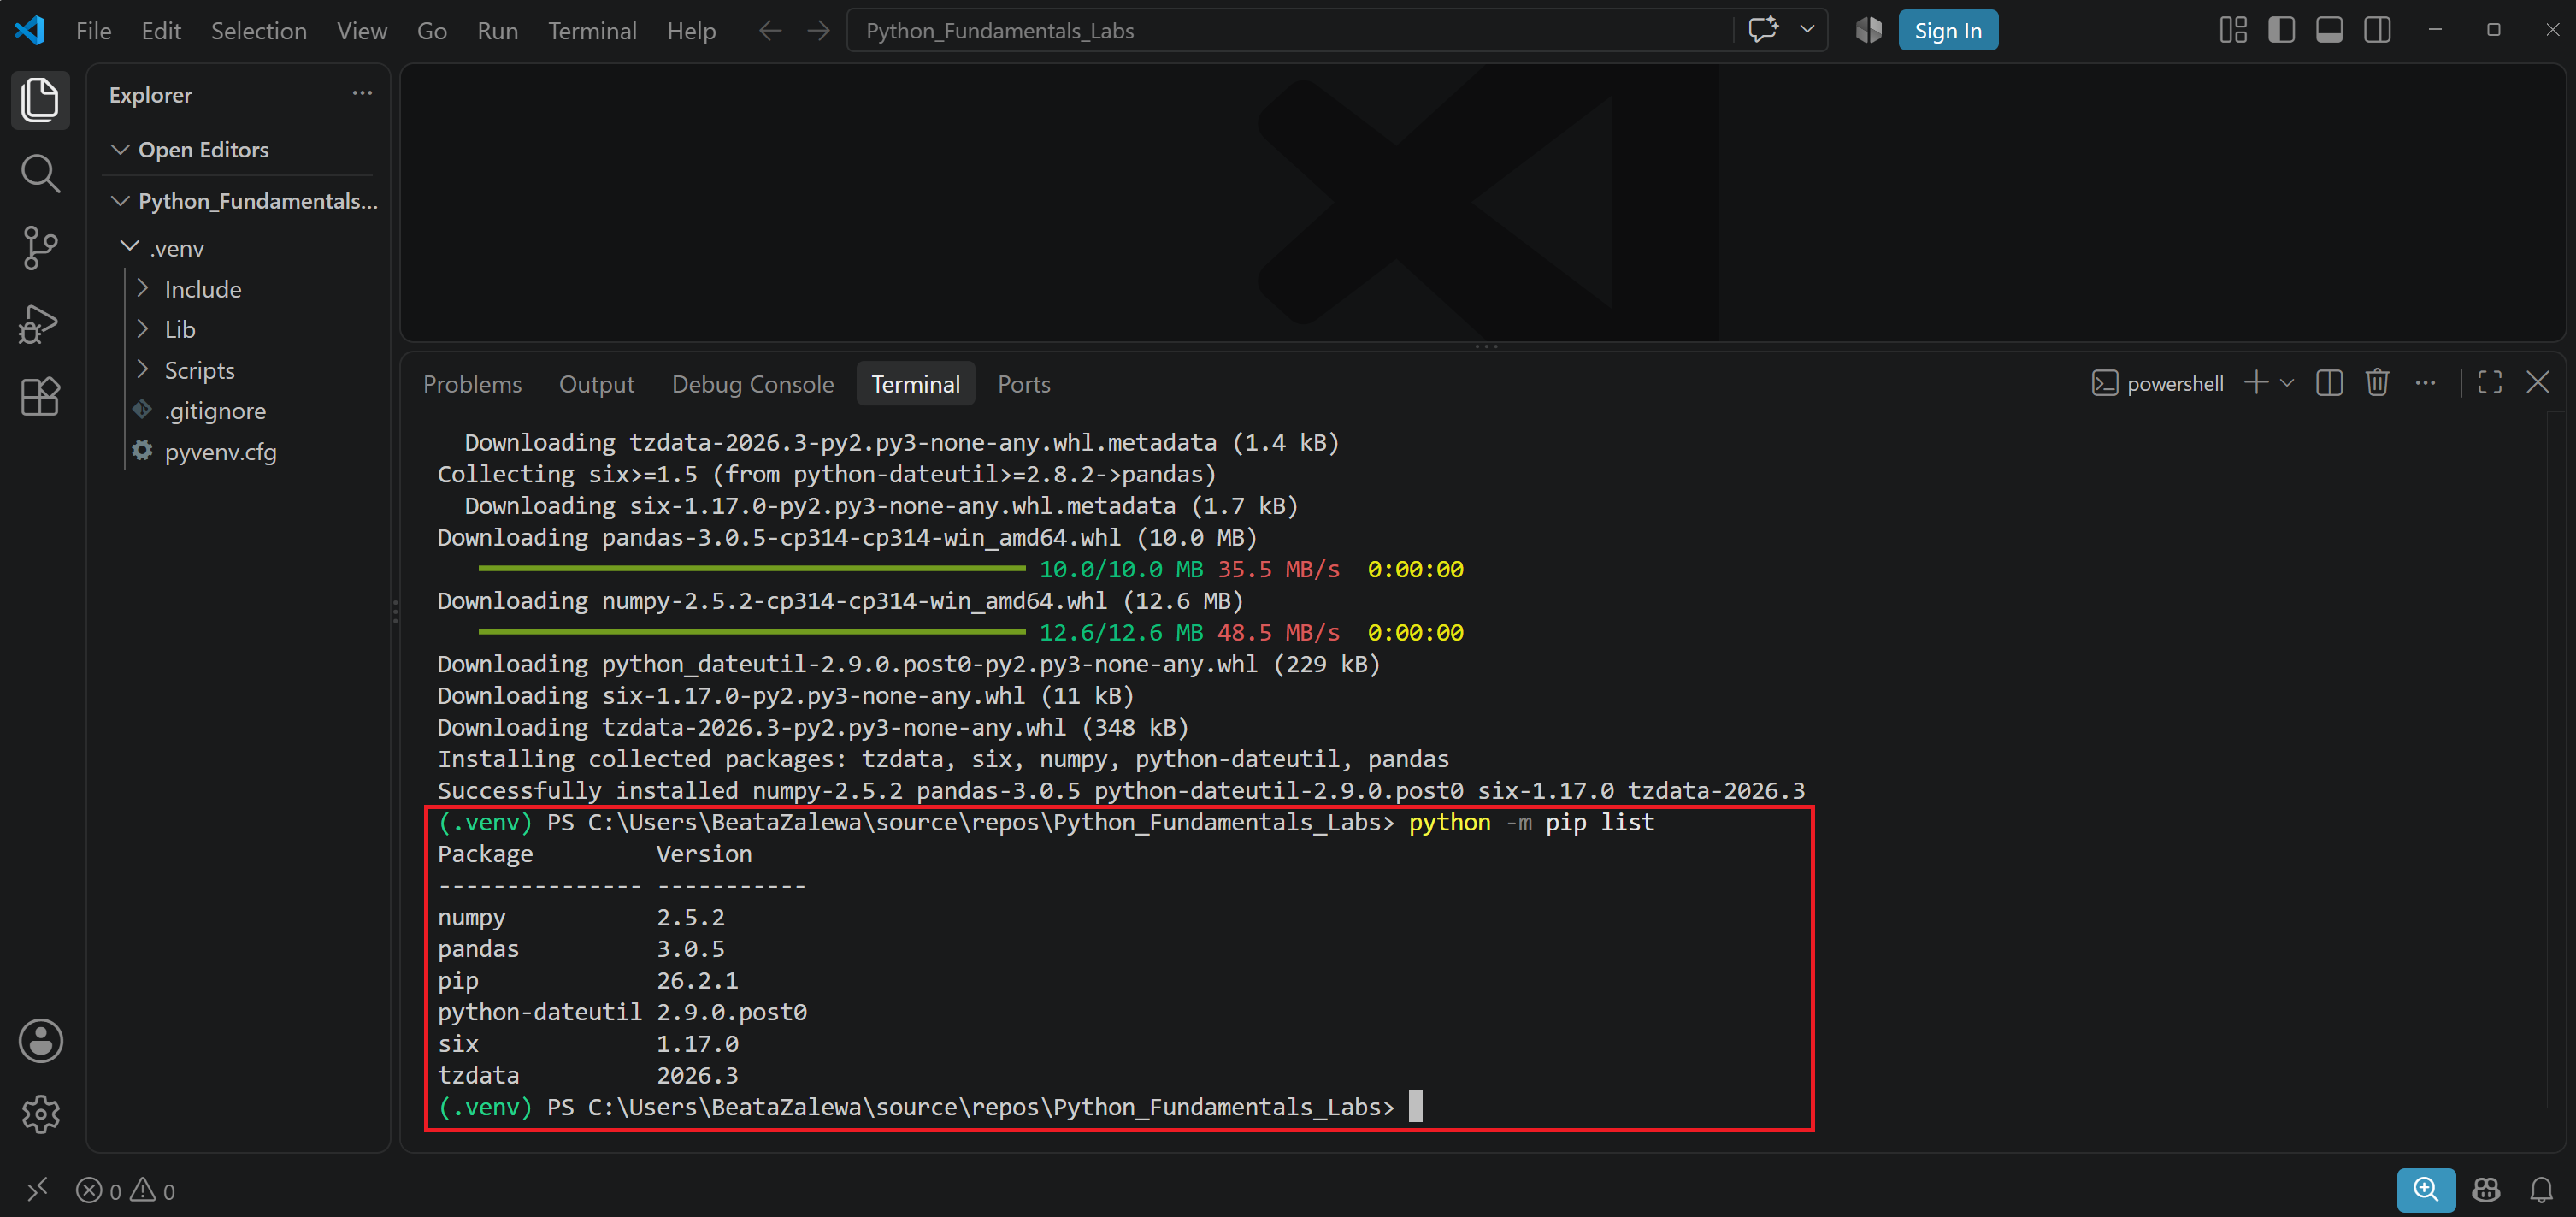
List all installed packages:
python -m pip listBecause the environment is isolated, these packages will not be added to other Python projects.
Step 7: Test the Python Virtual Environment
Create a file named app.py inside the project folder.
Add the following code and save changes:
import pandas as pd

data = {
    "Product": ["Laptop", "Monitor", "Keyboard"],
    "Quantity": [4, 7, 12]
}

table = pd.DataFrame(data)

print(table)
Run the file:
python app.py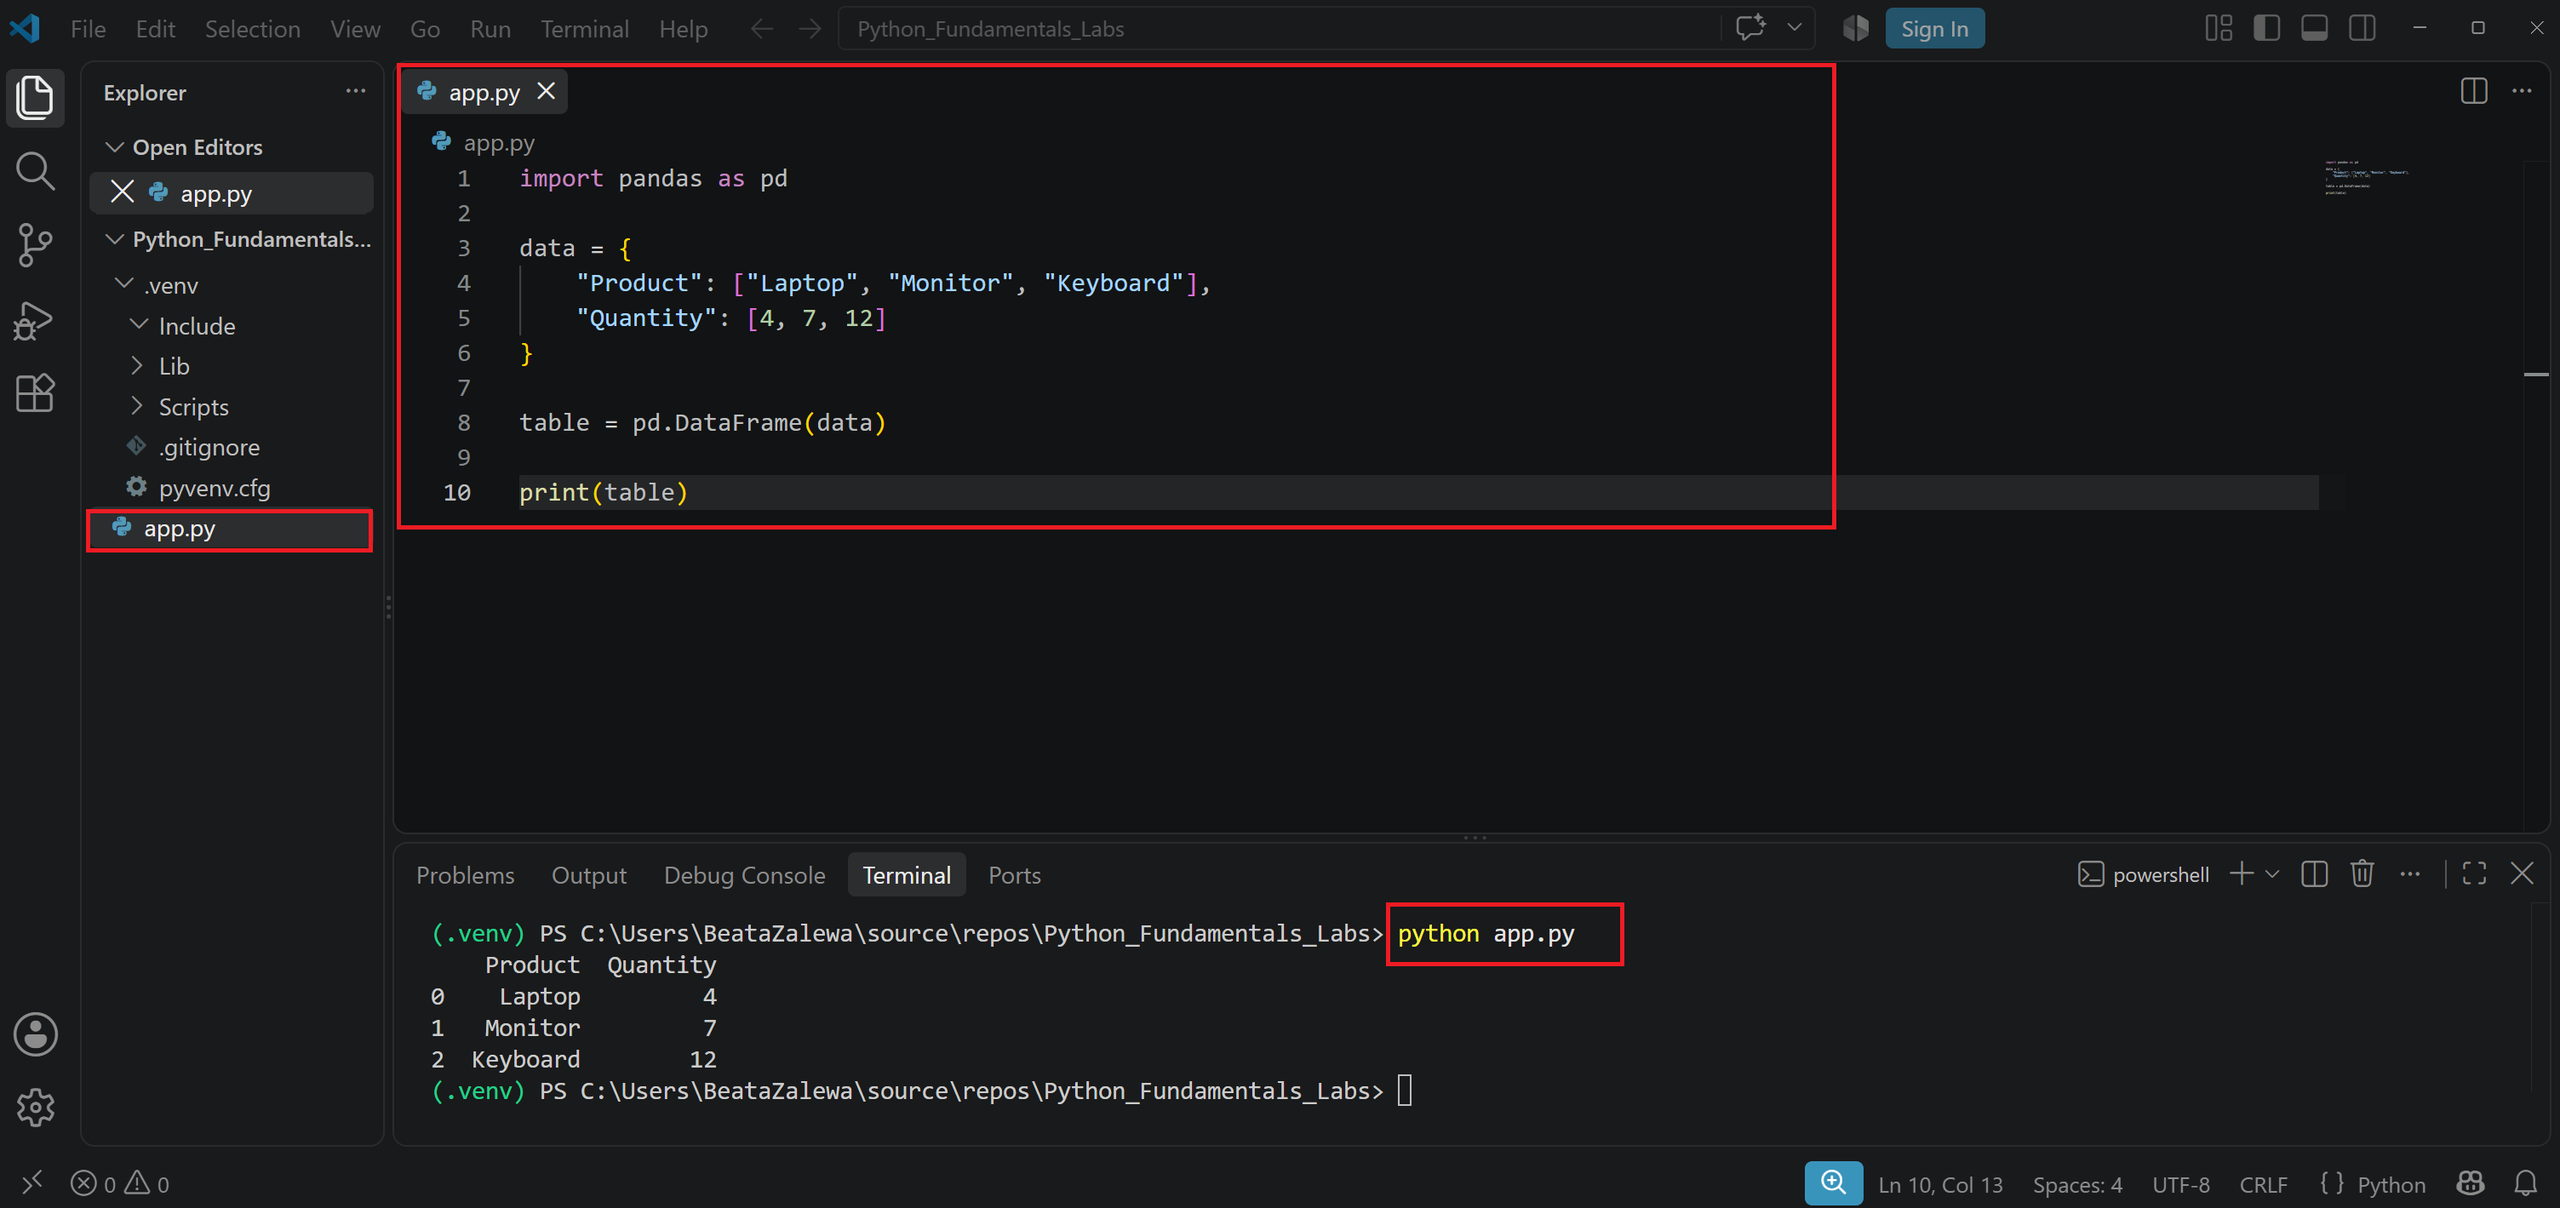
If pandas is installed correctly, Python will display a small table.
If you receive this error:
ModuleNotFoundError: No module named 'pandas'check whether:
- The virtual environment is active.
- pandas has been installed inside it.
- Visual Studio Code is using the correct interpreter.
Step 8: Save the Python project dependencies
A virtual environment directory should not normally be copied or shared. Instead, save a list of the packages required by the project.
Run:
python -m pip freeze > requirements.txt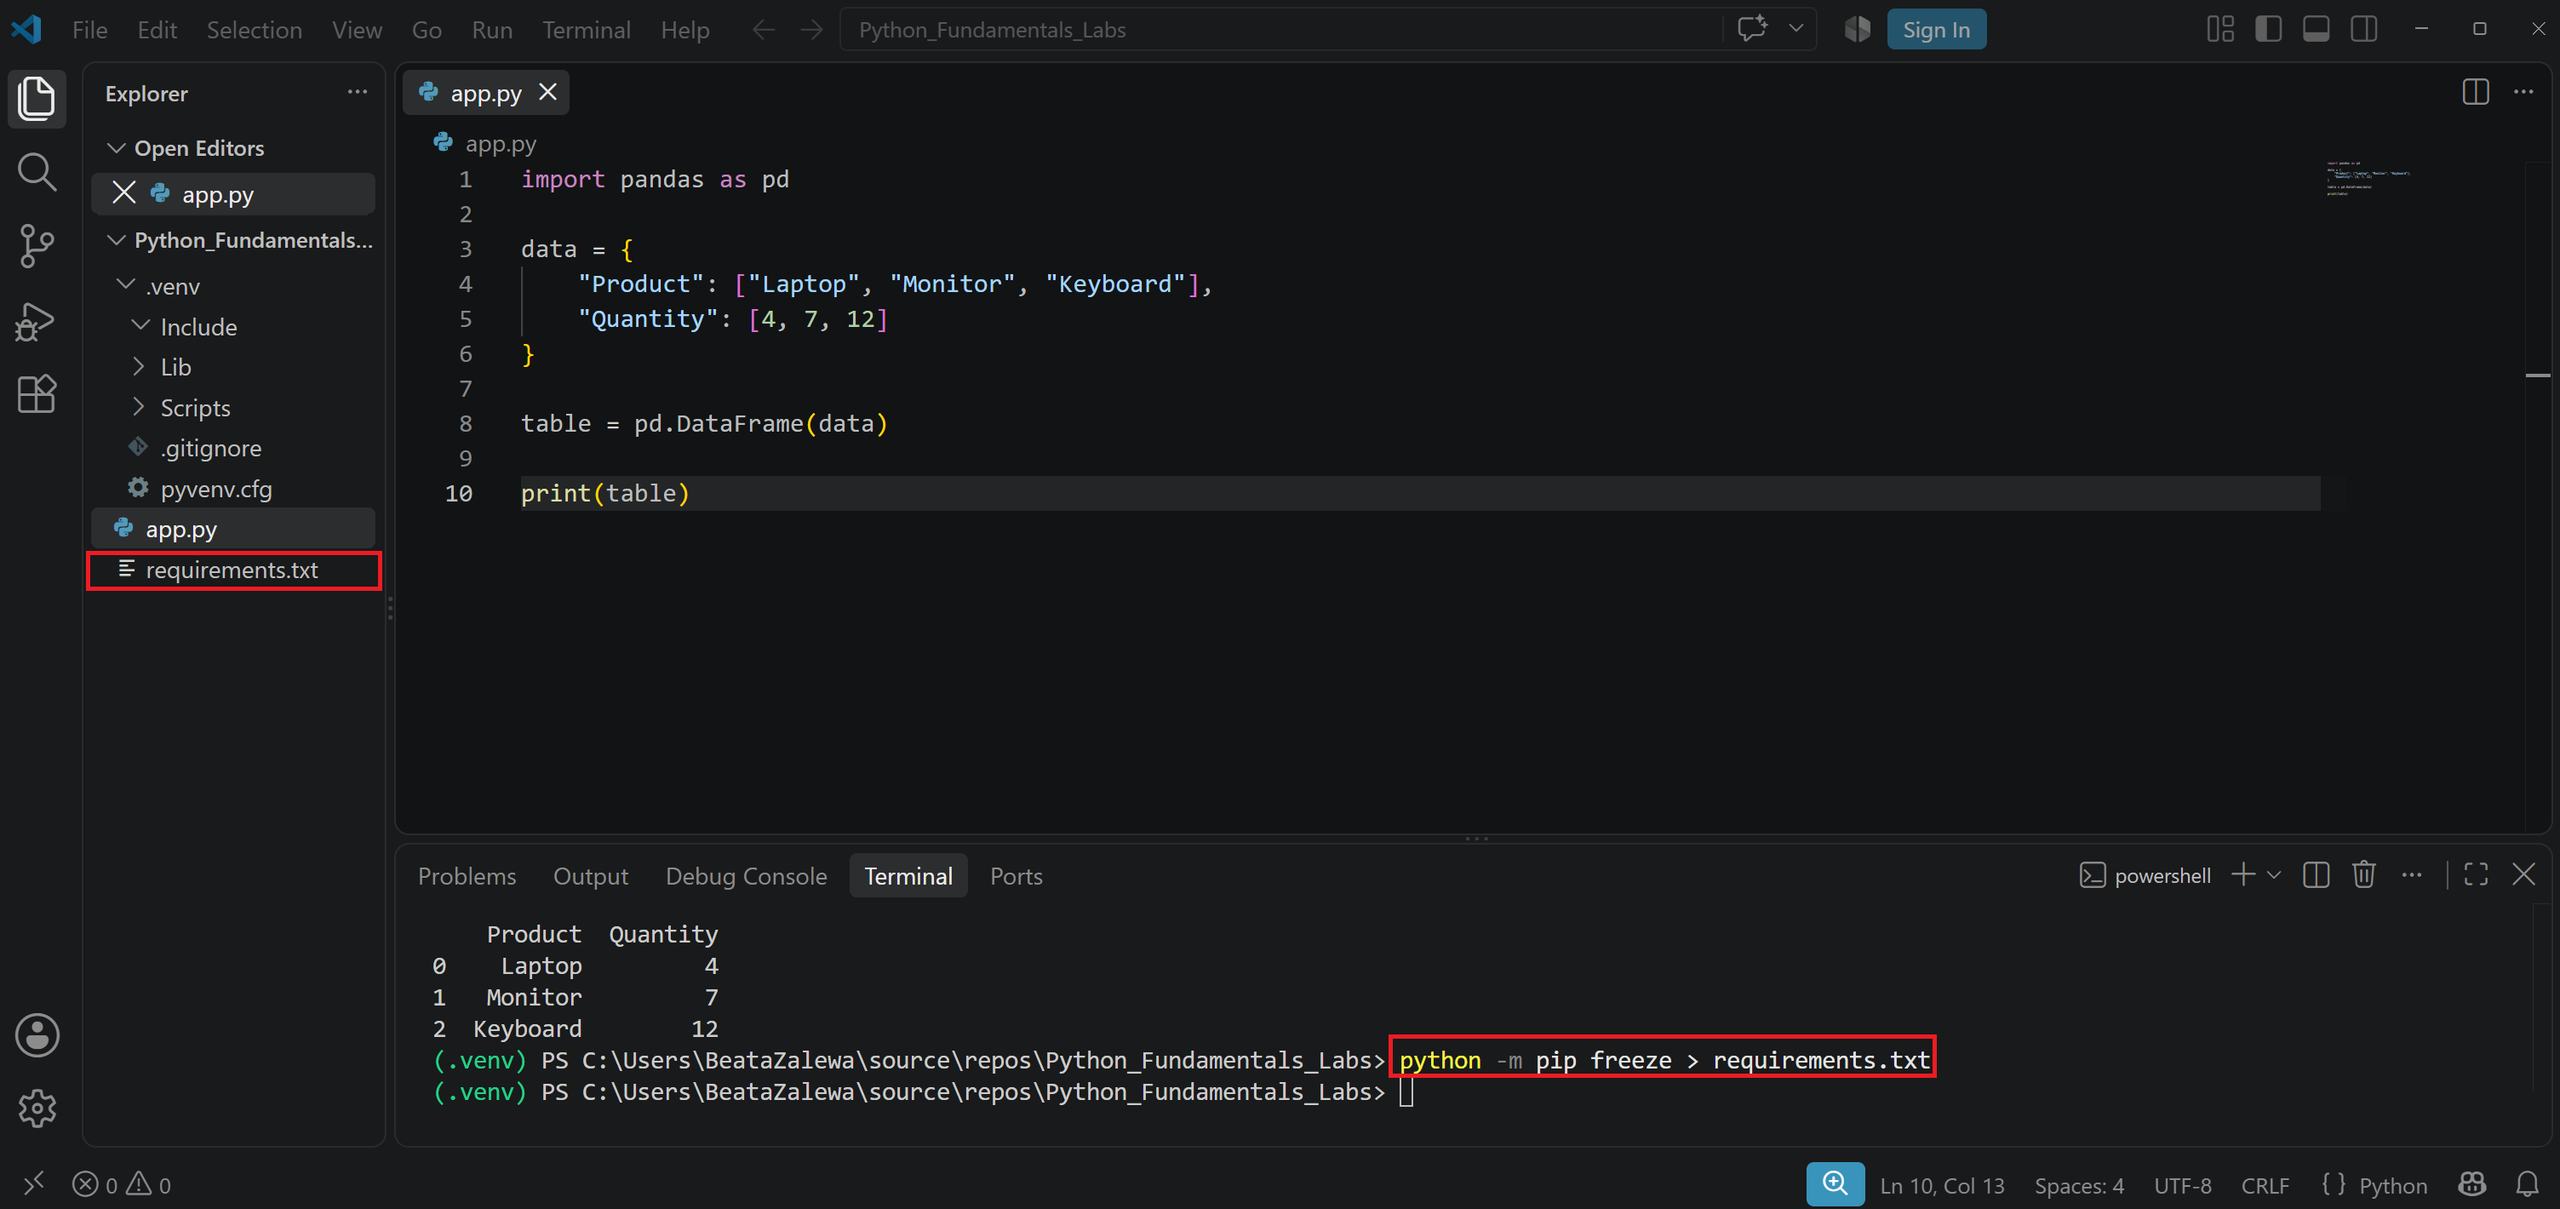
This command creates a requirements.txt file.
Its contents may look similar to:
numpy==2.5.2
pandas==3.0.5
python-dateutil==2.9.0.post0
six==1.17.0
tzdata==2026.3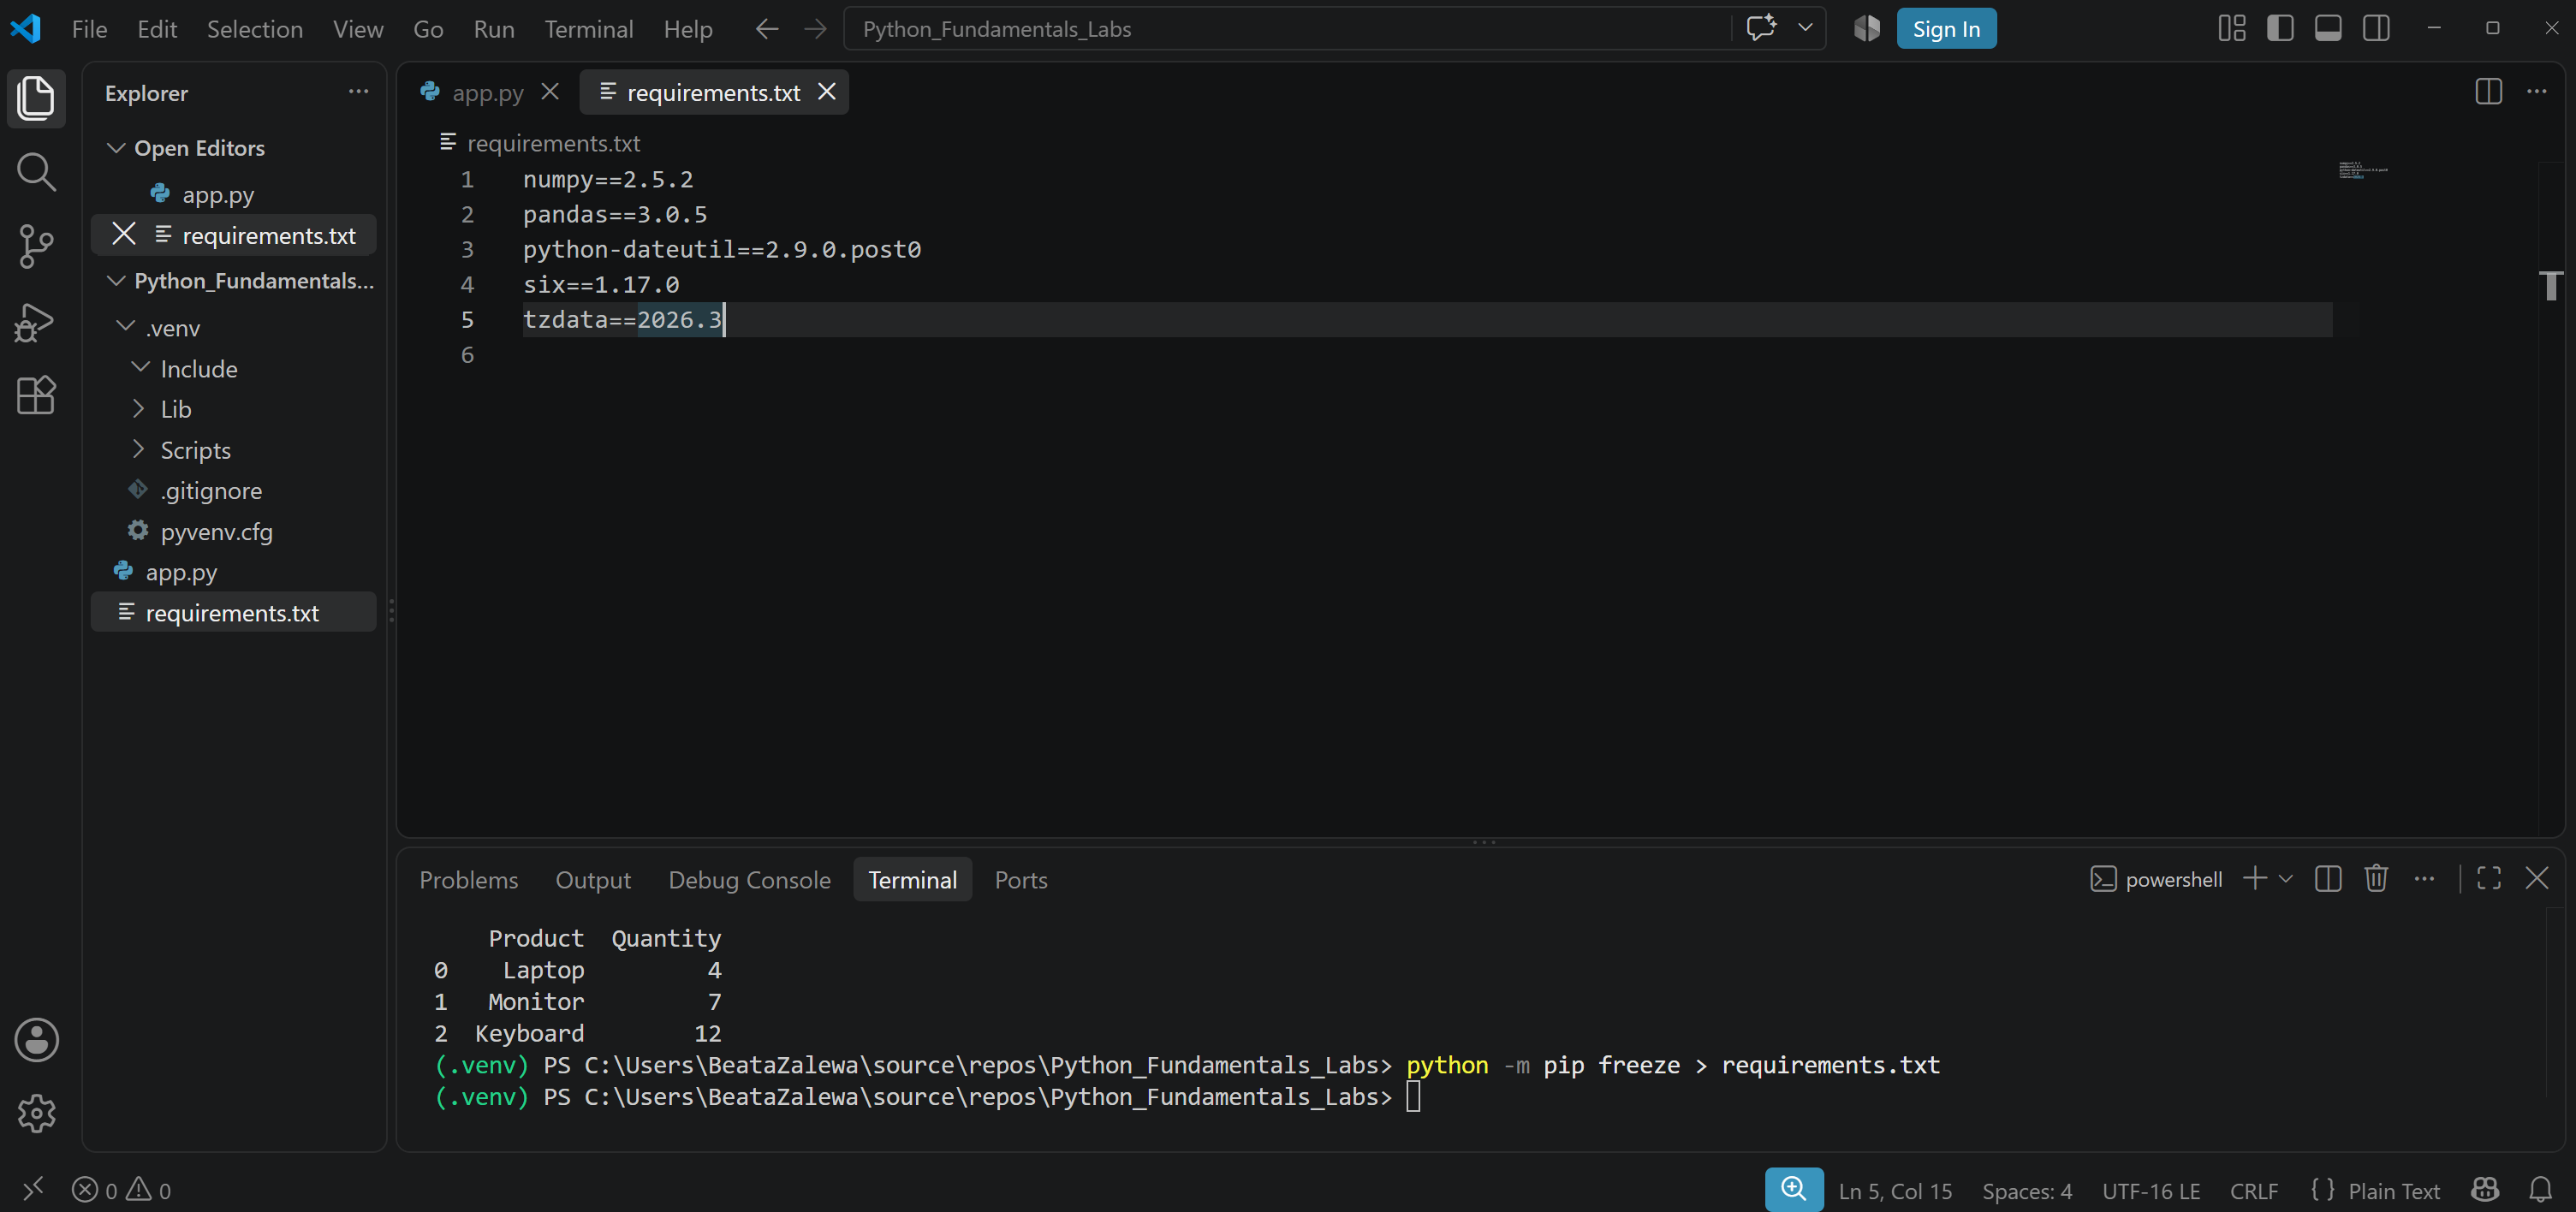
The exact versions make the project easier to reproduce on another computer.
A developer who receives the project can create a new environment and install the dependencies with:
python -m pip install -r requirements.txtUsing a Python Virtual Environment on Windows in Visual Studio Code
If you didn’t open project folder till now, open the project folder in Visual Studio Code and type:
code .If the code . command is unavailable, open Visual Studio Code manually and select: File → Open Folder.
Choose the project folder, not the .venv folder.
Next, select the correct Python interpreter:
- Press Ctrl+Shift+P.
- Type Python: Select Interpreter.
- Select the interpreter located in .venv.
- If it is not listed, choose Enter interpreter path.
- Select .venv\Scripts\python.exe.
The selected environment is used by Visual Studio Code for running code, debugging and Python language features. Visual Studio Code usually discovers environments named .venv automatically. For more details, see the official Visual Studio Code documentation about Python environments.
When you open a new terminal in Visual Studio Code, the environment may activate automatically.
How to deactivate a Python Virtual Environment on Windows
When you finish working on the project, run:
deactivateThe (.venv) prefix will disappear.
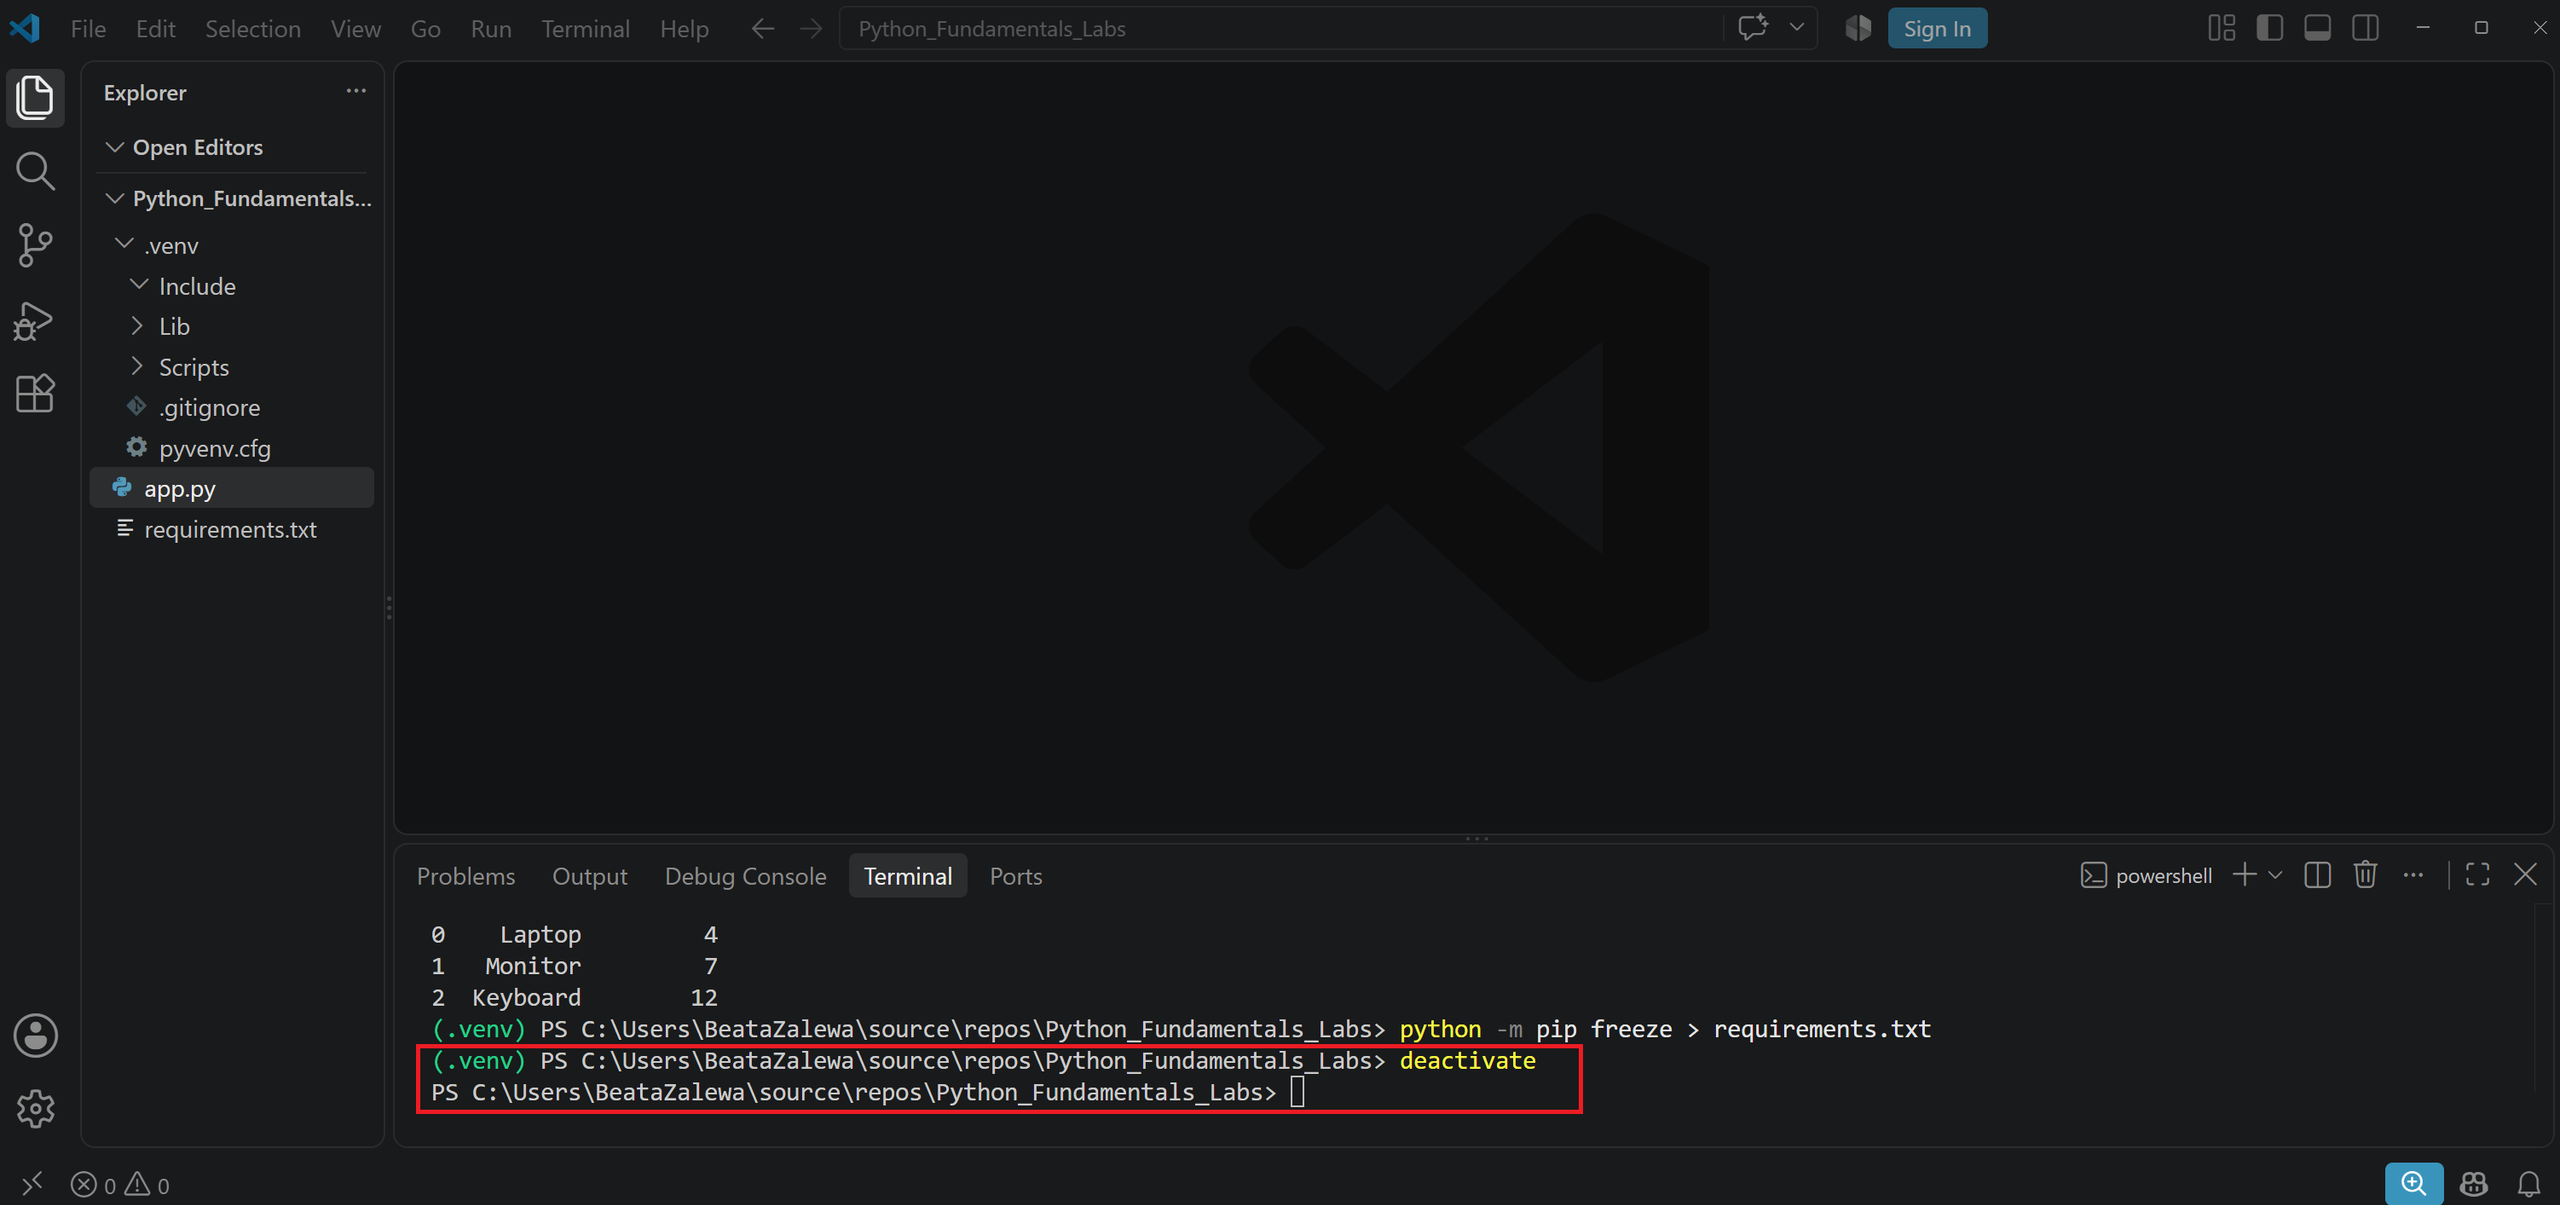
Deactivation does not delete the environment or remove installed packages. It only returns the current terminal session to the global Python installation.
To work on the project again, open its directory and reactivate the environment:
cd C:\Users\BeataZalewa\source\repos\Python_Fundamentals_Labs
.\.venv\Scripts\Activate.ps1
How to delete a Python Virtual Environment
A virtual environment does not require a special uninstallation command.
First, deactivate it:
deactivateThen delete the .venv directory using File Explorer.
If you use PowerShell, you can remove the project-specific environment folder with:
Remove-Item -Recurse -Force .venvBefore running this command, make sure that you are in the correct project directory. Deleting .venv removes the packages installed inside it, but it does not normally delete your project source files.
Recommended project structure
A simple Python project may use this structure:
my-python-project
├── .venv
├── data
├── tests
├── .gitignore
├── app.py
├── README.md
└── requirements.txt
In this example:
- .venv contains the virtual environment.
- data contains input files.
- tests contains automated tests.
- .gitignore tells Git which files to ignore.
- app.py contains the Python application.
- README.md explains how to use the project.
- requirements.txt
Important: Do not add the .venv folder to the Git repository. The environment should be reproducible using the requirements.txt file.
Quick command summary
Create a project directory:
mkdir my-python-project
cd my-python-project
Create the virtual environment:
py -m venv .venvActivate it in PowerShell:
.\.venv\Scripts\Activate.ps1Upgrade pip:
python -m pip install --upgrade pipInstall packages:
python -m pip install pandas matplotlib openpyxlSave dependencies:
python -m pip freeze > requirements.txtDeactivate the environment:
deactivateConclusion
Creating a Python virtual environment on Windows is a simple but important step in Python development. It isolates dependencies, prevents package conflicts and makes projects easier to maintain and share.
The complete process consists of four essential commands:
py -m venv .venv
.\.venv\Scripts\Activate.ps1
python -m pip install package-name
deactivate
Once you understand these commands, you can create a clean environment for every new Python project. As a result, your development setup will become more organised, predictable and professional.