
Configuring multi-app kiosk mode on Windows 10 devices
In today’s business, educational, and public environments, a standard Windows desktop often presents an unnecessary risk and a source of distraction. Specifically, users with full access to files, settings, and the web browser can compromise shared systems. From point-of-sale (POS) terminals in retail stores to shared devices for first-line warehouse workers, organisations desperately need dedicated, locked-down experiences that serve a specific purpose.
To answer this demand, you can configure multi-app kiosk mode. Essentially, this powerful Windows 10 feature allows administrators to transform a standard device into a secure, purpose-built terminal.
Understanding Multi-App Kiosk Mode
However, many scenarios require greater flexibility. What if an employee needs access to both an inventory system and a corporate messaging app? What if a student in a computer lab should be able to use a word processor, a web browser, and an educational program? This is precisely where multi-app kiosk mode comes in.
This advanced configuration allows for the creation of a fully customized and controlled, yet flexible, ecosystem. After logging in, the user is presented not with the standard desktop, but with a custom Start screen containing only the applications that an administrator has made available.
Core Benefits
Configuring a multi-app kiosk offers a range of benefits: it drastically enhances security by reducing the attack surface, boosts productivity by eliminating distractions, and simplifies the user interface, which is crucial for shared devices. It finds wide application in retail, education, healthcare, and on factory floors—anywhere a device is meant to fulfill a strictly defined role.
This guide will walk you through the step-by-step process of planning, creating, and deploying a multi-app kiosk configuration on your Windows 10 devices, using tools such as Windows Configuration Designer and Microsoft Intune.
Configure the multi-app kiosk mode profile
First, you must create the configuration profile that dictates the kiosk behaviour.
1. Profile Basics
- Sign-in to the Microsoft Intune admin center.
- In the Microsoft Intune admin center navigate to Devices –> Configuration under Managed devices.
- Click + Create –> New Policy.
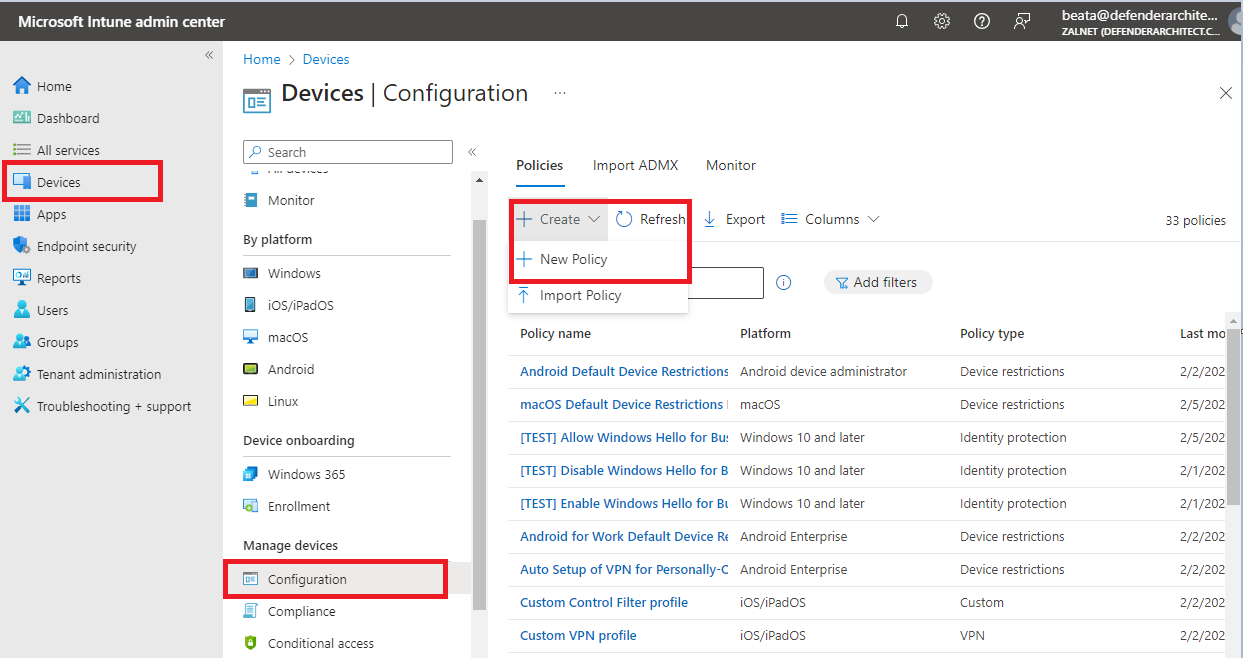
4. On the Create a profile page, provide the following information and click Create:
- Platform: Select Windows 10 and later as value
- Profile type: Select Templates as value
- Template name: Select Kiosk as value
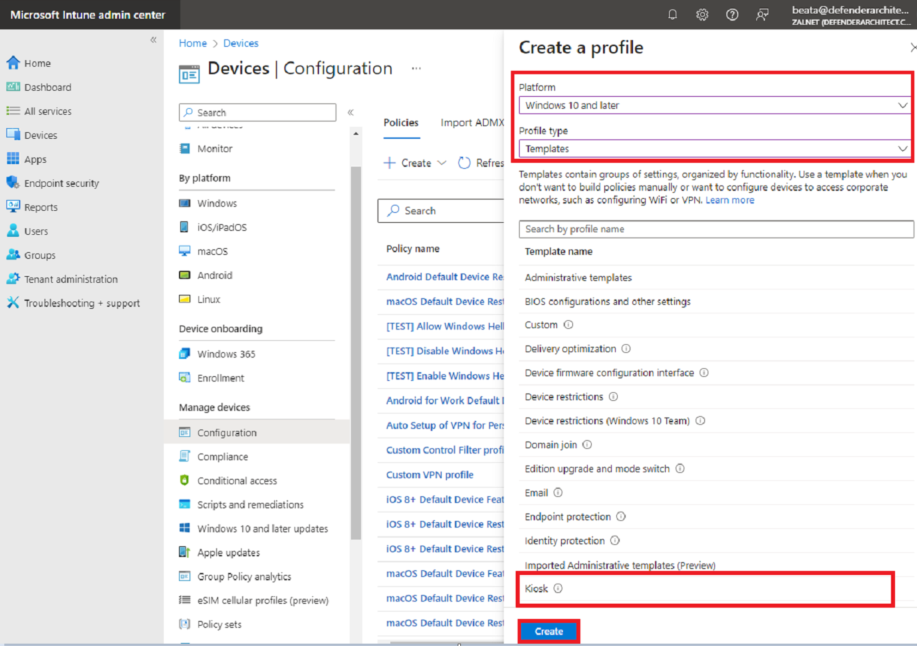
5. On the Basics page, provide a unique Name to distinguish the profile from other custom profiles, add Description and click Next.
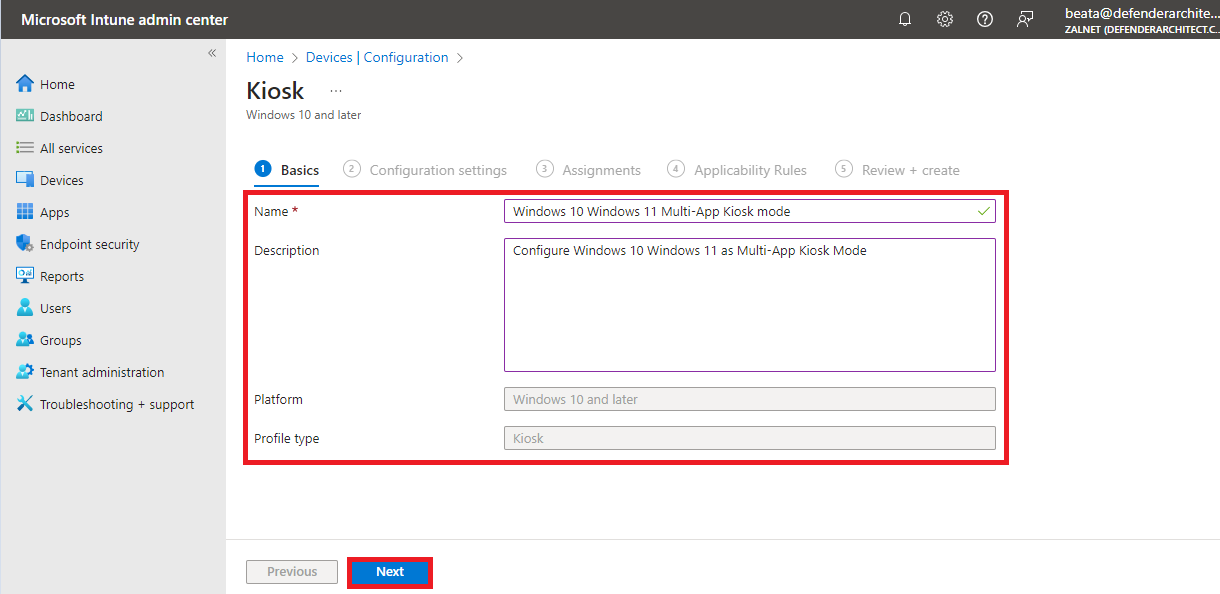
2. Configuration Settings
On the Configuration settings page, add the following settings:
- Choose Multi app kiosk as Kiosk mode
- Choose No for the Windows 10 in S mode
- Choose the Logon type of your choice (you can choose Autologon, but also select an Azure AD user or Group)
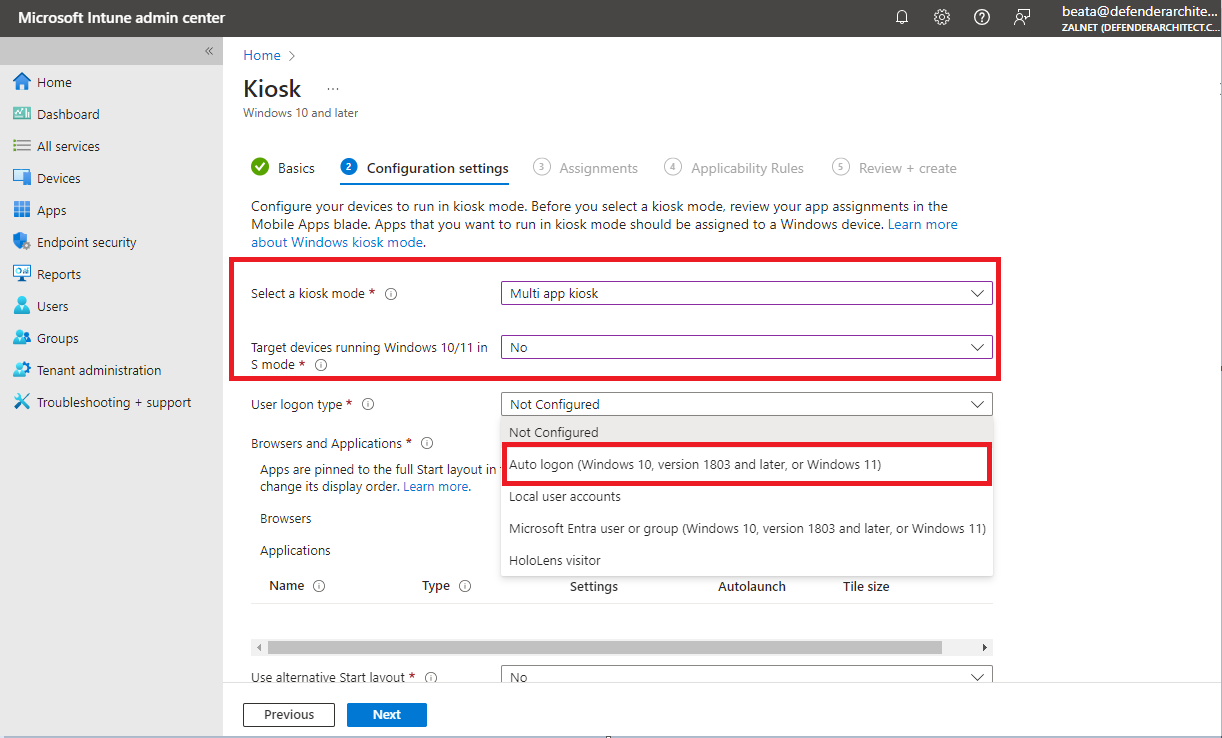
3. Adding Kiosk Applications
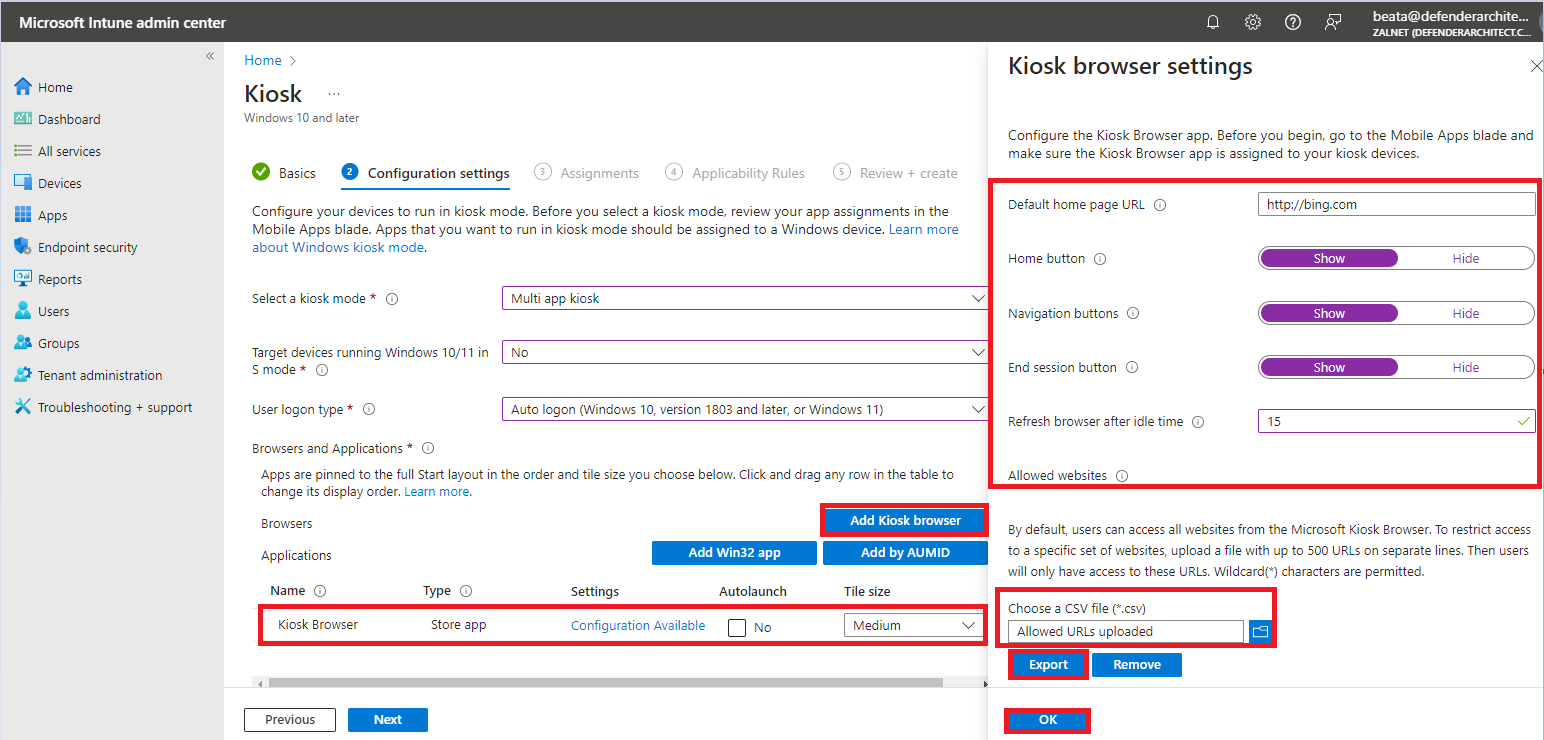
Next, you can also add various types of applications; Store apps, Win32 apps or apps by AUMID. To add a browser, click Add Kiosk browser.
- In the Kiosk browser settings page choose the following settings:
- Default home page URL: Default webpage that opens when kiosk browser opens and restarts
- Home button: By default, home button is not configured
- Navigation buttons: Refers to the forward and back buttons users click to get from one page to another
- End session button: End Session button clears all browsing data and navigates user back to the default home page URL
- Refresh browser after idle time: Specifies when Kiosk Browser should restart. Determined by the idle time, which is the number of minutes since the user’s last interaction. (1-1440 minutes)
- Allowed websites: List of allowed URLs users can access. Note: If you upload a list, make sure to include the default home page URL
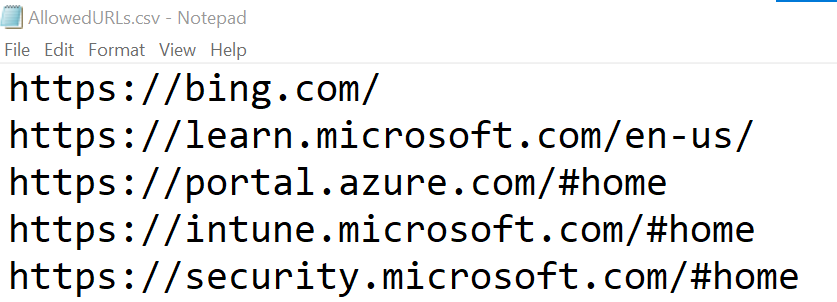
- Click Browse icon in Choose a CSV file (*.csv), select a file and click OK:
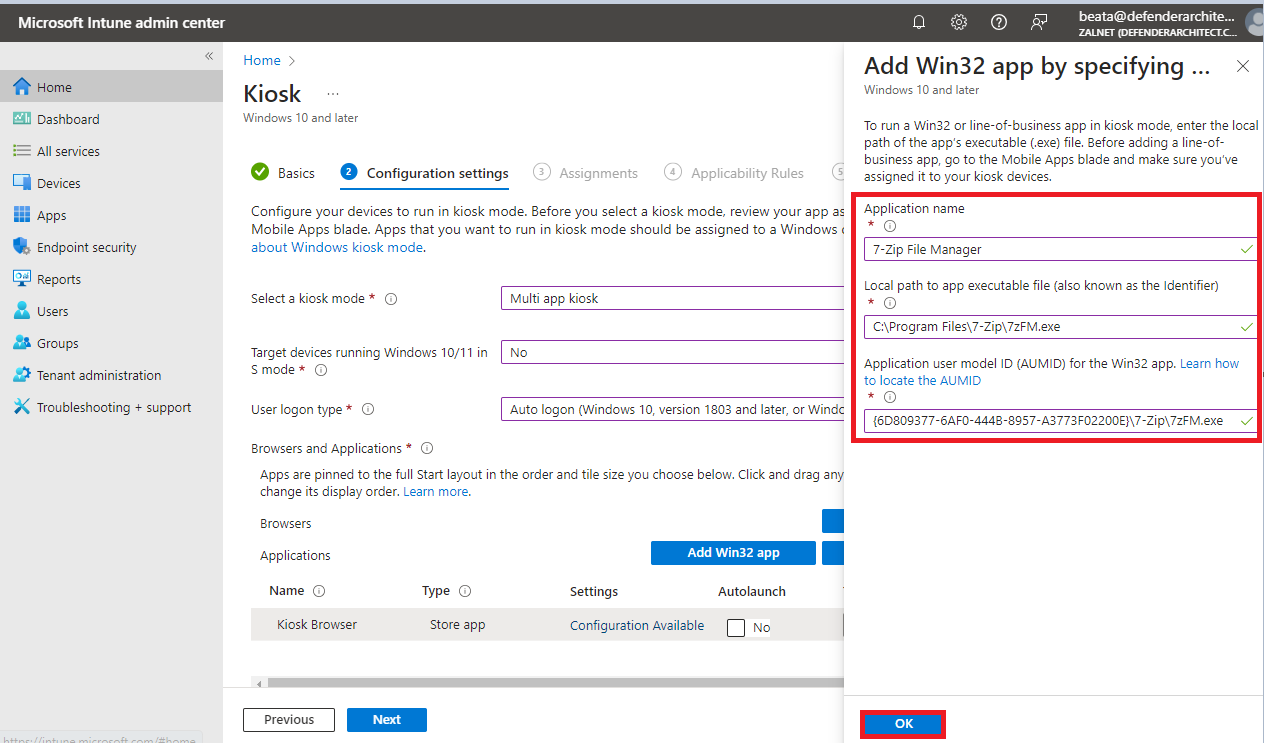
Click Add Win32 app, add the following settings and click OK:
- Application name
- Local path to app executable file (also known as the Identifier)
- Application user model ID (AUMID) for the Win32 app
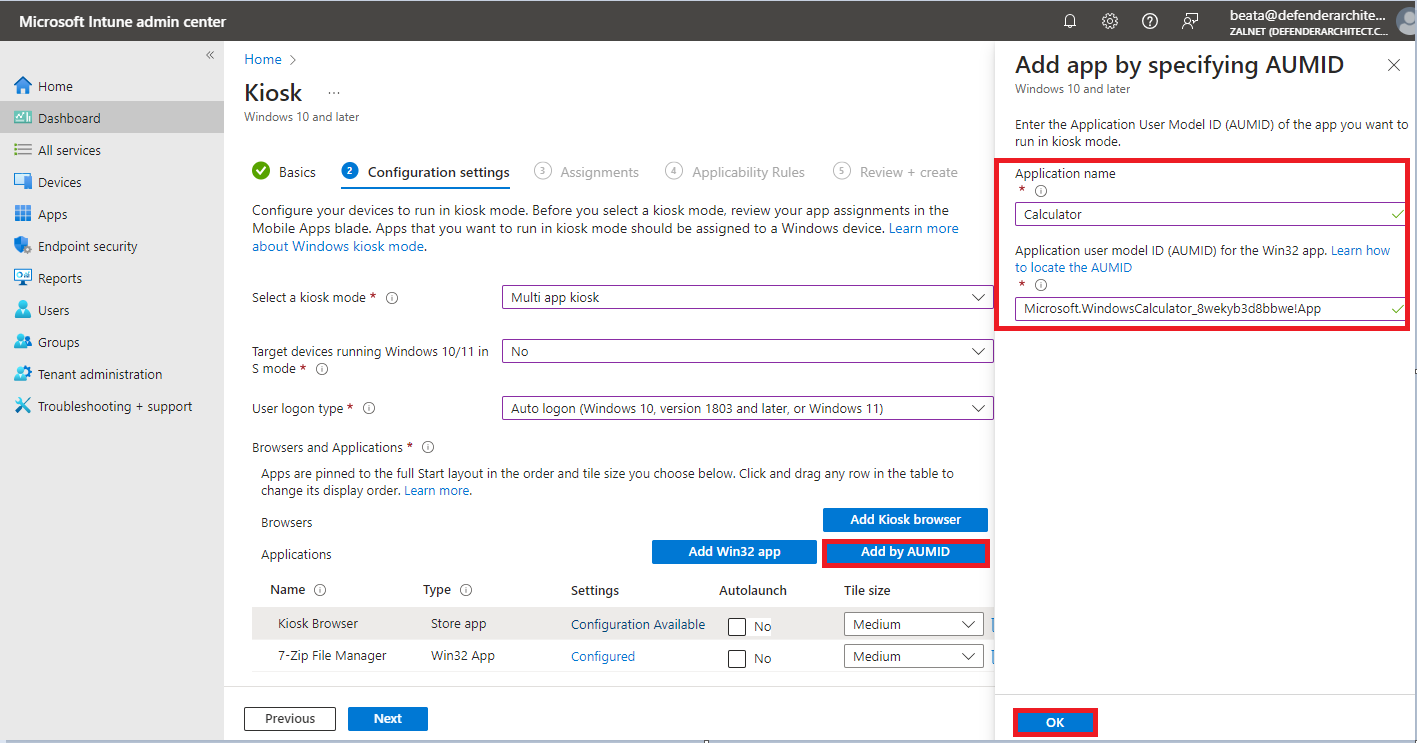
To add by AUMID, click Add by AUMID, input the required ID settings, and click OK.
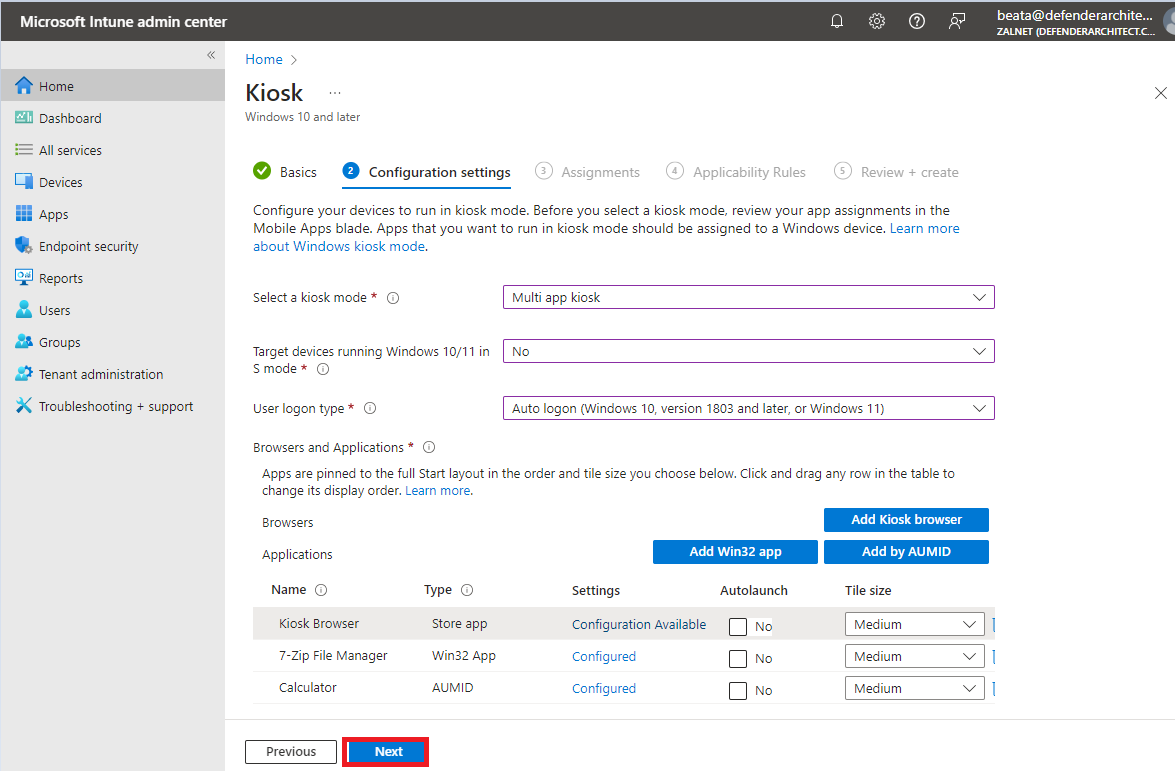
Click Next:
4. Assignments and Review
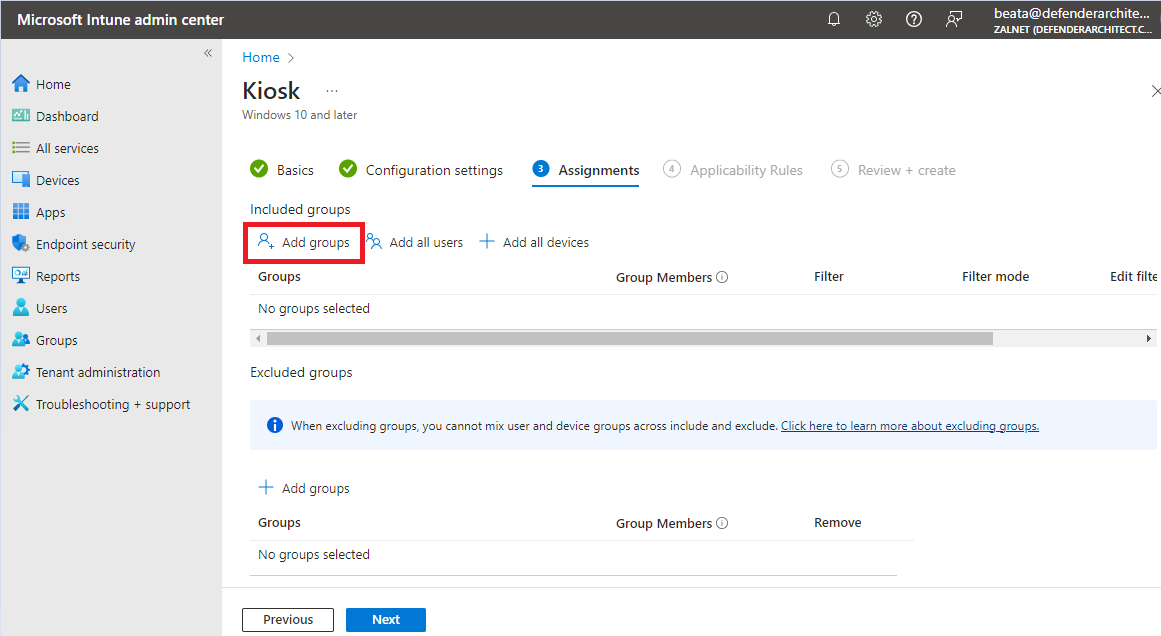
In the Assignments tab click Add groups, Add all users, or Add all devices:
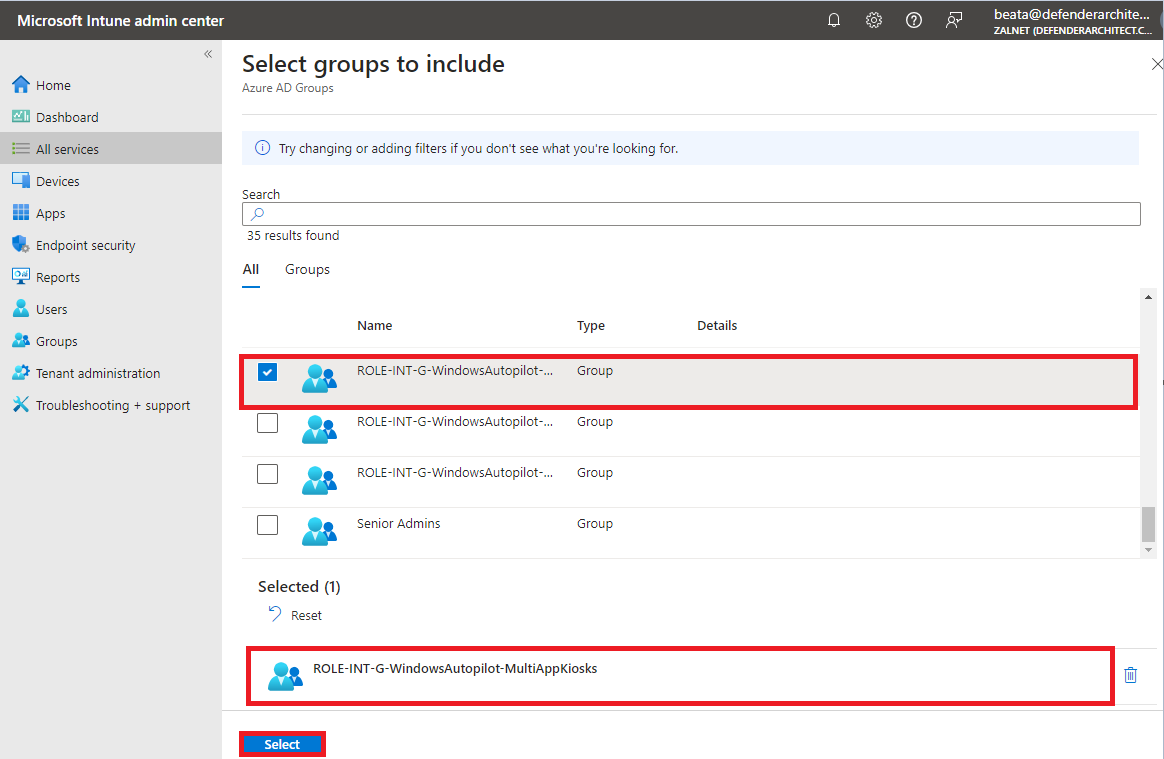
Choose a group or groups and then click Select:
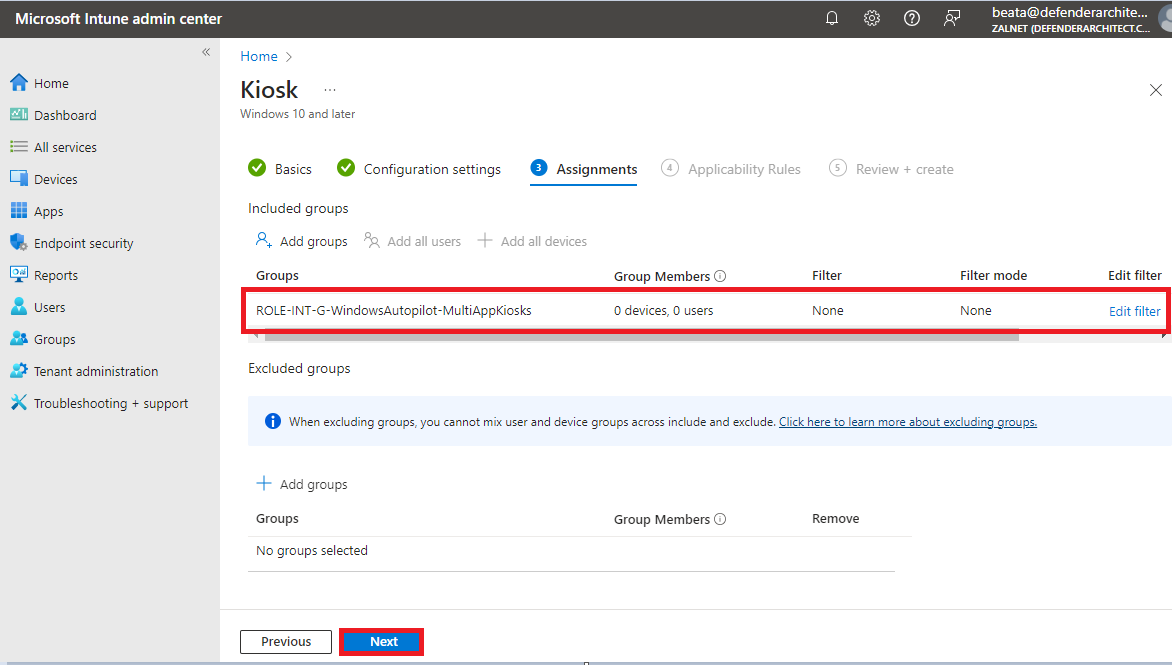
Click Next to display the Applicability Rules page. Then click Next again.
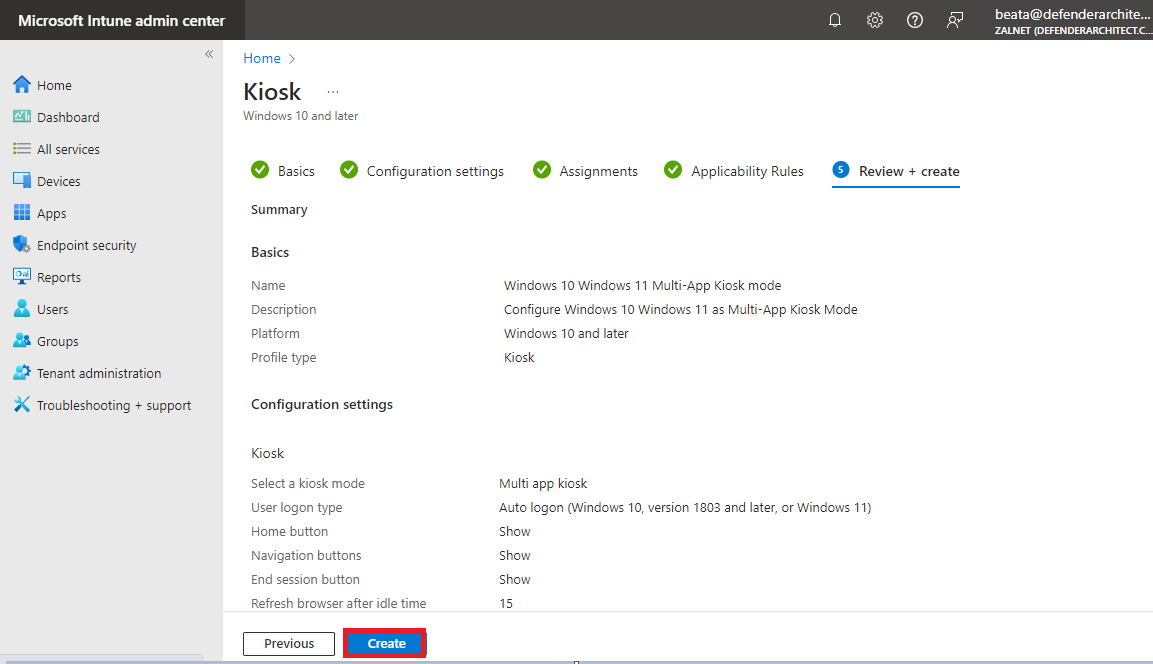
Review the app settings and after reviewing Create.
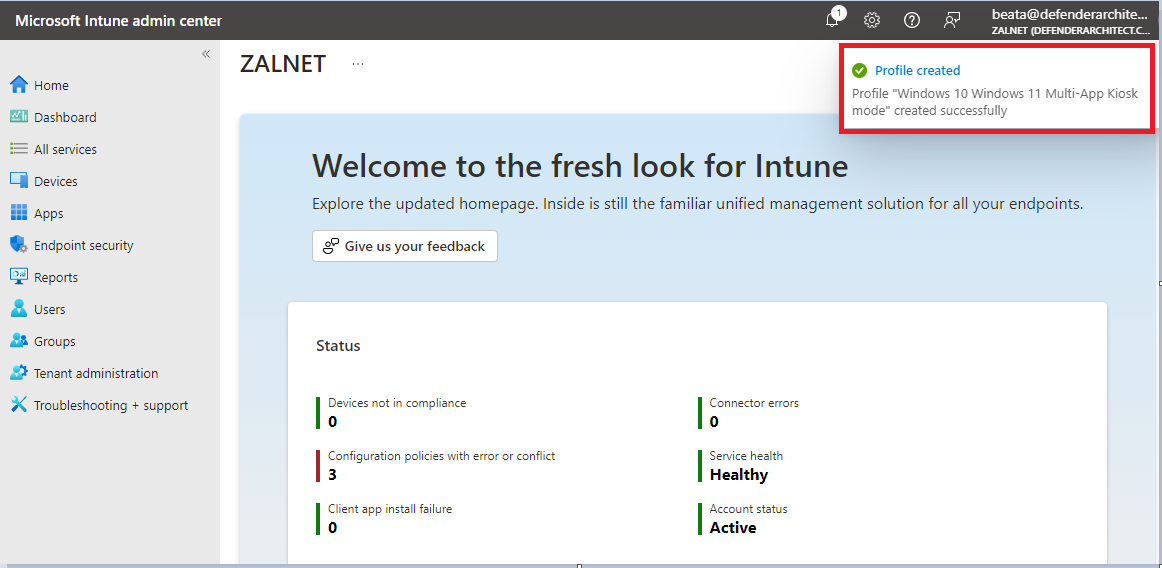
Let’s verify that the application was created successfully.
Create an Autopilot Deployment Profile
To deploy these devices automatically, you must configure a deployment profile.
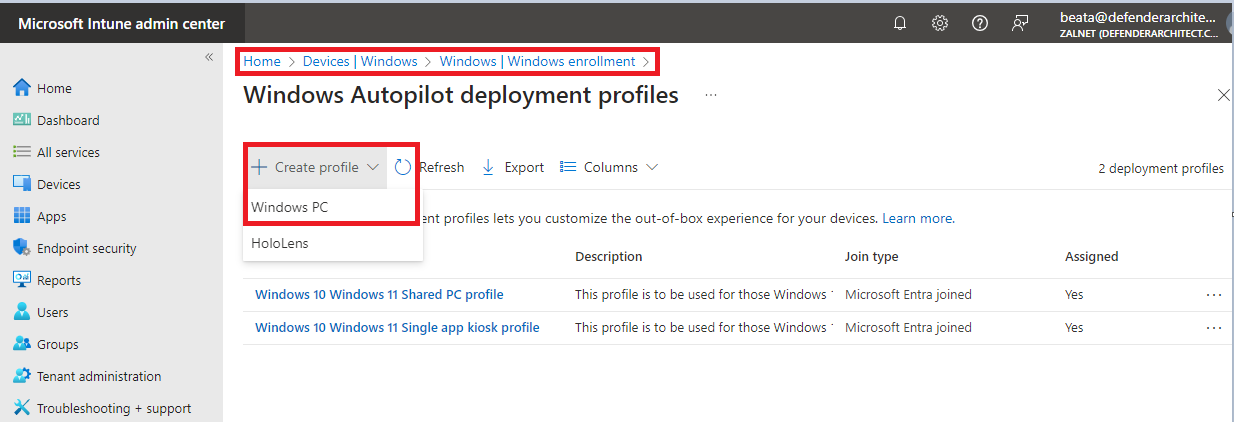
- In the Microsoft Intune admin center navigate to Devices –> Windows –> Windows enrollment –> Deployment profiles.
- Click + Create profile –> Windows PC:
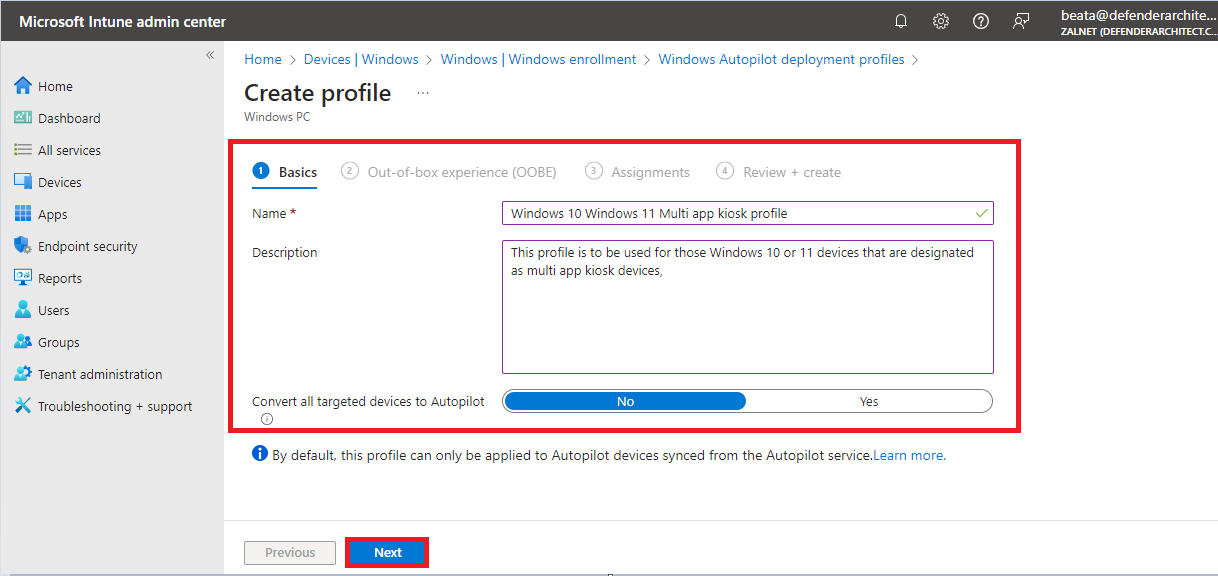
2. In the Basics tab provide the Name for the profile and fill in the Description (optional). Click Next:
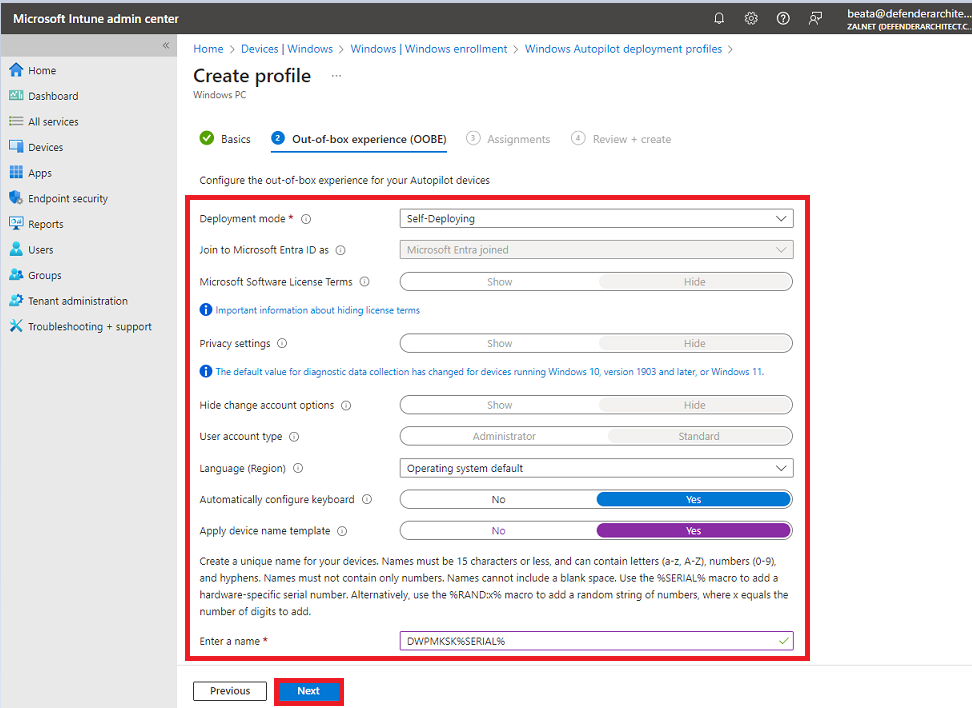
3. In the Out-of-box experience (OOBE) tab provide the following settings and click Next:
- Choose Self Deploying (preview) as Deployment mode
- Provide a template for device name
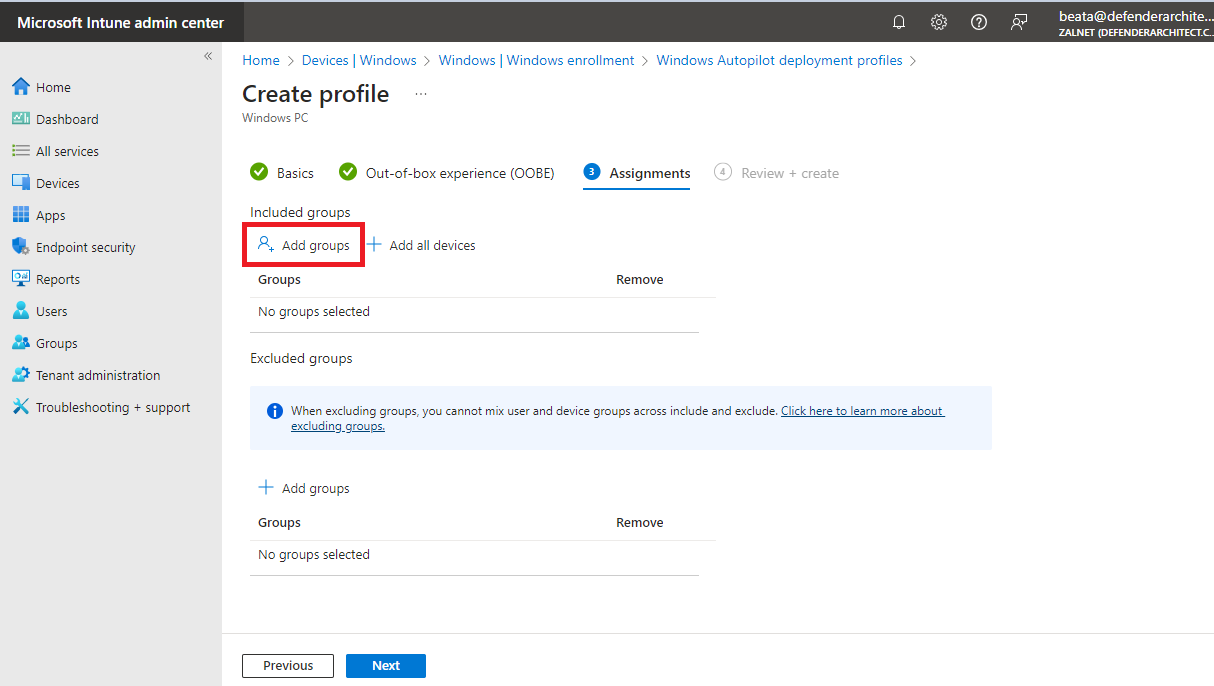
4. In the Assignments tab click Add groups, or Add all users:
5. Choose a group or groups and then click Select:
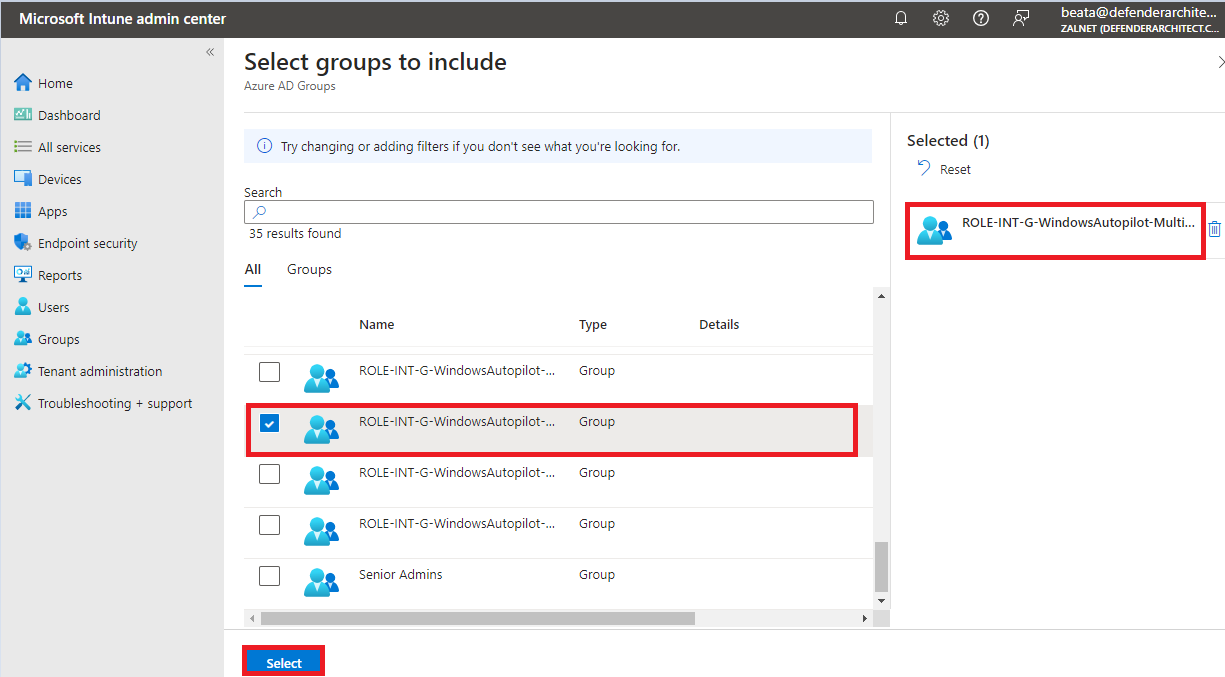
6. Choose a group or groups and then click Select:
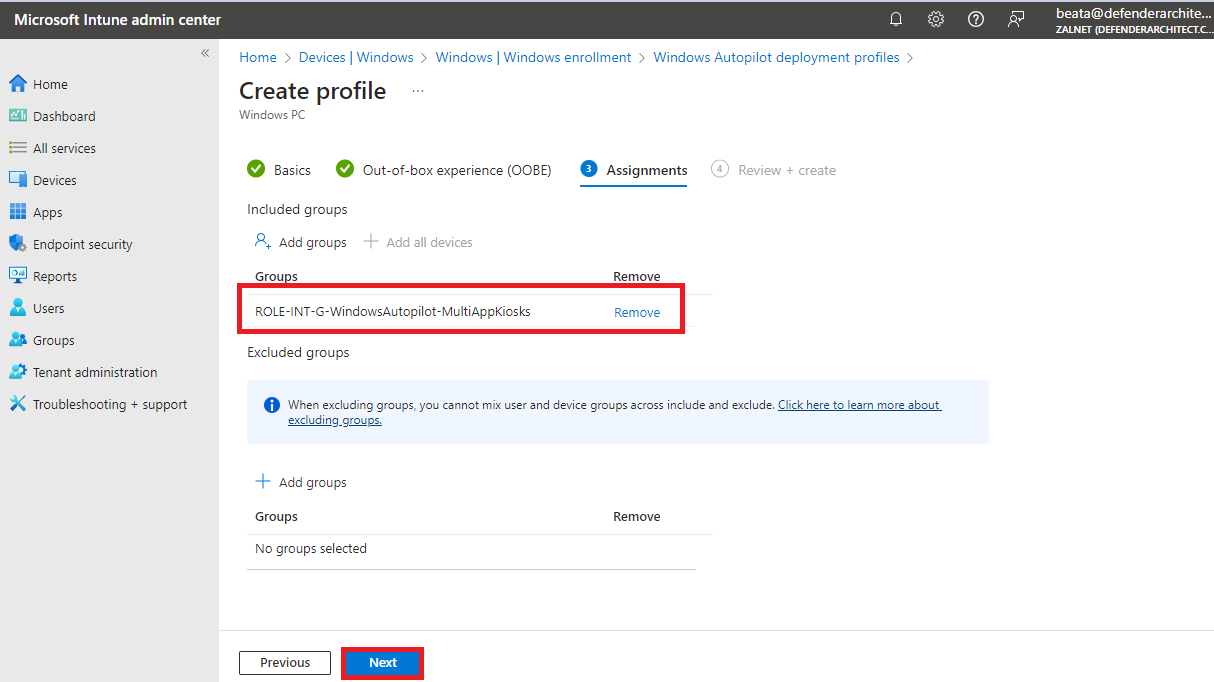
7. Review the app settings and after reviewing Create:
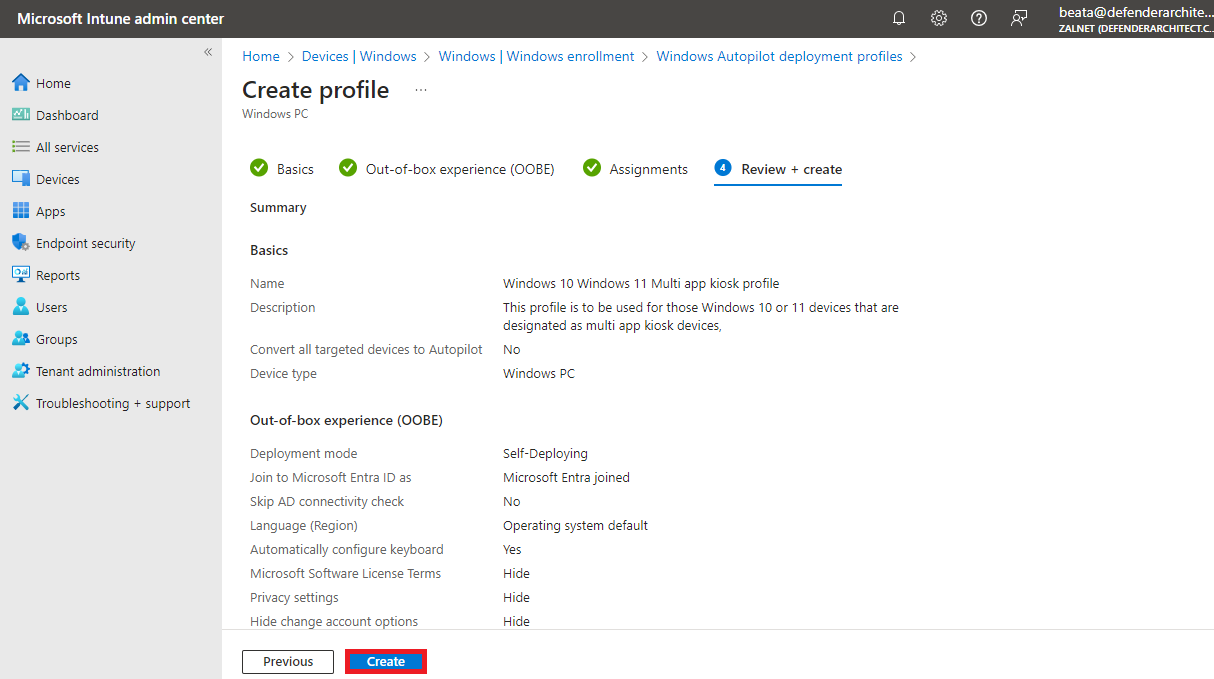
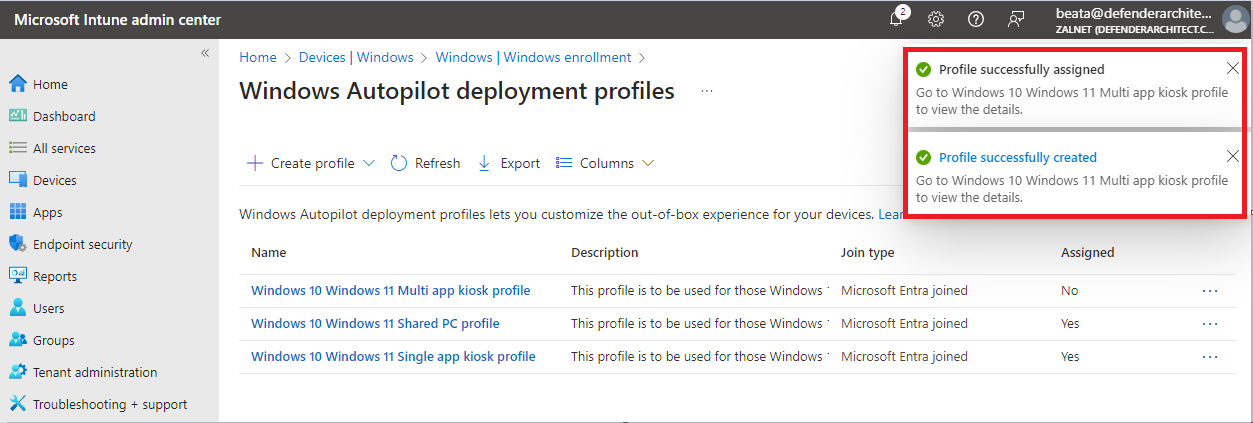
8. Let’s verify that the application was created successfully.