Tip: How to fix ‘dotnet’ is not recognized as the name of a cmdlet error
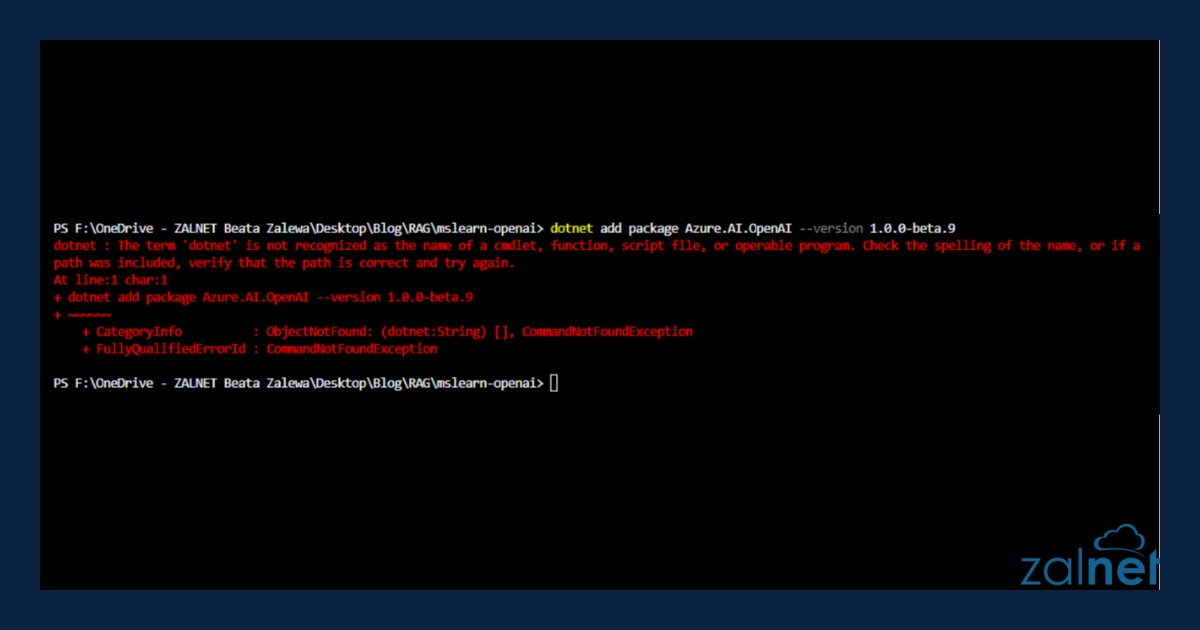
Recently, I encountered a very frustrating issue while developing. Specifically, I received the following message: The term ‘dotnet’ is not recognized as the name of a cmdlet, function, script file, or operable program. Consequently, I could not run my standard package installation commands.
If you are facing this exact dotnet is not recognized error, you are in the right place. In this post, I will show you exactly how to troubleshoot and resolve this issue quickly.
Understanding the “dotnet is not recognized” Error Context
To begin, let us look at the system details where this error occurred
- Operating System: Windows 10 Pro
- Version: 22H2
- Architecture: 64-bit operating system
Error details are given below.
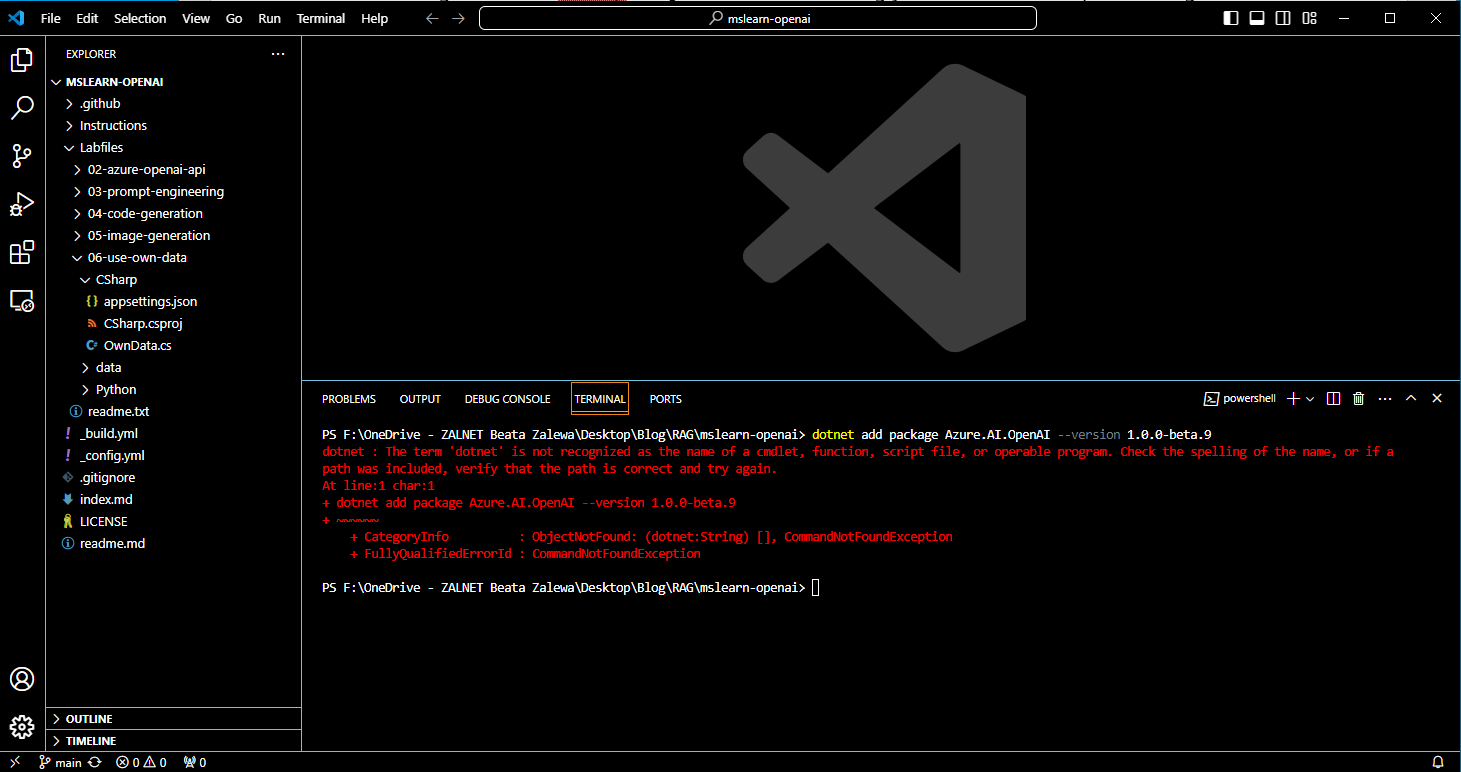
When I tried to run the command dotnet add package Azure.AI.OpenAI –version 1.0.0-beta.9, the system threw an exception. Specifically, you can see the exact error details below:
At line:1 char:1
+ dotnet add package Azure.AI.OpenAI –version 1.0.0-beta.9
+ ~~~~~~
+ CategoryInfo : ObjectNotFound: (dotnet:String) [], CommandNotFoundException
+ FullyQualifiedErrorId : CommandNotFoundException
How to Fix the ‘dotnet is not recognized’ error
Fundamentally, installing just Visual Studio Code does not install .NET Core automatically. Therefore, you must install the .NET Core SDK manually to make these commands work.
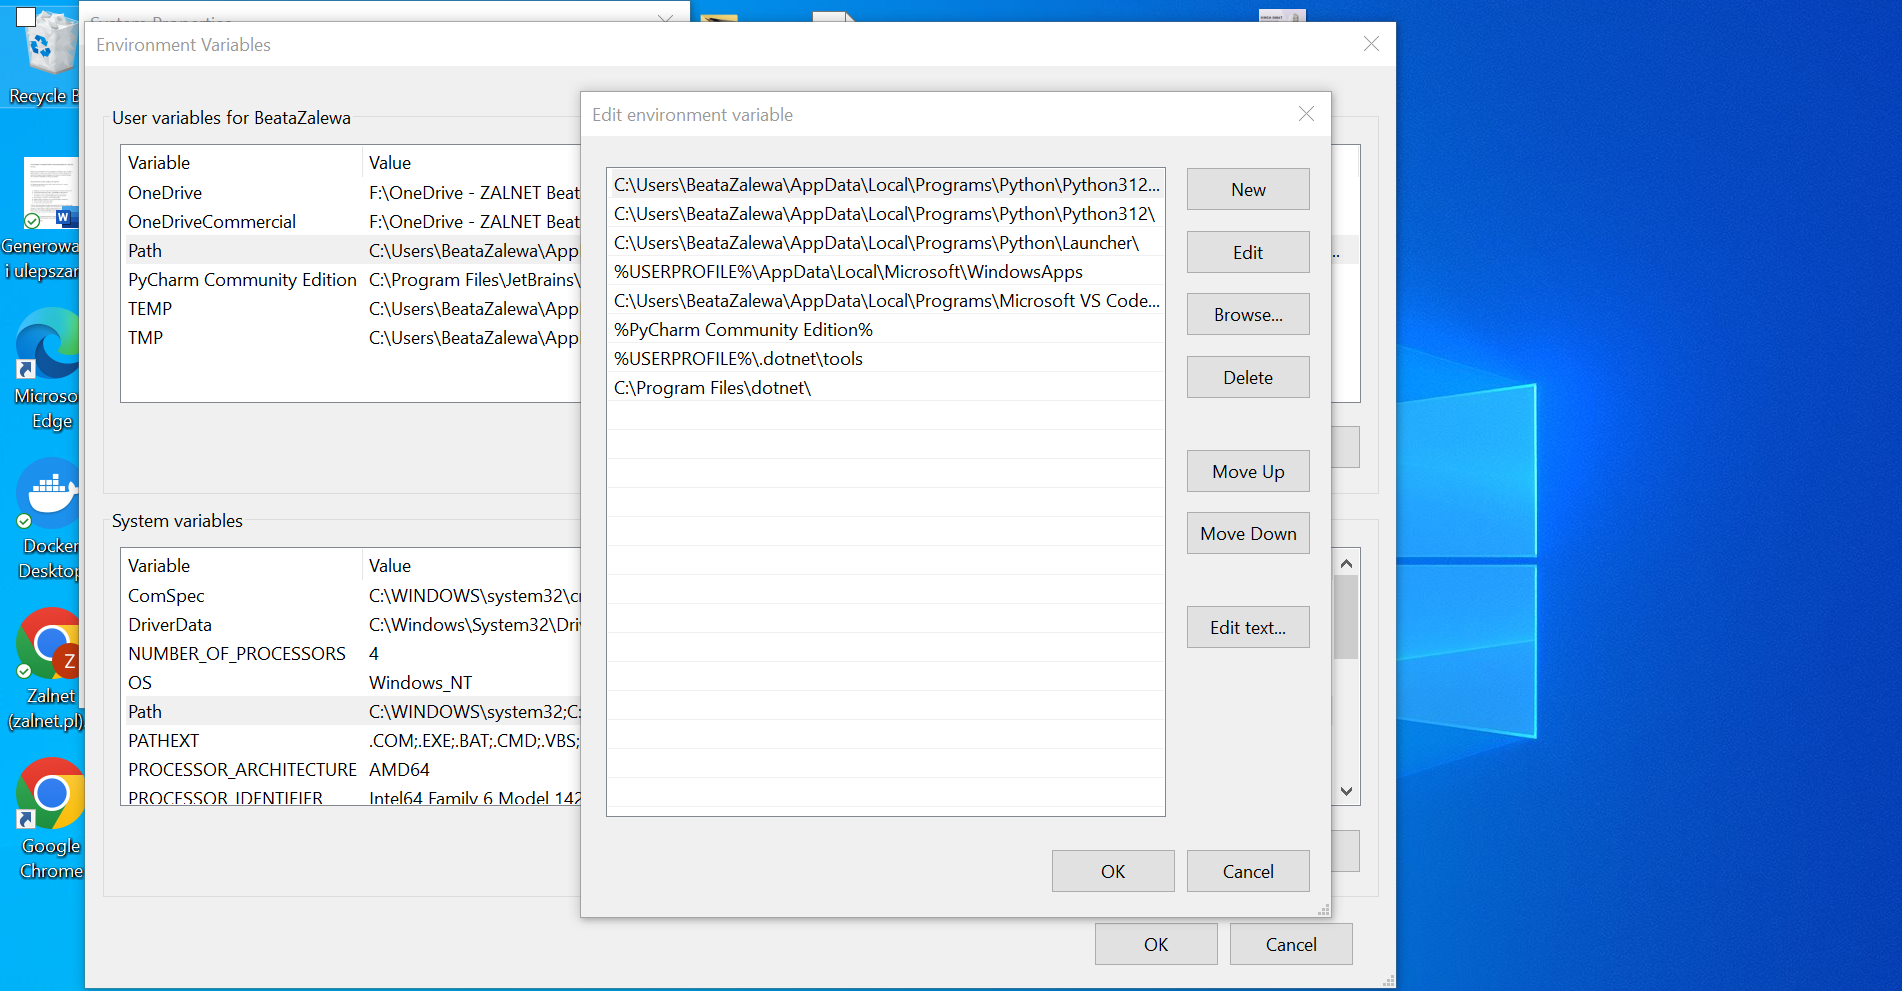
Alternatively, if you did install the .NET Core SDK already, your system PATH variable might not point to the correct installation location. Typically, this location should be C:\Program Files\dotnet.
Step 1: Run Troubleshooting Commands
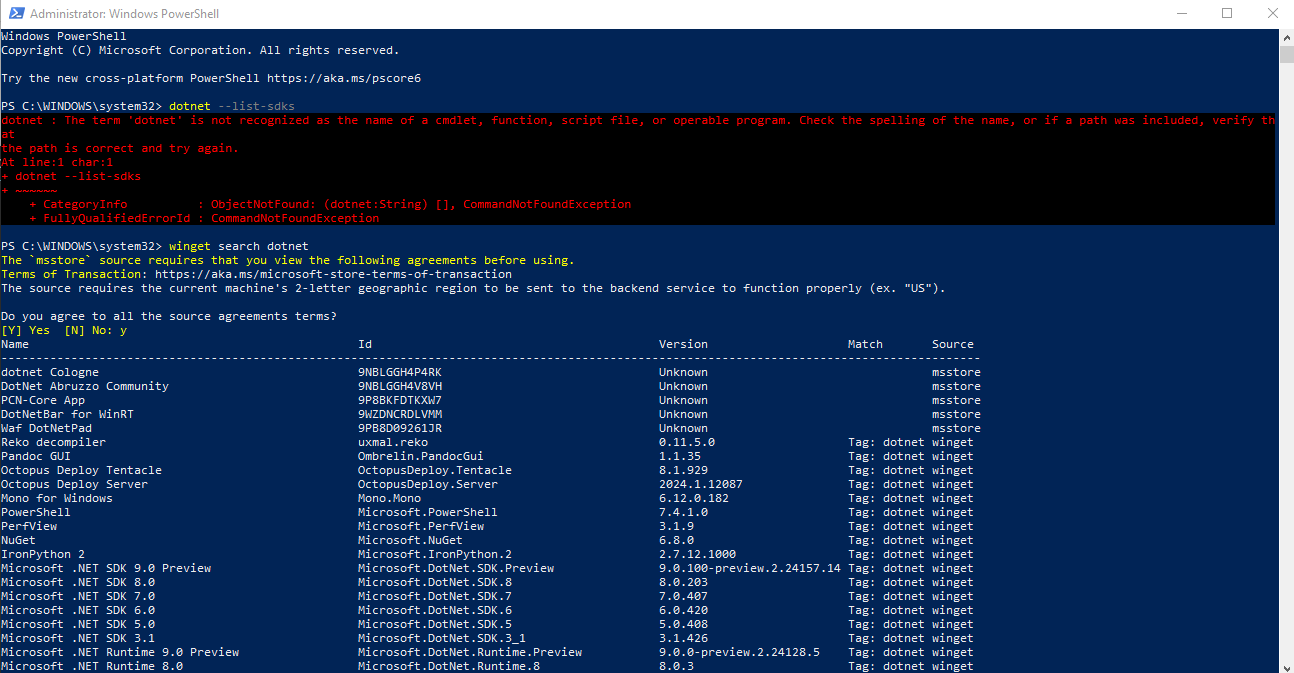
Firstly, open your PowerShell terminal as admin. Next, run these specific commands in sequence to troubleshoot the problem:
- Check current SDKs: dotnet –list-sdks
- Search for available packages: winget search dotnet
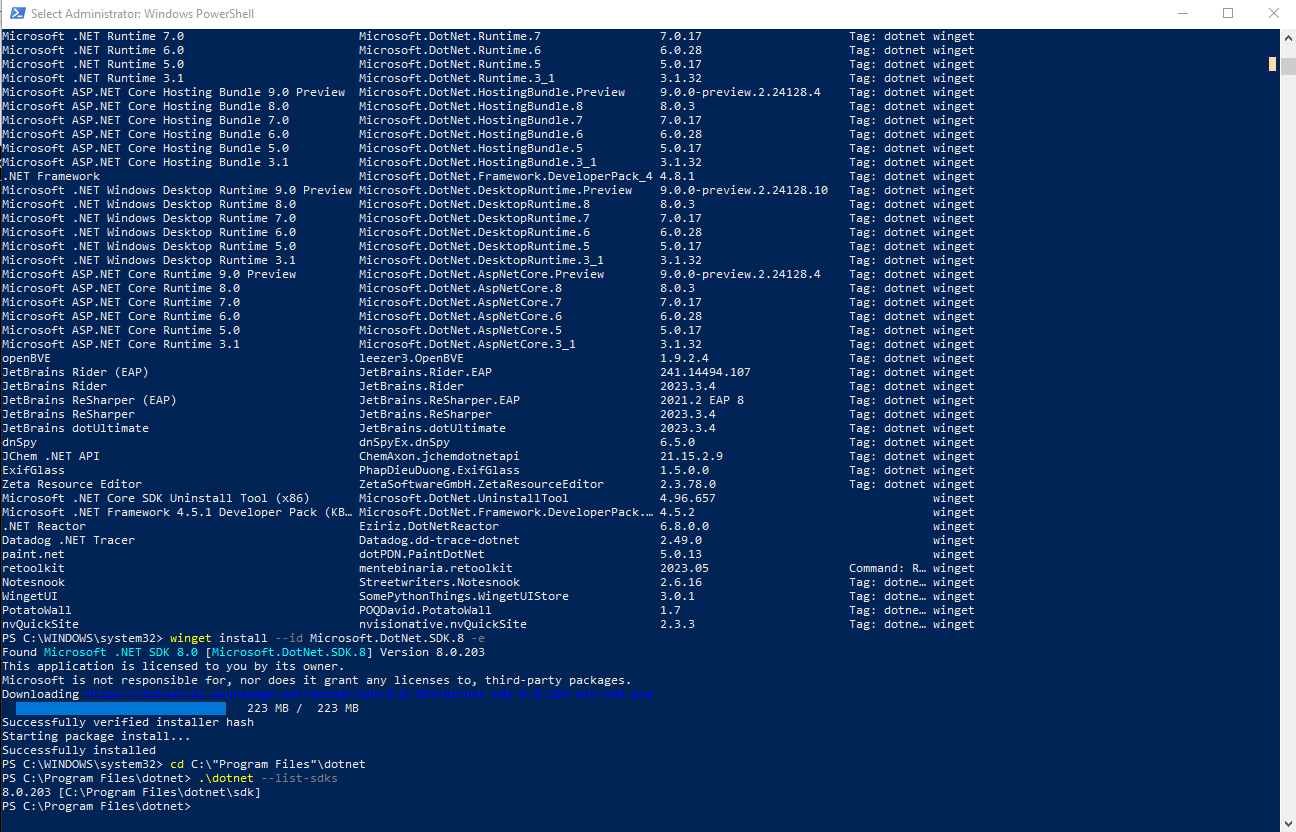
- Install the SDK: winget install –id Microsoft.DotNet.SDK.8 -e
- Navigate to the installation path: cd C:\”Program Files”\dotnet
- Verify the installation locally: .\dotnet –list-sdks
Step 2: Verify the Installation Globally
Secondly, you must close and restart the PowerShell terminal entirely. Once restarted, run the dotnet –list-sdks command again. Consequently, you should see that .NET 8 installed successfully.

Step 3: Update Your Environment Variables
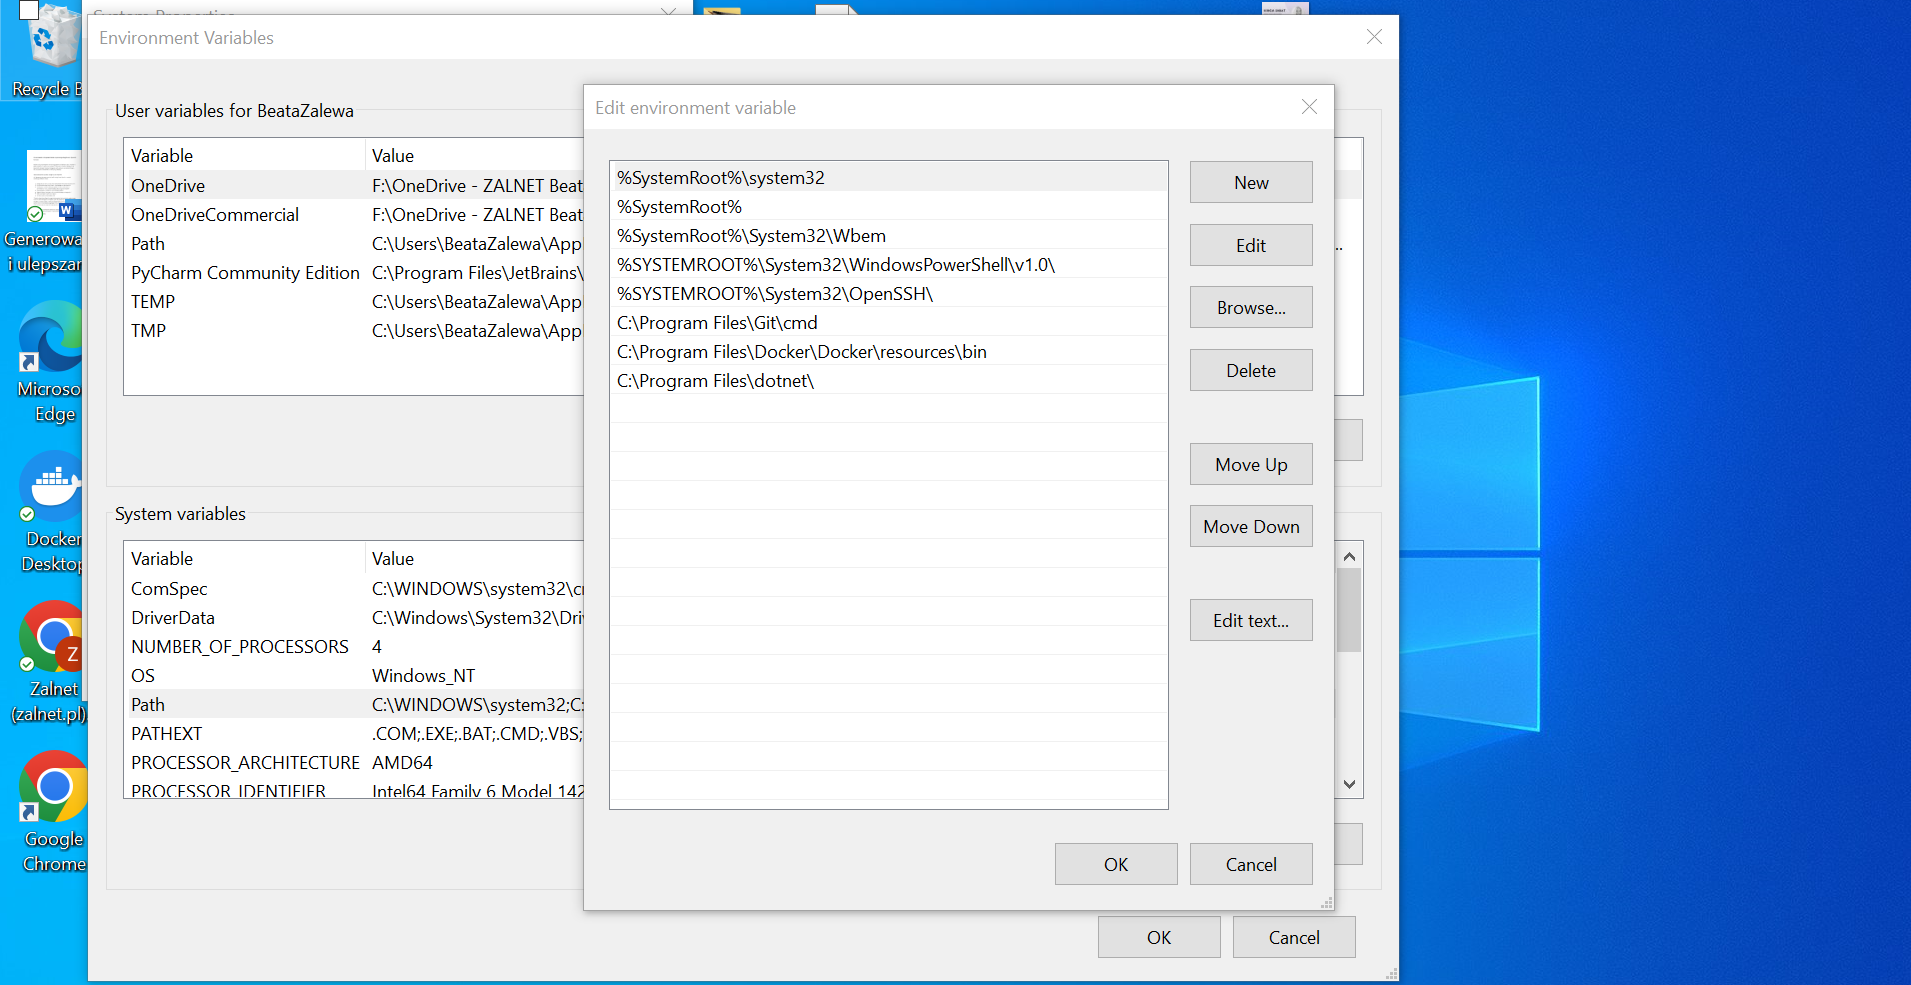
Thirdly, make absolutely sure that your system has updated the Environment path variable. Specifically, the PATH must include the C:\Program Files\dotnet directory for the system to recognise the command globally.
Step 4: Restart Visual Studio Code
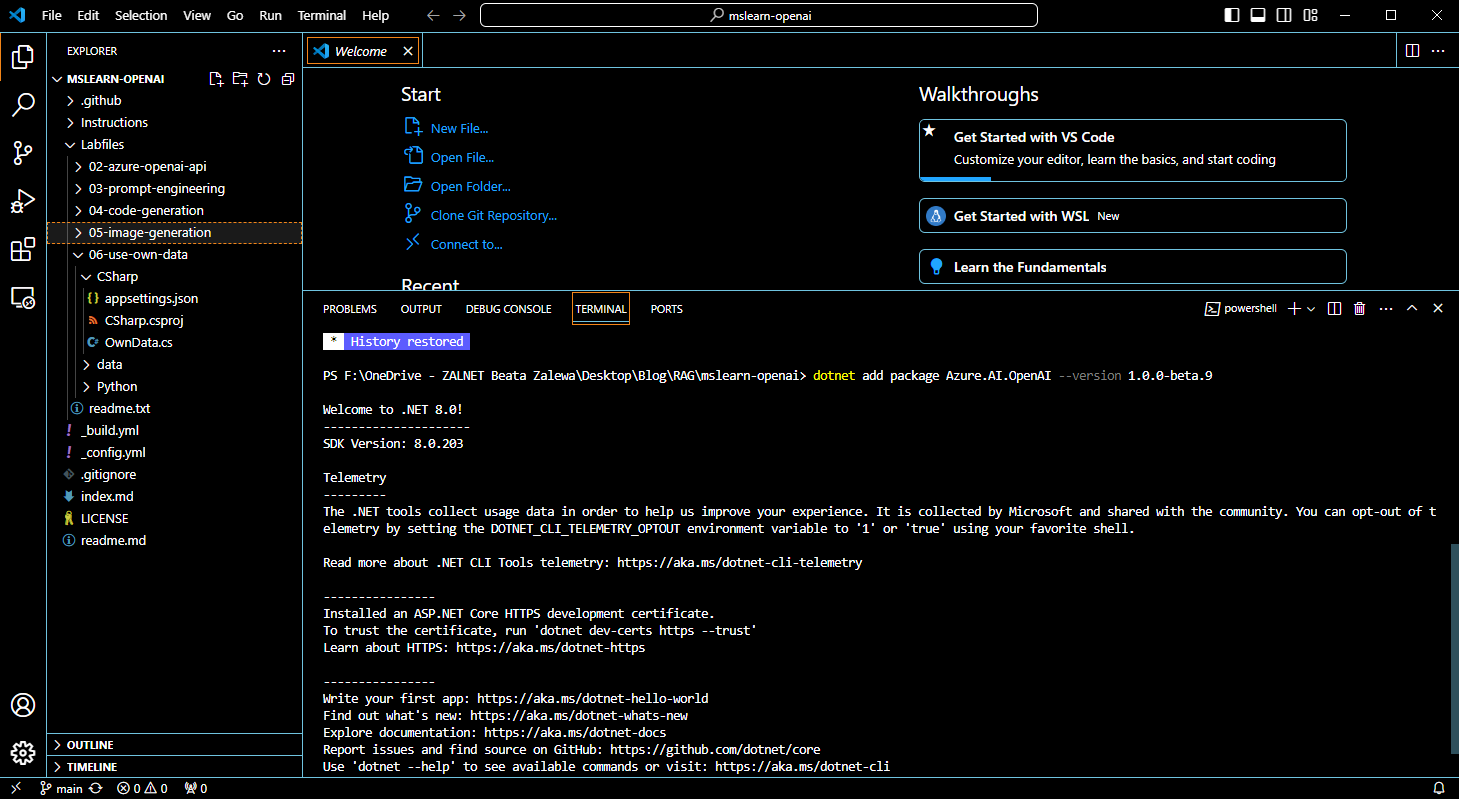
Finally, restart Visual Studio Code. Because you have just updated the environment variables, VS Code requires a fresh restart to pick up the new PATH configuration.
Conclusion
In conclusion, after making these simple changes in our environment, we can see that the command now works properly. Ultimately, installing the correct SDK and verifying the environment PATH resolves the ‘dotnet’ is not recognized error completely!